Learn How To Embroidery with this comprehensive guide, presented by LEARNS.EDU.VN, offering easy-to-follow instructions and essential tips. Discover the joys of crafting beautiful, personalized designs and mastering the art of embroidery stitching. Unleash your creativity and start stitching today with our step-by-step tutorials and expert advice on needlework and handcrafted designs.
1. Embarking on Your Embroidery Journey
Embroidery, an age-old craft, involves decorating fabric with needle and thread, allowing for the creation of stunning designs. From simple patterns to intricate artworks, embroidery offers endless possibilities for personalization and self-expression. Whether you’re a complete beginner or looking to refine your skills, this guide will equip you with the knowledge and techniques to confidently embark on your embroidery journey. At LEARNS.EDU.VN, we believe everyone can learn this beautiful craft with the right guidance and resources. We offer a plethora of tutorials and courses to help you every step of the way.
1.1 Why Learn How to Embroidery?
Embroidery offers a multitude of benefits that extend far beyond the creation of beautiful objects. It’s a therapeutic activity that can reduce stress, improve focus, and boost creativity. The repetitive motions involved in stitching can be meditative, allowing you to relax and unwind. Moreover, embroidery provides a sense of accomplishment as you watch your designs come to life, stitch by stitch.
According to a study by the American Art Therapy Association, engaging in creative activities like embroidery can lower cortisol levels (the stress hormone) and increase serotonin levels (the mood-boosting neurotransmitter).
Source: American Art Therapy Association
Here is a list of the benefits of learning how to embroidery:
| Benefit | Description |
|---|---|
| Stress Reduction | The repetitive motions of stitching can be calming and meditative, helping to reduce stress and anxiety. |
| Increased Focus | Embroidery requires concentration and attention to detail, which can improve your focus and cognitive skills. |
| Creative Expression | Embroidery allows you to express your creativity and personalize items with unique designs. |
| Sense of Accomplishment | Completing an embroidery project provides a sense of satisfaction and pride in your handmade creation. |
| Mindfulness | Engaging in embroidery encourages you to be present in the moment, fostering mindfulness and a sense of calm. |


1.2 Who Can Learn How to Embroidery?
The beauty of embroidery lies in its accessibility. It’s a craft that can be enjoyed by people of all ages, genders, and skill levels. Whether you’re a student looking for a creative outlet, a busy professional seeking a relaxing hobby, or a retiree wanting to learn a new skill, embroidery is a perfect choice. With patience and practice, anyone can master the basic stitches and create beautiful designs. At LEARNS.EDU.VN, we tailor our tutorials to cater to diverse learning styles and paces, ensuring that everyone feels welcome and supported on their embroidery journey.
2. Essential Supplies for Embroidery Beginners
Before you start stitching, it’s important to gather the necessary supplies. Fortunately, embroidery doesn’t require a lot of expensive equipment. Here’s a list of essential tools and materials to get you started:
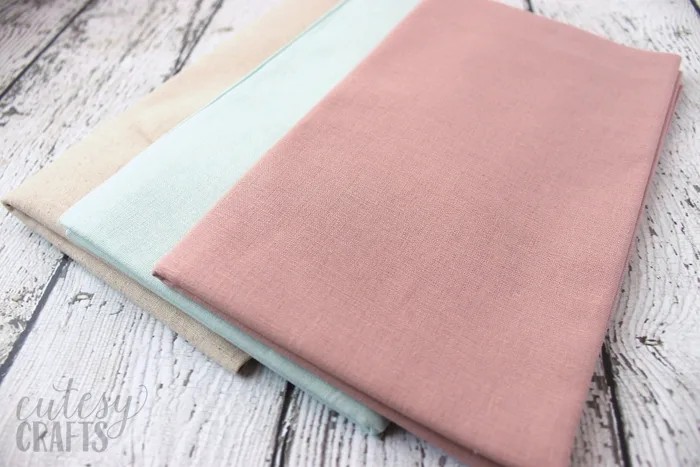
- Fabric: Choose a tightly woven, natural fabric like cotton, linen, or muslin. These fabrics are easy to work with and provide a good surface for stitching.
- Embroidery Floss: Embroidery floss is a type of thread specifically designed for embroidery. It’s typically made of cotton and comes in a wide range of colors.
- Embroidery Needles: Embroidery needles have a large eye to accommodate embroidery floss and a sharp point for piercing fabric.
- Embroidery Hoop: An embroidery hoop is used to hold the fabric taut while you stitch. This makes it easier to create neat and even stitches.
- Scissors: Small, sharp scissors are essential for trimming threads and fabric.
- Tracing Supplies: You’ll need tracing paper and a pen or pencil to transfer your chosen pattern onto the fabric.
2.1 Choosing the Right Fabric
The type of fabric you choose can significantly impact the outcome of your embroidery project. For beginners, it’s best to start with a fabric that is easy to handle and provides a good surface for stitching. Cotton, linen, and muslin are all excellent choices. Avoid fabrics that are too stretchy, slippery, or loosely woven, as these can be challenging to work with.
Pro Tip: Pre-wash your fabric before starting your embroidery project to prevent shrinking or distortion later on.
Here is a comparison table of the best fabrics for embroidery:
| Fabric | Pros | Cons | Best For |
|---|---|---|---|
| Cotton | Easy to work with, widely available, affordable | Can wrinkle easily | Samplers, beginner projects, clothing |
| Linen | Durable, natural texture, elegant look | Can be more expensive, may require more care | Home décor, heirloom pieces, intricate designs |
| Muslin | Lightweight, inexpensive, good for practice | Can be sheer, not as durable | Practice projects, backing fabric, lightweight designs |
2.2 Selecting Embroidery Floss
Embroidery floss is available in a vast array of colors and materials, allowing you to create stunning visual effects. Cotton floss is the most common type and is ideal for a wide range of projects. Other options include silk floss, metallic floss, and rayon floss, each offering its own unique texture and sheen. When choosing floss colors, consider the overall design of your project and select colors that complement each other.
Important Note: Embroidery floss typically consists of six strands that are loosely twisted together. For most projects, you’ll want to separate the strands and use only a few at a time. This allows you to create finer, more delicate stitches.
2.3 Investing in Quality Needles
Embroidery needles are specifically designed for hand embroidery and have a large eye to accommodate thicker threads and floss. The needle’s sharpness ensures smooth penetration through the fabric, preventing snags and tears. Look for needles labeled as “embroidery needles” or “crewel needles.” They come in various sizes; a size 7 or 8 is a good starting point for beginners. High-quality needles are crucial for comfortable stitching and professional-looking results.
3. Mastering Basic Embroidery Stitches
Embroidery is built upon a foundation of basic stitches. By mastering these stitches, you’ll be able to create a wide variety of designs and textures. Here are six essential embroidery stitches to learn:
- Running Stitch: A simple, straight stitch that is used for outlining and filling in areas.
- Backstitch: A strong, solid stitch that is used for outlining and creating fine lines.
- Split Stitch: A textured stitch that is used for outlining and filling in areas.
- Stem Stitch: A smooth, curved stitch that is used for outlining stems and vines.
- Satin Stitch: A smooth, solid stitch that is used for filling in areas with a satin-like finish.
- French Knot: A decorative knot that is used to add texture and detail to your embroidery.
3.1 The Running Stitch
The running stitch is the simplest embroidery stitch, making it perfect for beginners. It involves passing the needle in and out of the fabric in a straight line, creating a dashed effect. This stitch is ideal for outlining shapes, creating borders, and adding simple details to your embroidery projects.
How to execute a running stitch:
- Bring the needle up through the fabric at point A.
- Take the needle down through the fabric at point B, a short distance away.
- Bring the needle up again at point C, an equal distance away from point B.
- Repeat steps 2 and 3 to create a line of running stitches.
3.2 The Backstitch
The backstitch is a strong and versatile stitch that is commonly used for outlining and creating fine lines. It creates a solid line of stitching that is perfect for defining shapes and adding detail to your embroidery.
How to execute a backstitch:
- Bring the needle up through the fabric at point A.
- Take the needle down through the fabric at point B, a short distance away.
- Bring the needle up again at point C, an equal distance away from point A.
- Take the needle down into point A, creating a stitch that “backs up” to the previous stitch.
- Repeat steps 3 and 4 to create a line of backstitches.
3.3 The Split Stitch
The split stitch is a textured stitch that is used for outlining and filling in areas. It creates a slightly raised, rope-like effect that adds dimension to your embroidery.
How to execute a split stitch:
- Bring the needle up through the fabric at point A.
- Take the needle down through the fabric at point B, a short distance away.
- Bring the needle up again halfway between points A and B, splitting the previous stitch.
- Take the needle down through the fabric at point C, a short distance away from point B.
- Repeat steps 3 and 4 to create a line of split stitches.
3.4 The Stem Stitch
The stem stitch is a smooth, curved stitch that is used for outlining stems, vines, and other curved shapes. It creates a slightly raised line of stitching that adds definition to your embroidery.
How to execute a stem stitch:
- Bring the needle up through the fabric at point A.
- Take the needle down through the fabric at point B, a short distance away.
- Bring the needle up again at point C, slightly above and to the left of point B.
- Take the needle down into point B, creating a stitch that overlaps the previous stitch.
- Repeat steps 3 and 4 to create a line of stem stitches.
3.5 The Satin Stitch
The satin stitch is a smooth, solid stitch that is used for filling in areas with a satin-like finish. It creates a smooth, glossy surface that adds elegance to your embroidery.
How to execute a satin stitch:
- Bring the needle up through the fabric at point A.
- Take the needle down through the fabric at point B, directly across from point A.
- Bring the needle up again at point C, slightly to the side of point A.
- Take the needle down through the fabric at point D, directly across from point C.
- Repeat steps 3 and 4, filling in the desired area with parallel satin stitches.
3.6 The French Knot
The French knot is a decorative knot that is used to add texture and detail to your embroidery. It creates a small, raised dot that can be used to represent flowers, berries, or other small details.
How to execute a French knot:
- Bring the needle up through the fabric at point A.
- Wrap the floss around the needle once or twice, close to the fabric.
- Hold the floss taut and insert the needle back into the fabric very close to point A.
- Pull the floss gently until a knot forms on the surface of the fabric.
4. Transferring Embroidery Patterns
Before you can start stitching, you’ll need to transfer your chosen pattern onto the fabric. There are several methods for transferring embroidery patterns, each with its own pros and cons. Here are three popular methods:
- Tracing: This method involves tracing the pattern onto the fabric using tracing paper and a pen or pencil.
- Iron-On Transfer: This method involves printing the pattern onto special iron-on transfer paper and then ironing it onto the fabric.
- Water-Soluble Stabilizer: This method involves printing the pattern onto water-soluble stabilizer and then sticking the stabilizer onto the fabric.
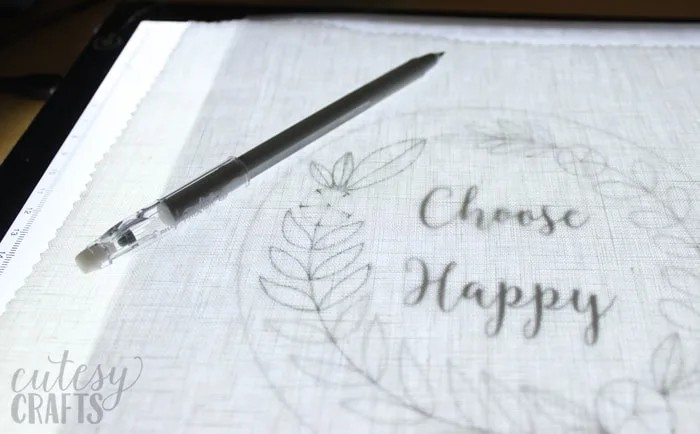
4.1 Tracing Method
The tracing method is a simple and inexpensive way to transfer embroidery patterns onto fabric. It’s best suited for light-colored fabrics that are easy to see through.
How to transfer a pattern using the tracing method:
- Print out your chosen embroidery pattern.
- Place a piece of tracing paper over the pattern and trace the design with a pen or pencil.
- Place the tracing paper onto the fabric, with the traced side facing down.
- Secure the tracing paper to the fabric with pins or tape.
- Trace over the design again with a pen or pencil, pressing firmly to transfer the image onto the fabric.
- Remove the tracing paper.
4.2 Iron-On Transfer Method
The iron-on transfer method is a quick and easy way to transfer embroidery patterns onto fabric. It’s best suited for fabrics that can withstand heat.
How to transfer a pattern using the iron-on transfer method:
- Print out your chosen embroidery pattern onto special iron-on transfer paper, following the manufacturer’s instructions.
- Place the transfer paper onto the fabric, with the printed side facing down.
- Iron the transfer paper onto the fabric, following the manufacturer’s instructions.
- Peel off the transfer paper.
4.3 Water-Soluble Stabilizer Method
The water-soluble stabilizer method is a versatile way to transfer embroidery patterns onto fabric. It’s suitable for a wide range of fabrics, including dark-colored and textured fabrics.
How to transfer a pattern using the water-soluble stabilizer method:
- Print out your chosen embroidery pattern onto water-soluble stabilizer.
- Peel off the backing from the stabilizer and stick it onto the fabric.
- Embroider over the pattern as desired.
- When finished, rinse the fabric with water to dissolve the stabilizer.
5. Essential Tips for Embroidery Success
Embroidery is a skill that improves with practice. Here are some essential tips to help you achieve embroidery success:
- Start with Simple Projects: Don’t try to tackle complicated designs right away. Begin with simple patterns that feature basic stitches.
- Practice Your Stitches: Before starting a project, practice your stitches on a scrap piece of fabric. This will help you develop muscle memory and improve your technique.
- Use a Good Light Source: Good lighting is essential for seeing your stitches clearly and preventing eye strain.
- Take Breaks: Embroidery can be tiring, so take breaks every so often to stretch your hands and eyes.
- Don’t Be Afraid to Experiment: Embroidery is a creative art form, so don’t be afraid to experiment with different stitches, colors, and patterns.
5.1 Mastering Threading Techniques
Threading the needle is a fundamental step in embroidery. There are a few techniques that can make this process easier:
- Use a Needle Threader: A needle threader is a small tool that helps you guide the floss through the eye of the needle.
- Wet the End of the Floss: Wetting the end of the floss can help to prevent it from fraying and make it easier to thread.
- Cut the Floss at an Angle: Cutting the floss at an angle creates a sharper point that is easier to insert into the eye of the needle.
5.2 Securing Your Stitches
Securing your stitches properly is essential for preventing your embroidery from unraveling. Here are two common methods for securing your stitches:
- Knotting: Tying a knot at the end of the floss before starting and after finishing your stitching.
- Weaving: Weaving the end of the floss through the back of your stitches to secure it in place.
5.3 Maintaining Even Tension
Maintaining even tension is crucial for creating neat and even stitches. Avoid pulling the floss too tightly, as this can distort the fabric. Also, avoid letting the floss become too loose, as this can create sloppy stitches.
6. Advanced Embroidery Techniques
Once you’ve mastered the basic embroidery stitches, you can start exploring more advanced techniques. Here are a few ideas to get you started:
- Shading: Using different shades of floss to create a sense of depth and dimension in your embroidery.
- Layering: Layering different stitches on top of each other to create texture and visual interest.
- Appliqué: Attaching pieces of fabric to your embroidery to create a mixed-media effect.
- Beading: Adding beads to your embroidery to create sparkle and embellishment.
6.1 Exploring Different Embroidery Styles
Embroidery has a rich history and encompasses a wide range of styles. Here are a few popular embroidery styles to explore:
- Crewel Embroidery: A type of embroidery that uses wool yarn to create textured designs.
- Needlepoint: A type of embroidery that covers the entire fabric surface with stitches.
- Blackwork Embroidery: A type of embroidery that uses black thread to create geometric patterns.
- Whitework Embroidery: A type of embroidery that uses white thread to create delicate, lacy designs.
Here is a table comparing different embroidery styles:
| Style | Materials | Techniques | Common Uses |
|---|---|---|---|
| Crewel Embroidery | Wool yarn, linen fabric | Stem stitch, satin stitch, couching | Home décor, tapestries, wall hangings |
| Needlepoint | Wool or cotton yarn, canvas fabric | Tent stitch, half cross stitch, basketweave stitch | Pillows, rugs, upholstery |
| Blackwork Embroidery | Black thread, linen fabric | Holbein stitch, double running stitch, backstitch | Clothing, accessories, samplers |
| Whitework Embroidery | White thread, linen fabric | Eyelet stitch, satin stitch, drawn thread work | Linens, christening gowns, heirloom pieces |
6.2 Combining Stitches for Unique Effects
Experimenting with different combinations of stitches can create unique and visually appealing effects. For example, you can combine the running stitch with the backstitch to create a textured outline. Or, you can combine the satin stitch with the French knot to create a floral design with added dimension.
7. Finishing and Caring for Your Embroidery
Once you’ve completed your embroidery project, it’s important to finish it properly to protect it and ensure that it lasts for years to come. Here are a few tips for finishing and caring for your embroidery:
- Wash Your Embroidery Gently: Hand wash your embroidery in cold water with a mild detergent. Avoid using harsh chemicals or bleach.
- Dry Your Embroidery Flat: Lay your embroidery flat to dry. Avoid hanging it, as this can cause it to stretch or distort.
- Iron Your Embroidery on Low Heat: Iron your embroidery on low heat, with the wrong side facing up. Place a clean cloth between the iron and the embroidery to protect the stitches.
- Store Your Embroidery Properly: Store your embroidery in a cool, dry place away from direct sunlight.
7.1 Framing Your Embroidery
Framing your embroidery is a great way to display and protect your finished work. You can frame your embroidery in a traditional picture frame or in an embroidery hoop.
How to frame your embroidery in an embroidery hoop:
- Trim the excess fabric around the embroidery hoop, leaving about 1 inch of fabric.
- Fold the fabric over the back of the hoop and glue it in place with fabric glue.
- Cover the back of the hoop with felt to create a clean and finished look.
7.2 Washing and Pressing Techniques
Proper washing and pressing techniques are essential for preserving the beauty of your embroidery. Always hand wash your embroidery gently, using cold water and a mild detergent. Avoid wringing or twisting the fabric. Lay the embroidery flat to dry, away from direct sunlight. When ironing, use a low heat setting and place a clean cloth between the iron and the embroidery to protect the stitches.
8. Frequently Asked Questions (FAQ) About Learning How to Embroidery
Here are some frequently asked questions about learning how to embroidery:
- Is embroidery difficult to learn?
- Embroidery is relatively easy to learn, especially if you start with basic stitches and simple projects.
- What are the essential supplies for embroidery?
- The essential supplies for embroidery include fabric, embroidery floss, embroidery needles, an embroidery hoop, scissors, and tracing supplies.
- What are the basic embroidery stitches?
- The basic embroidery stitches include the running stitch, backstitch, split stitch, stem stitch, satin stitch, and French knot.
- How do I transfer an embroidery pattern onto fabric?
- You can transfer an embroidery pattern onto fabric using the tracing method, the iron-on transfer method, or the water-soluble stabilizer method.
- How do I secure my stitches?
- You can secure your stitches by knotting the end of the floss or by weaving the end of the floss through the back of your stitches.
- How do I maintain even tension while embroidering?
- To maintain even tension, avoid pulling the floss too tightly or letting it become too loose.
- How do I wash and care for my embroidery?
- Hand wash your embroidery in cold water with a mild detergent, dry it flat, and iron it on low heat.
- What are some advanced embroidery techniques?
- Some advanced embroidery techniques include shading, layering, appliqué, and beading.
- What are some different embroidery styles?
- Some different embroidery styles include crewel embroidery, needlepoint, blackwork embroidery, and whitework embroidery.
- Where can I find embroidery patterns and inspiration?
- You can find embroidery patterns and inspiration online, in books, and in magazines. LEARNS.EDU.VN also offers a variety of patterns and tutorials to inspire your creativity.
9. Unlock Your Creative Potential with LEARNS.EDU.VN
Learning how to embroidery opens up a world of creative possibilities. From personalizing clothing and home décor to creating unique gifts and keepsakes, embroidery allows you to express your individuality and add a personal touch to everything you create. Don’t be afraid to experiment, explore different techniques, and develop your own unique style. With patience and practice, you’ll be amazed at what you can achieve.
Remember, the imperfections are what make your hand-embroidered pieces unique and charming. Embrace the learning process, and enjoy the journey of discovering the art of embroidery.
At LEARNS.EDU.VN, we are committed to providing you with the resources and support you need to succeed in your embroidery endeavors. Our comprehensive tutorials, expert advice, and inspiring patterns will guide you every step of the way. Join our community of passionate embroiderers and unlock your creative potential today!
Are you ready to embark on your embroidery adventure? Visit LEARNS.EDU.VN now to explore our extensive collection of embroidery tutorials, patterns, and supplies. Unleash your creativity and start stitching your way to beautiful, handmade creations.
For more information, contact us at:
Address: 123 Education Way, Learnville, CA 90210, United States
Whatsapp: +1 555-555-1212
Website: LEARNS.EDU.VN
Let learns.edu.vn be your trusted guide on your journey to mastering the art of embroidery. Together, let’s create beautiful things!