Learning How Do I Learn To Crochet can be a rewarding and enjoyable experience, opening doors to creating beautiful and unique items. At LEARNS.EDU.VN, we are dedicated to providing you with the most comprehensive and easy-to-follow guide to get you started on your crochet journey. Our goal is to help you master the basics and inspire you to explore the endless possibilities of this wonderful craft.
1. Understanding the Basics of Crochet
Crochet is a craft that uses a hook to create loops of yarn, forming fabric. It’s different from knitting, which uses two needles. To start your crochet journey, you need to understand the basic tools and materials.
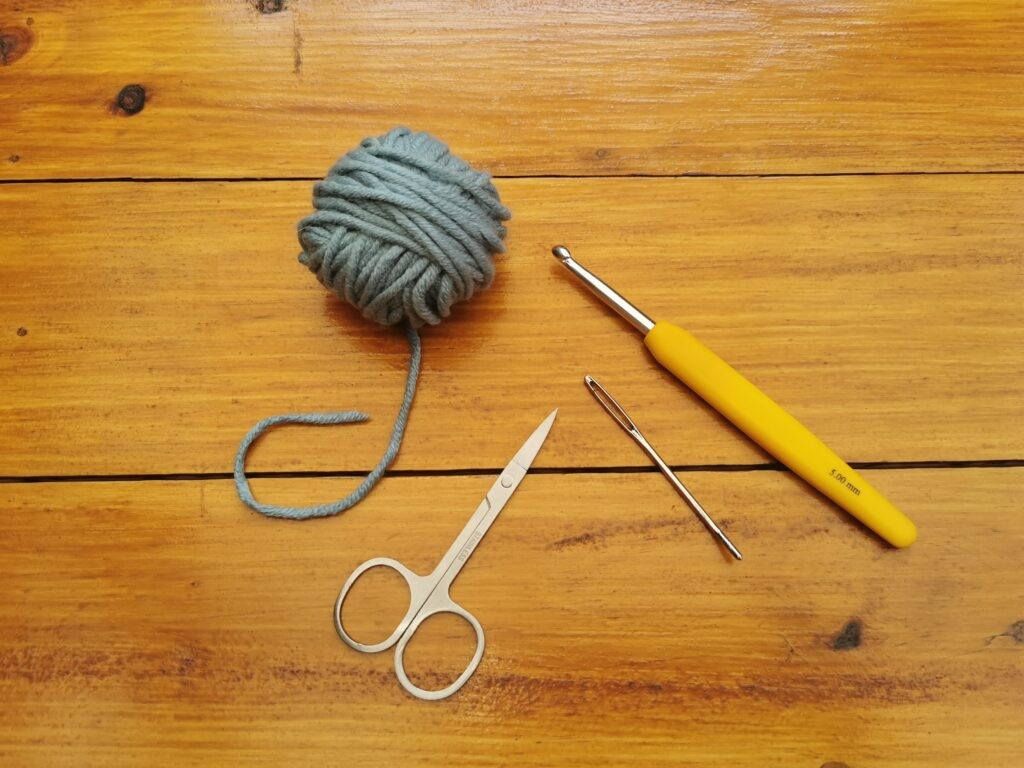
1.1. Essential Crochet Supplies
- Yarn: The material you’ll be using to create your projects.
- Crochet Hook: The tool used to create loops in the yarn.
- Scissors: For cutting the yarn.
- Yarn Needle: Also known as a tapestry needle, used to weave in the ends of your yarn to give your project a clean and professional look.
1.2. Choosing the Right Yarn
When beginning to crochet, selecting the right yarn is crucial for a smooth learning experience. Thicker yarns are easier to handle and allow you to see your stitches more clearly.
- Yarn Weight: Look for yarn labeled as “Worsted Weight” or “Aran Weight” (Size 4).
- Fiber Type: Acrylic yarn is a good option for beginners because it is inexpensive, easy to care for, and available in many colors. Cotton yarn is another excellent choice due to its durability and stitch definition.
- Color: Light-colored yarns are generally better for beginners as they make it easier to see the individual stitches.
When shopping for yarn, you’ll notice numbers on the yarn label indicating the yarn size. Beginners should look for sizes 4 and up. The yarn label also suggests the appropriate hook size. For size 4 yarn, a 5.5mm or I-9 hook is generally recommended.
1.3 Types of Crochet Hooks
Crochet hooks come in various sizes and materials. For beginners, it’s best to start with a standard aluminum or plastic hook.
- Size: As mentioned above, a 5.5mm (I-9) hook is a good starting point for worsted weight yarn.
- Material: Aluminum hooks are durable and allow the yarn to slide easily. Plastic hooks are lightweight and can be more comfortable for some users.
- Shape: Hooks with a comfortable grip can reduce hand fatigue, especially during longer crochet sessions.
1.4. Understanding Yarn Labels
Yarn labels provide important information about the yarn, including its weight, fiber content, recommended hook size, and care instructions. Understanding these labels will help you choose the right yarn for your project and ensure its longevity.
Here is a breakdown of the key information found on a yarn label:
| Information | Description |
|---|---|
| Yarn Weight | Indicates the thickness of the yarn. Common weights include lace, fingering, sport, DK, worsted, aran, bulky, and super bulky. |
| Fiber Content | Specifies the materials the yarn is made from, such as acrylic, cotton, wool, or blends. Each fiber has different properties, affecting the yarn’s texture, durability, and care requirements. |
| Recommended Hook Size | Suggests the appropriate crochet hook size to achieve the recommended gauge. Using the recommended hook size helps ensure your finished project matches the pattern’s dimensions. |
| Gauge | Indicates the number of stitches and rows per inch (or centimeter) achieved with the recommended hook size. Checking your gauge against the pattern’s gauge is essential for ensuring your project turns out the correct size. |
| Care Instructions | Provides guidelines on how to wash and dry the yarn. Following these instructions will help maintain the yarn’s quality and prevent shrinkage or damage. Common symbols include machine wash, hand wash, do not wash, tumble dry, lay flat to dry, and dry clean. |


2. Basic Crochet Techniques
Now that you have your supplies, let’s dive into the fundamental techniques you’ll need to know to start crocheting.
2.1. Holding the Hook and Yarn
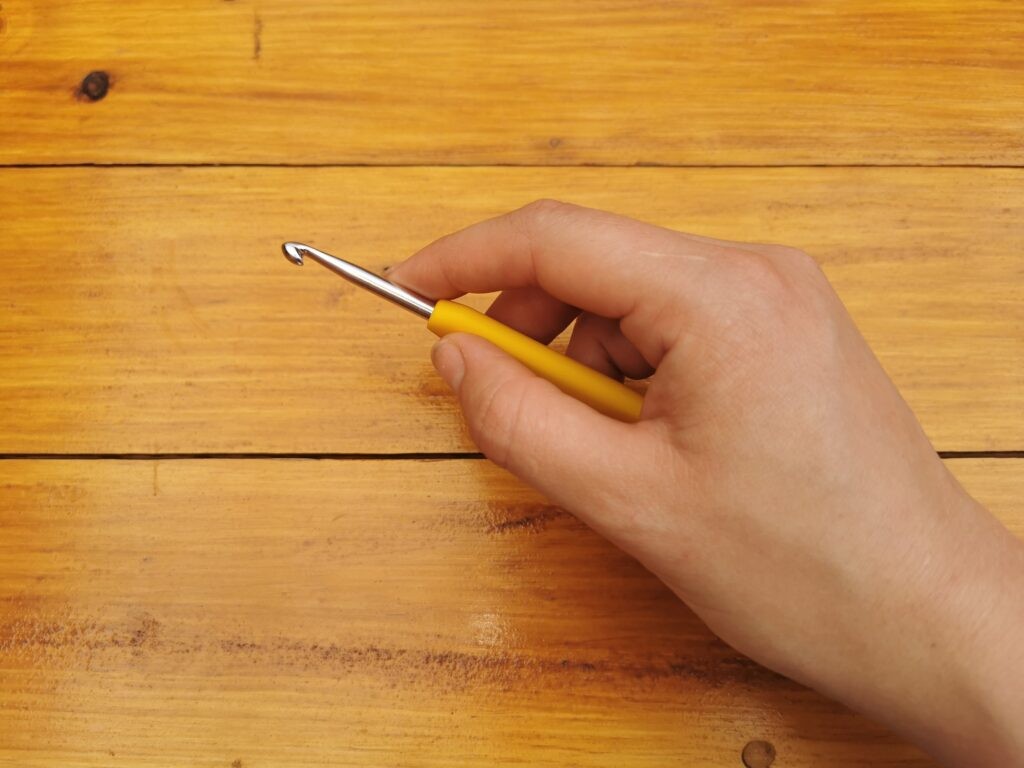
There are two common ways to hold a crochet hook: the knife hold and the pencil hold. The best method is the one that feels most comfortable for you.
- Knife Hold: Hold the hook as you would hold a knife, with your hand wrapped around the handle.
- Pencil Hold: Hold the hook as you would hold a pencil, with your thumb and index finger near the hook’s head.
Knife Hold
Pencil Hold
Holding the yarn involves maintaining consistent tension so your stitches are uniform.
- Right-Handed: Hold the yarn in your left hand, wrapping it around your fingers to control the tension.
- Left-Handed: Hold the yarn in your right hand, wrapping it around your fingers to control the tension.
2.2. Making a Slip Knot
A slip knot is the first loop you create on your hook to begin crocheting. Here’s how to make one:
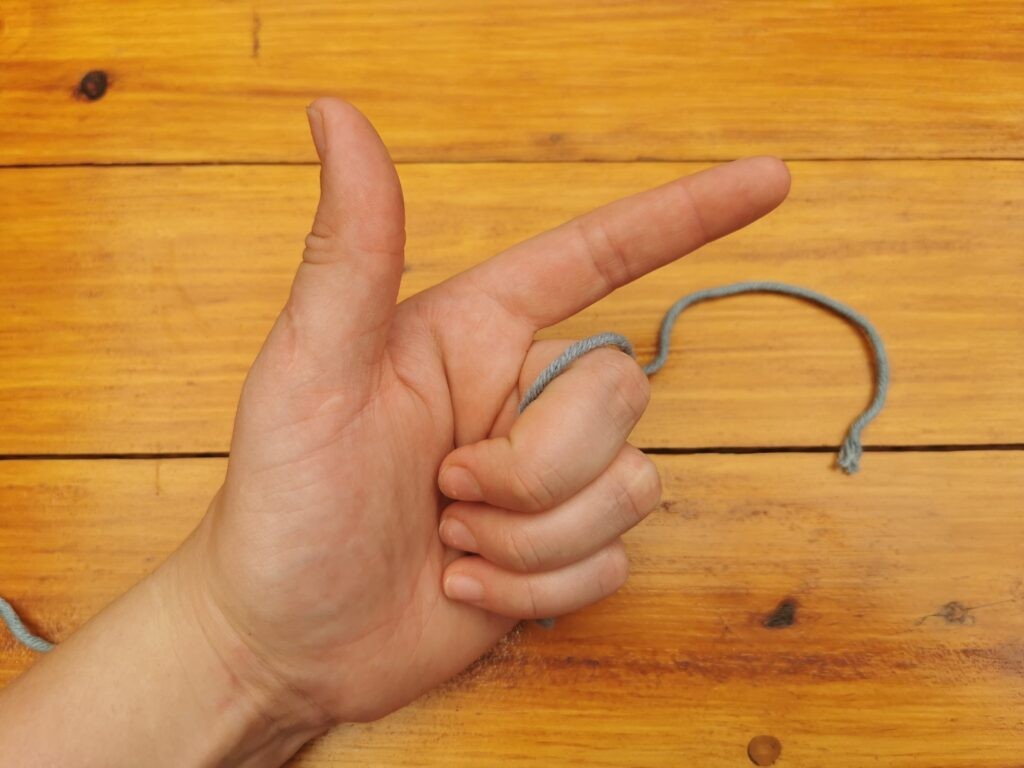
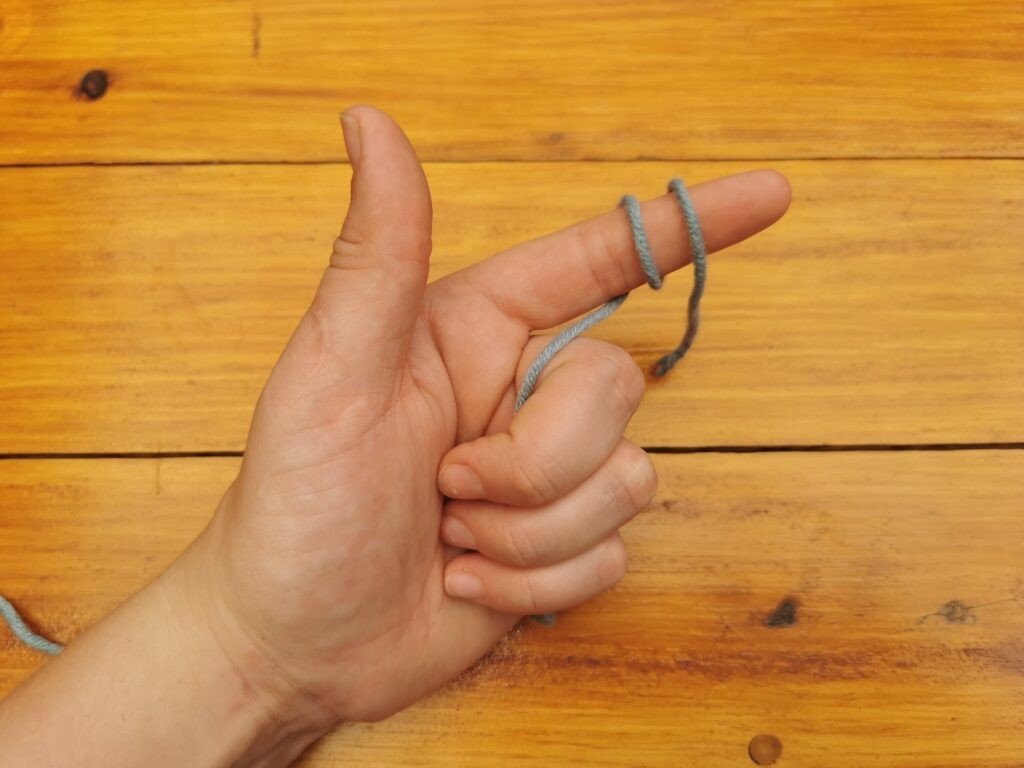
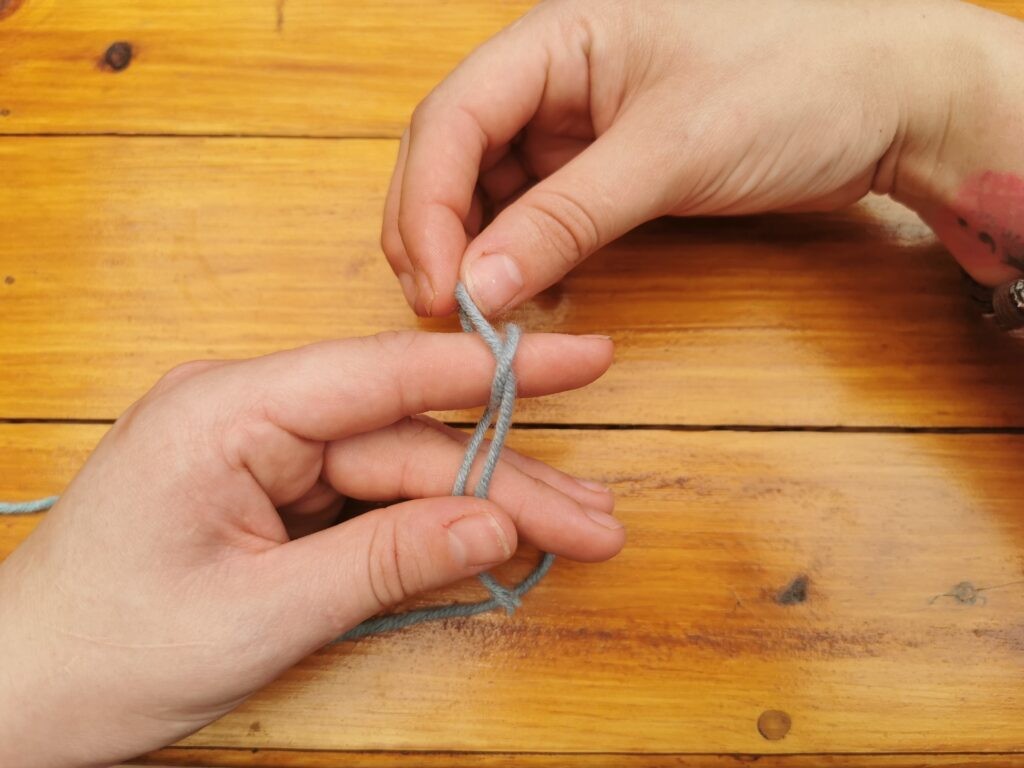
- Measure out around 3 inches of yarn. Grab the yarn with three fingers and point your index finger outward.
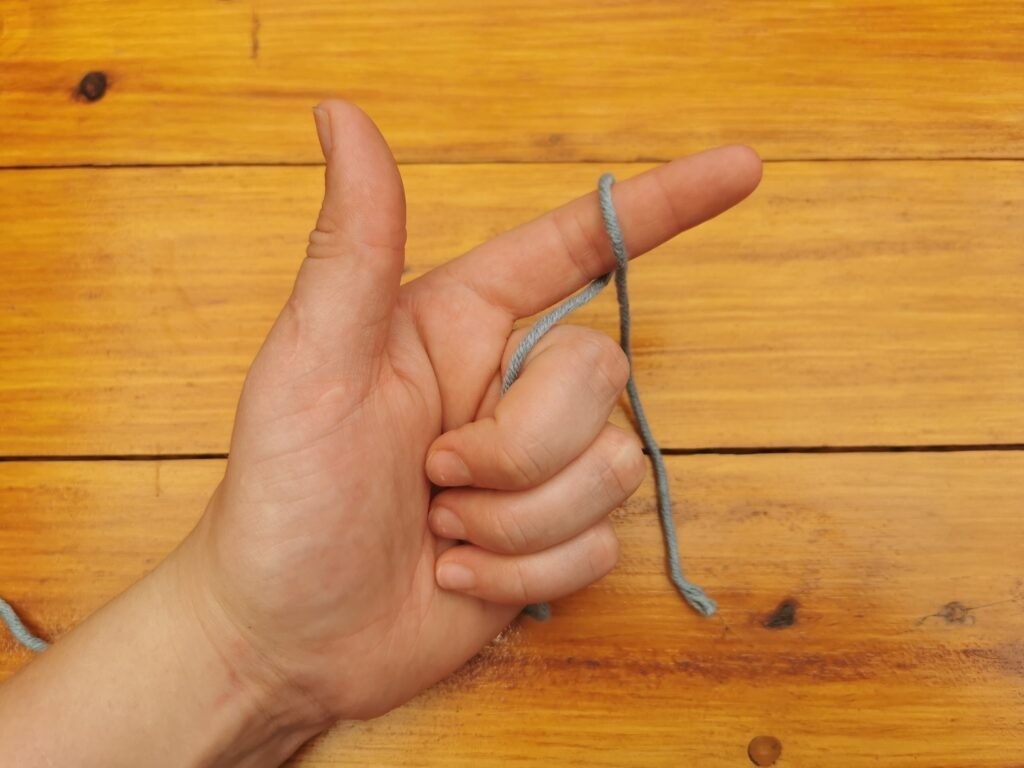
- Wrap the yarn over your index finger once with the short end at the front of your finger.
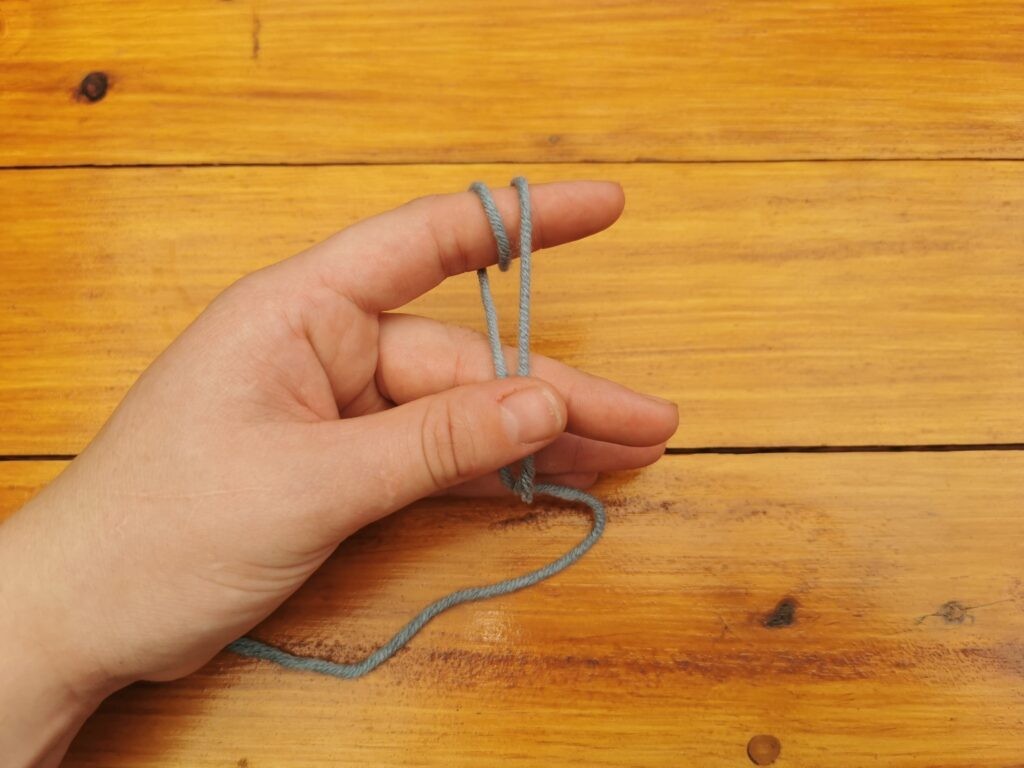
- Wrap the yarn around your finger once again, so that you have two “loops” around your finger.
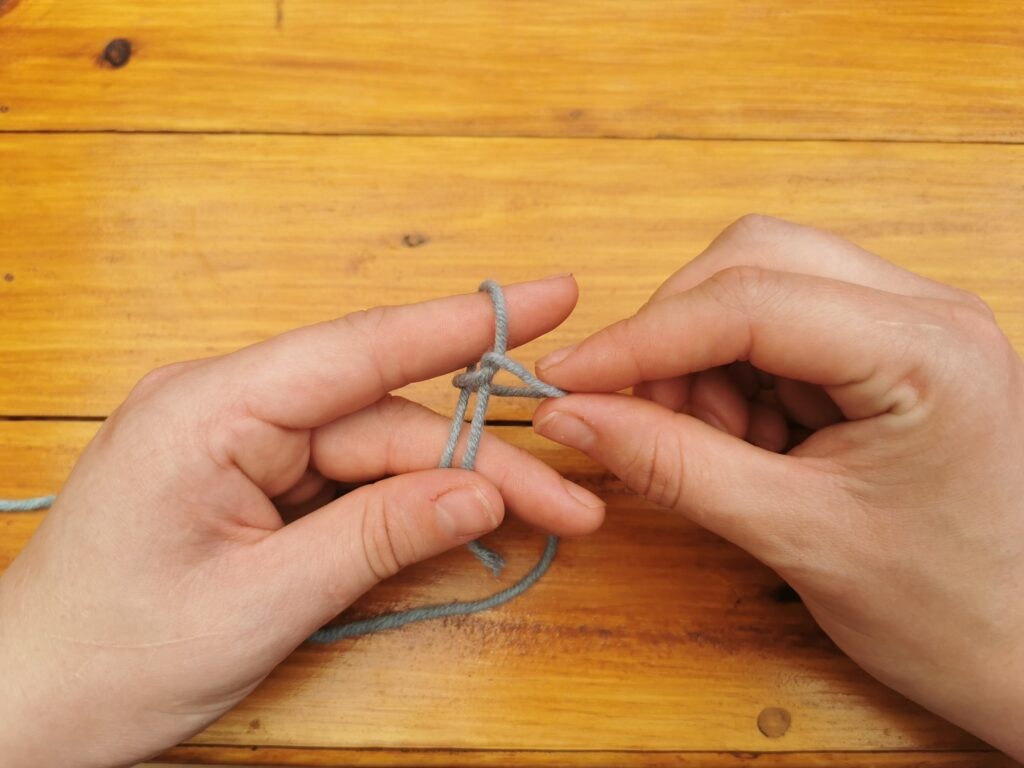
- Grab both ends, the short tail and the long tail (attached to the ball of yarn), also known as the working yarn, with your thumb and middle finger.
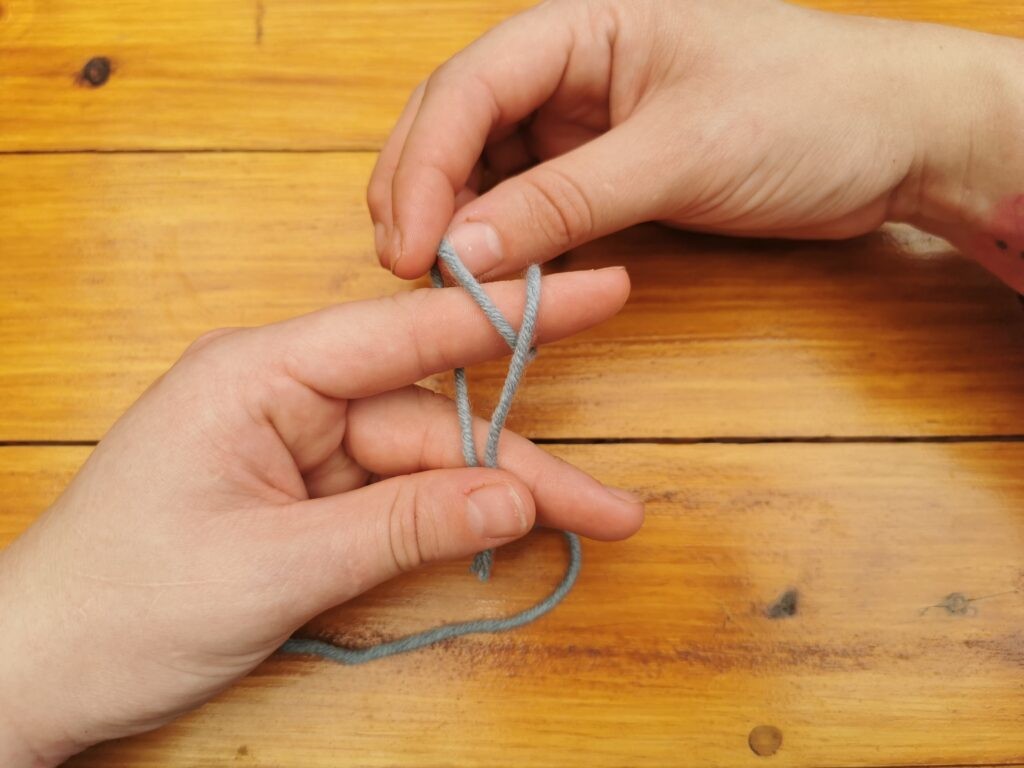
- Take the back loop and pull it over the front loop, but don’t pull it off all the way.
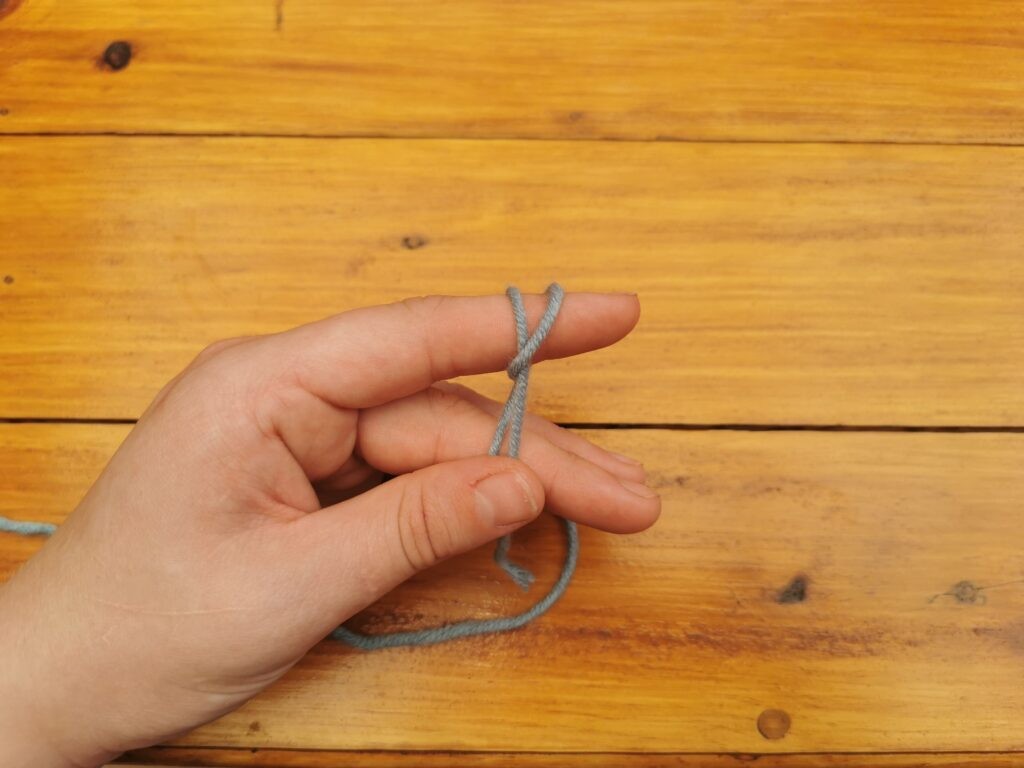
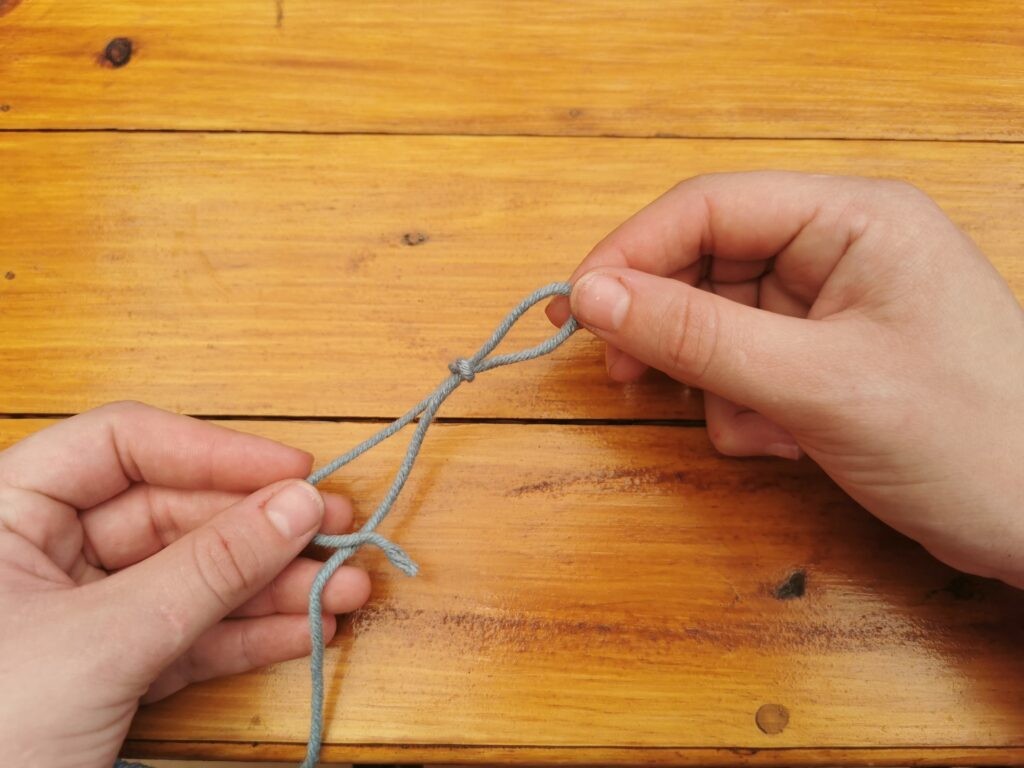
- Now take the back loop and pull it off your finger completely and tighten the knot. Make sure not to make it super tight because you want the slip knot to be able to slip up and down.
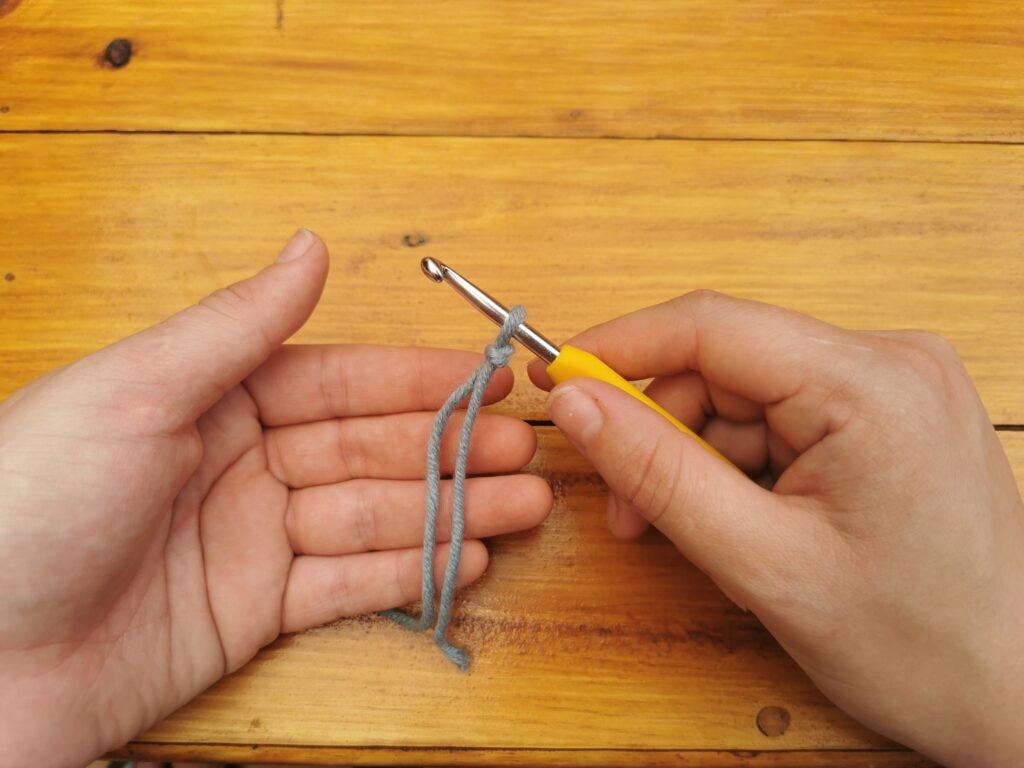
- Insert your hook into the slip knot and pull on the working yarn. Make sure the tail end faces towards the hook.
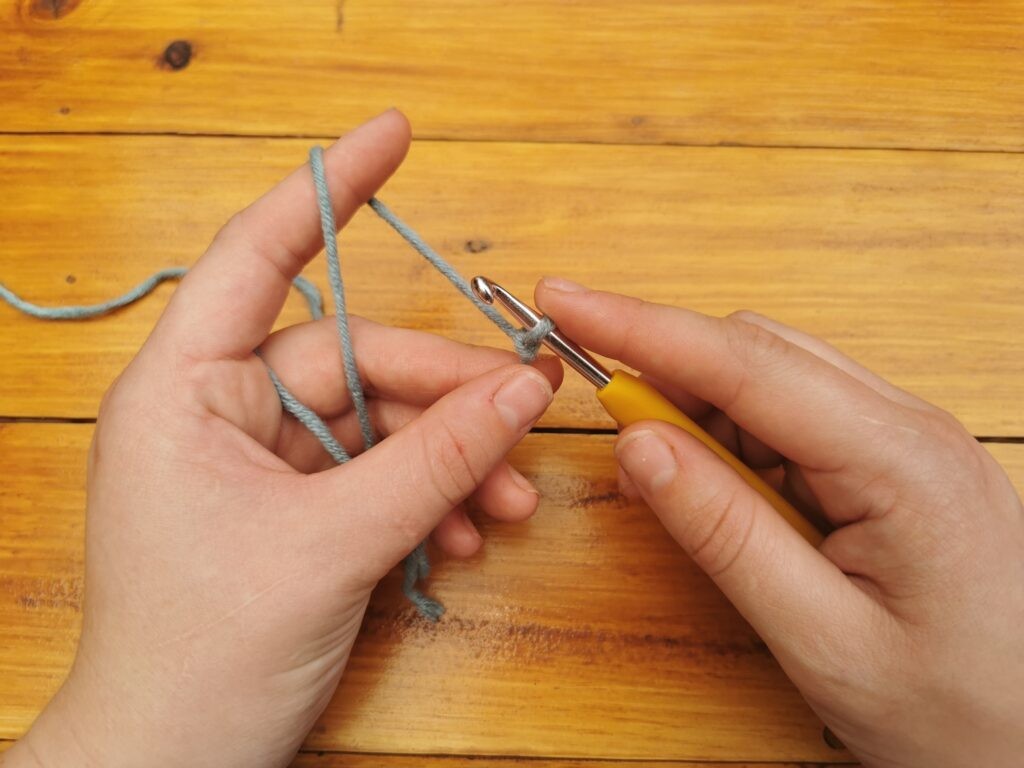
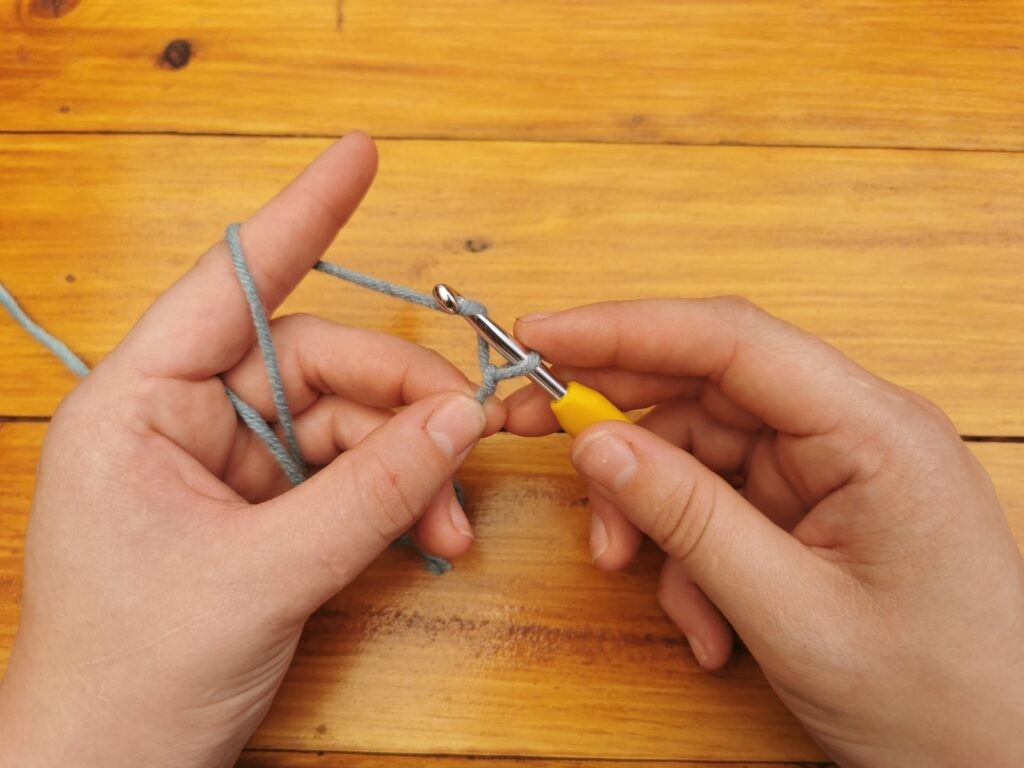
2.3. Making a Chain (ch)
The chain stitch is the foundation for most crochet projects. It’s a series of loops that create a base row.
- Hold the hook with the slip knot in your dominant hand and the yarn in your other hand.
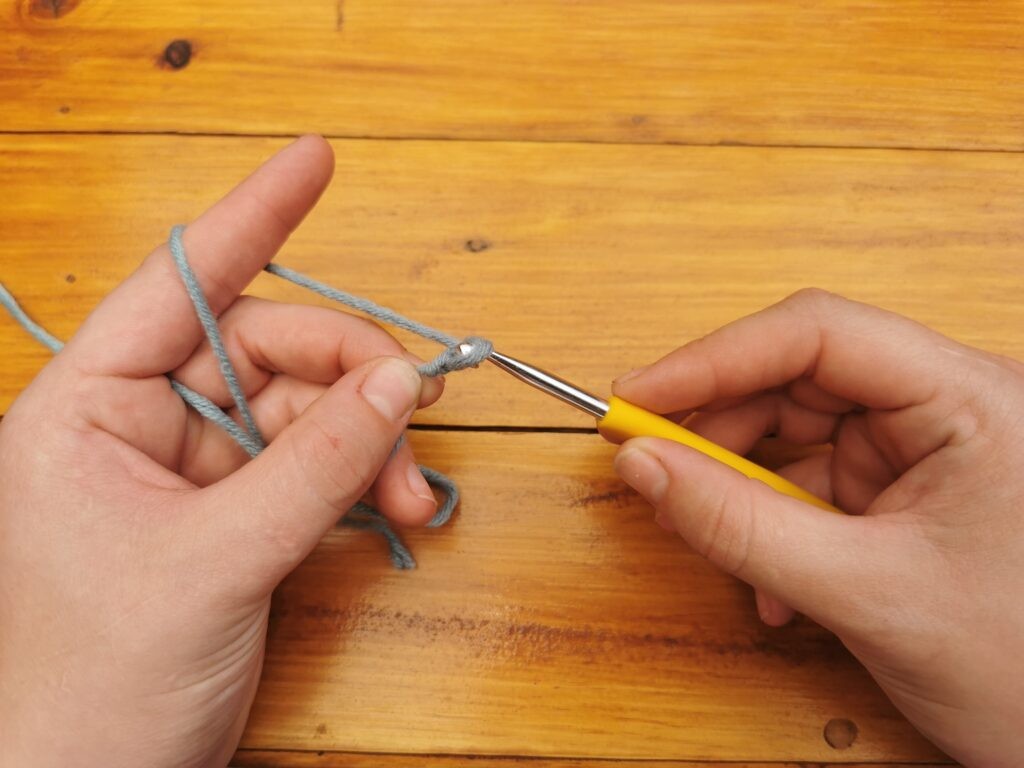
- Yarn over (wrap the yarn around the hook from back to front).
- Pull the yarn through the loop on the hook.
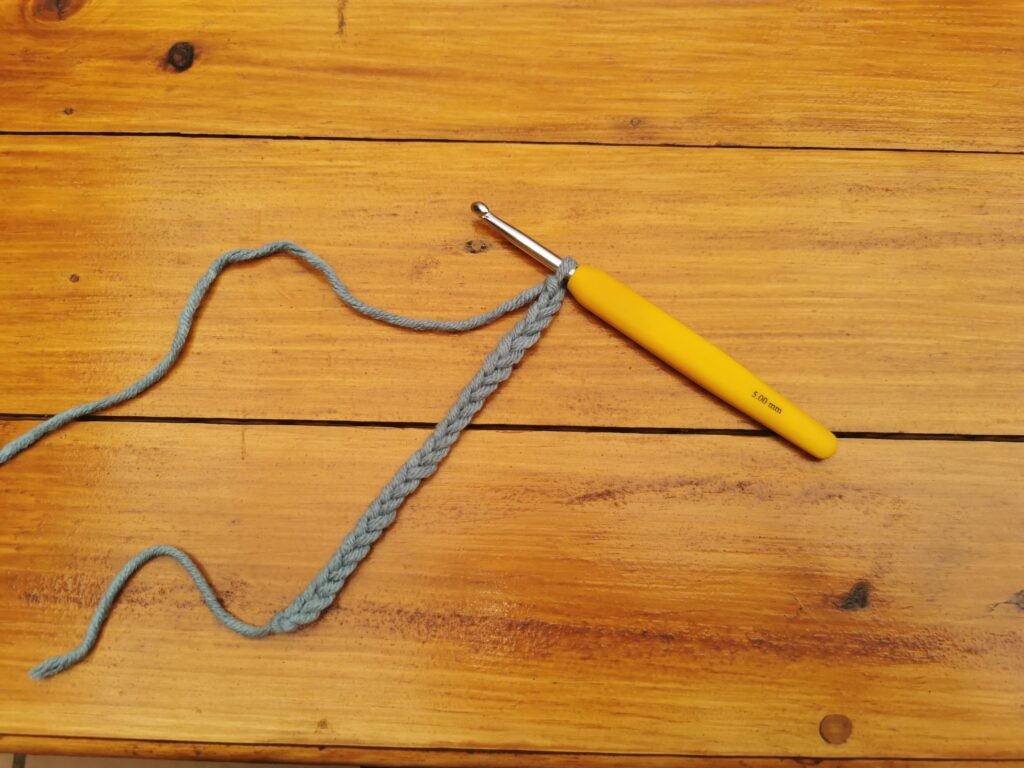
- Repeat steps 2 and 3 to create a chain of the desired length.
Your chain should look something like this:
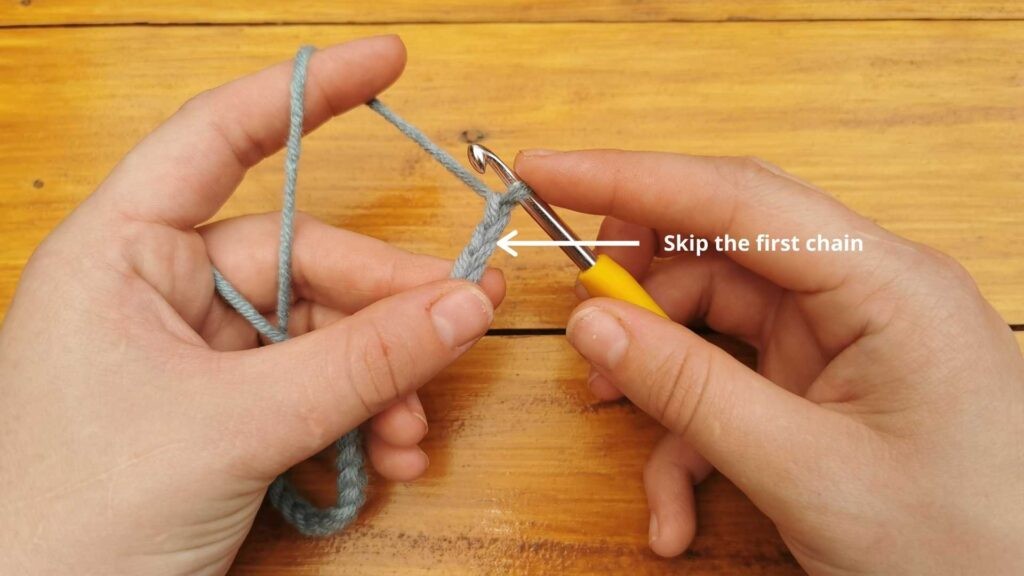
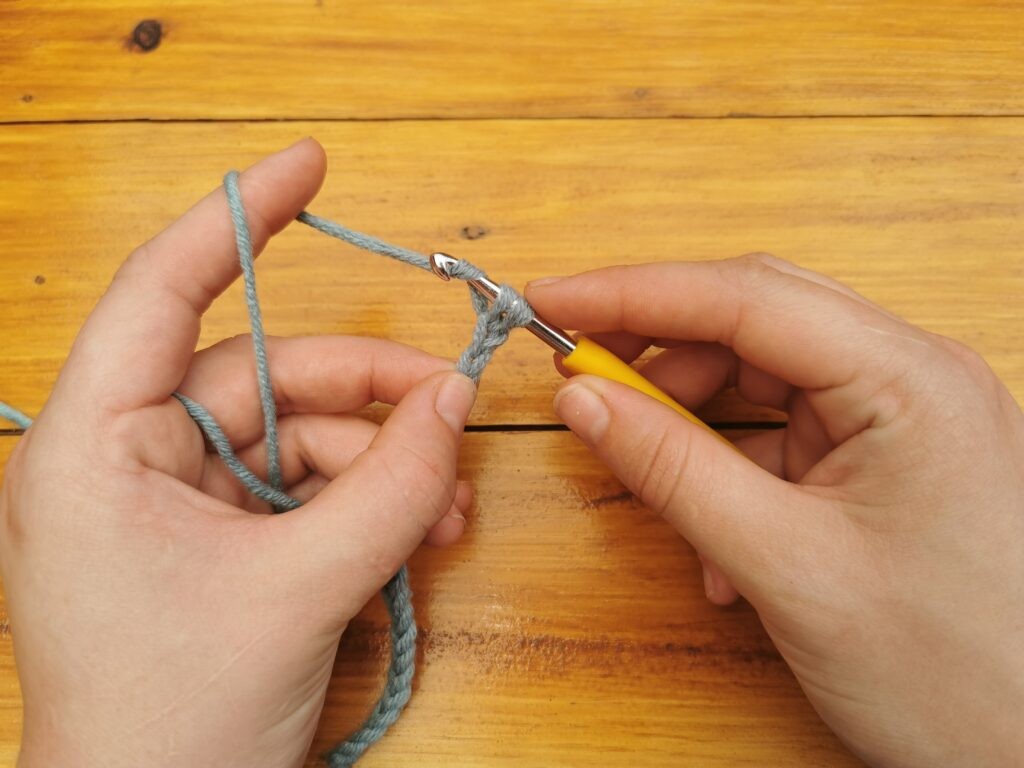
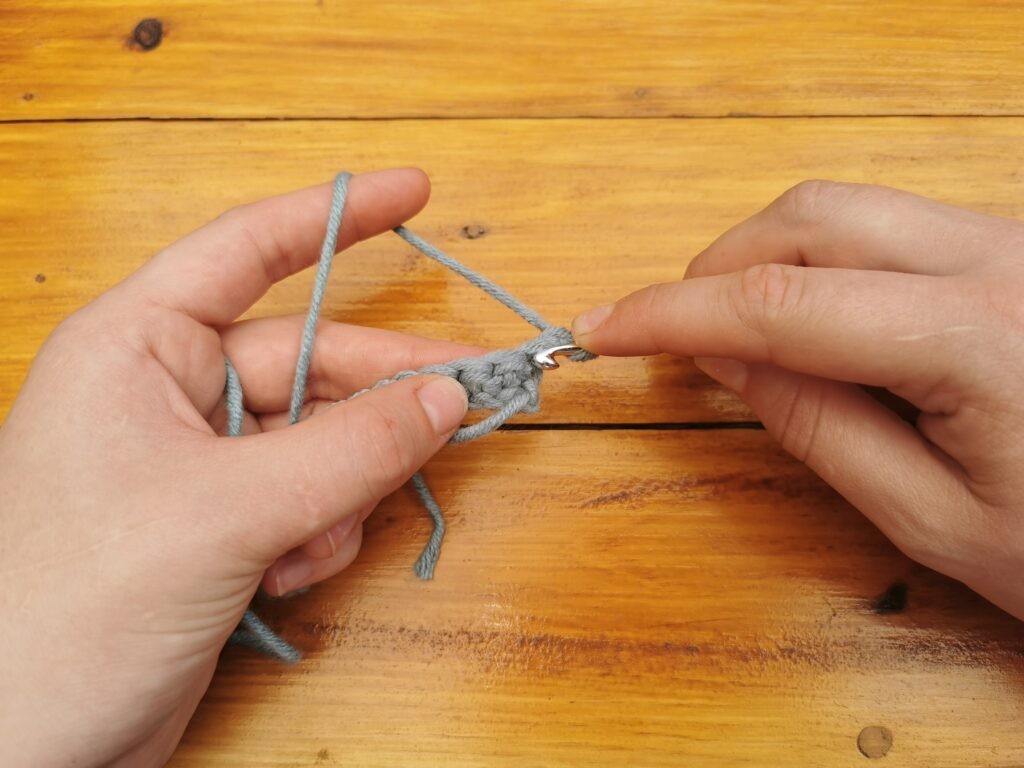
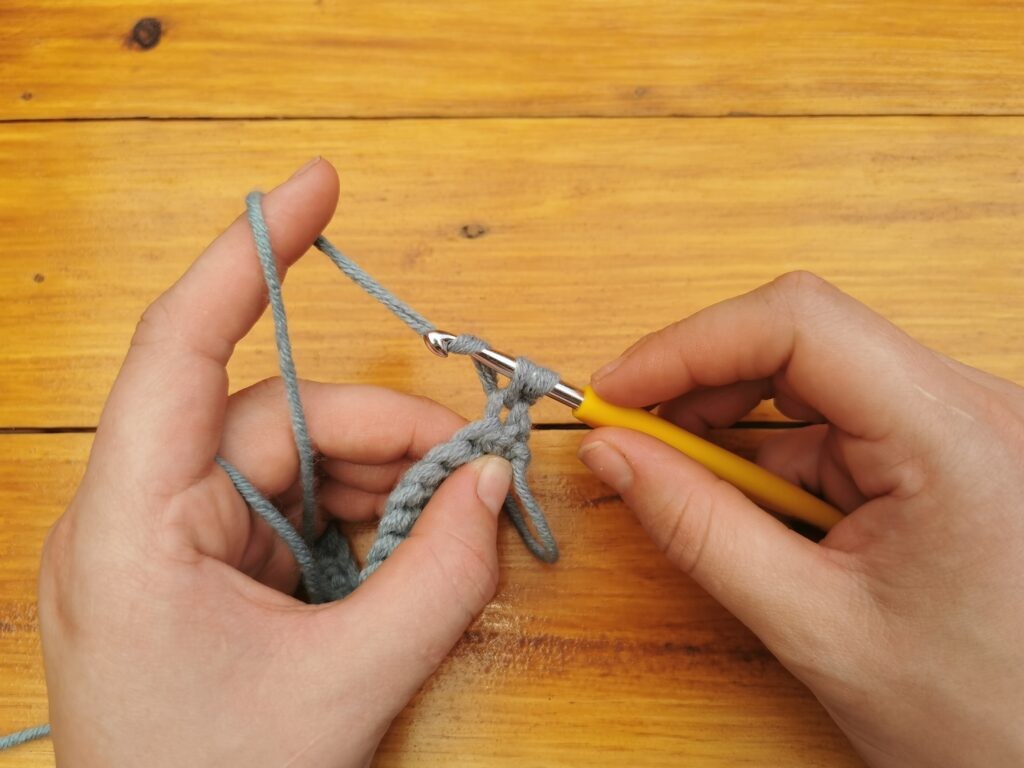
2.4. Single Crochet (sc)
The single crochet stitch is one of the most basic and versatile stitches in crochet.
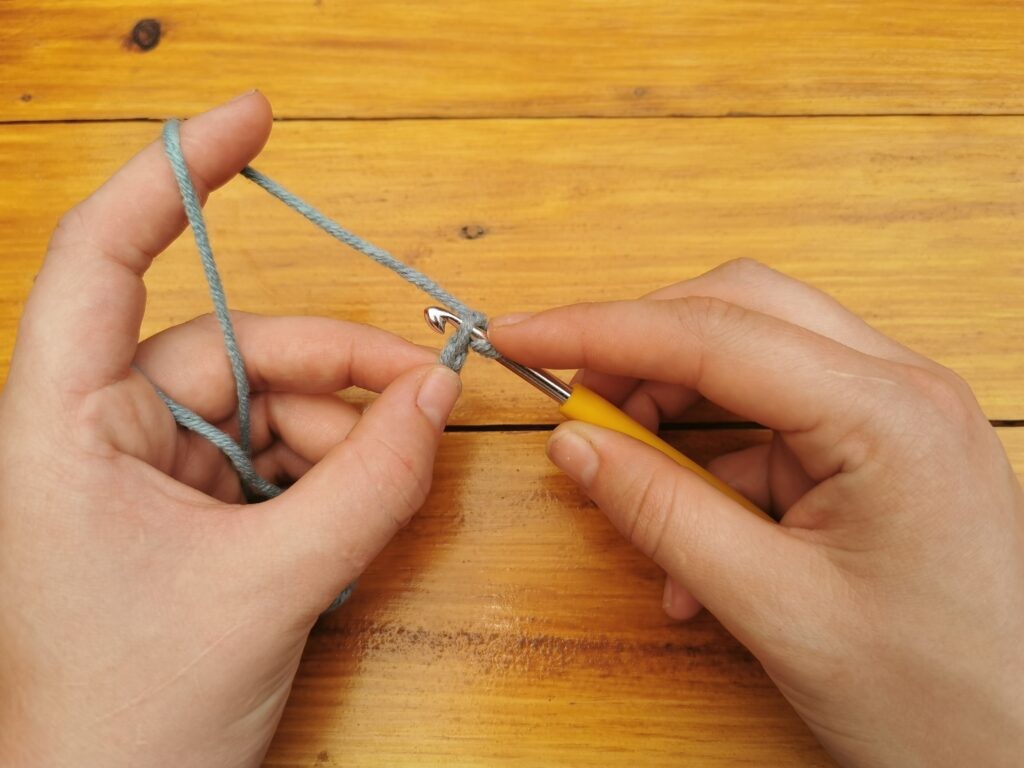
- Insert your hook into the second chain from the hook.
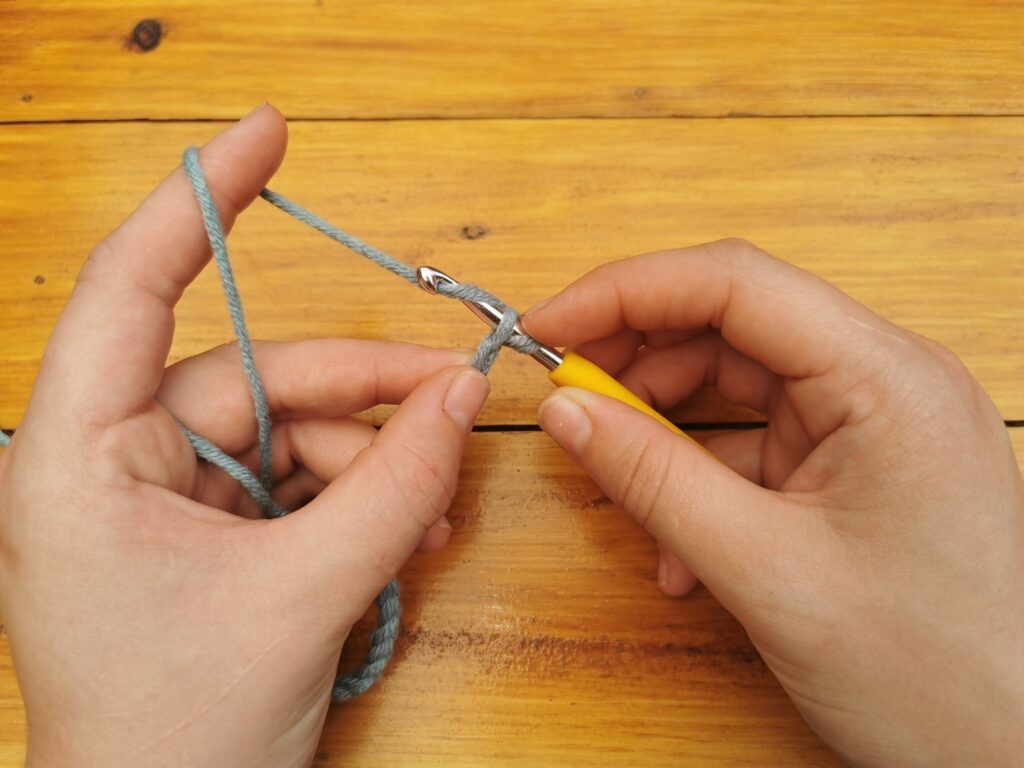
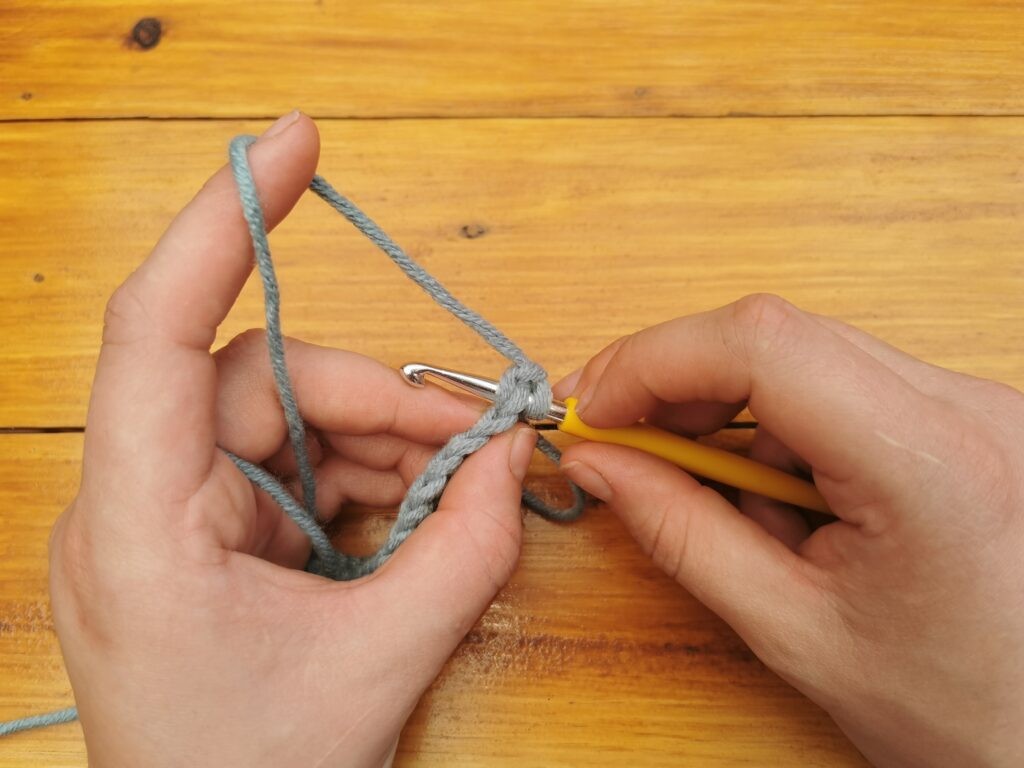
- Yarn over (wrap the yarn around the hook from back to front).
- Pull the yarn through the chain and up your hook. There should be two loops on your hook.
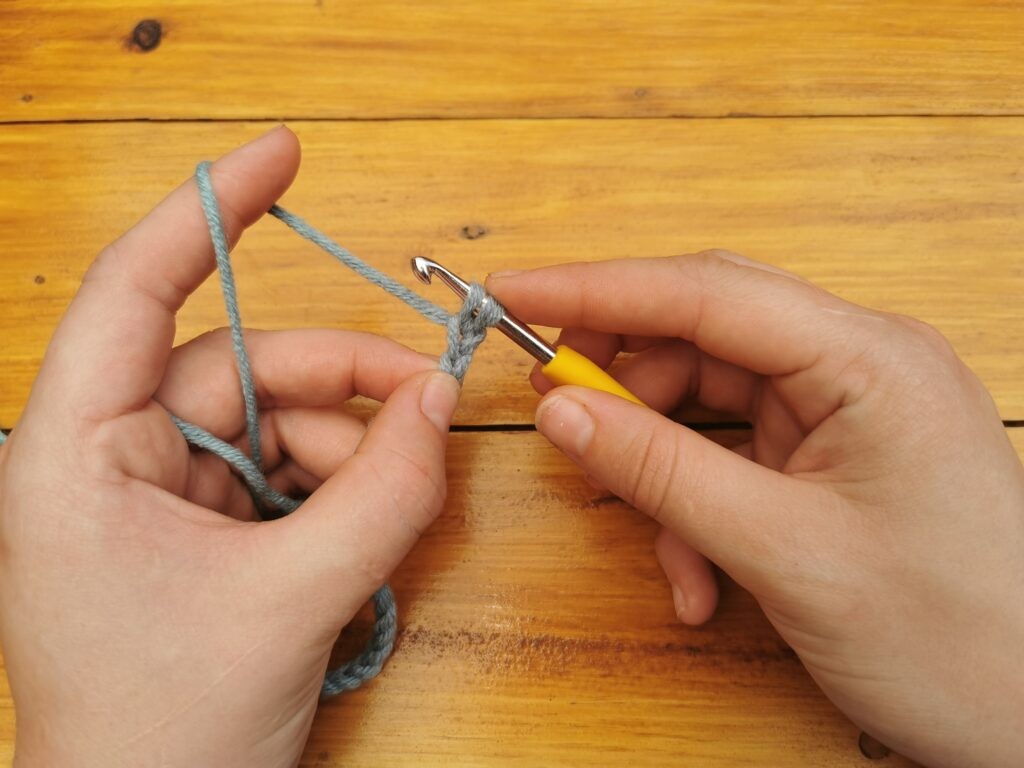
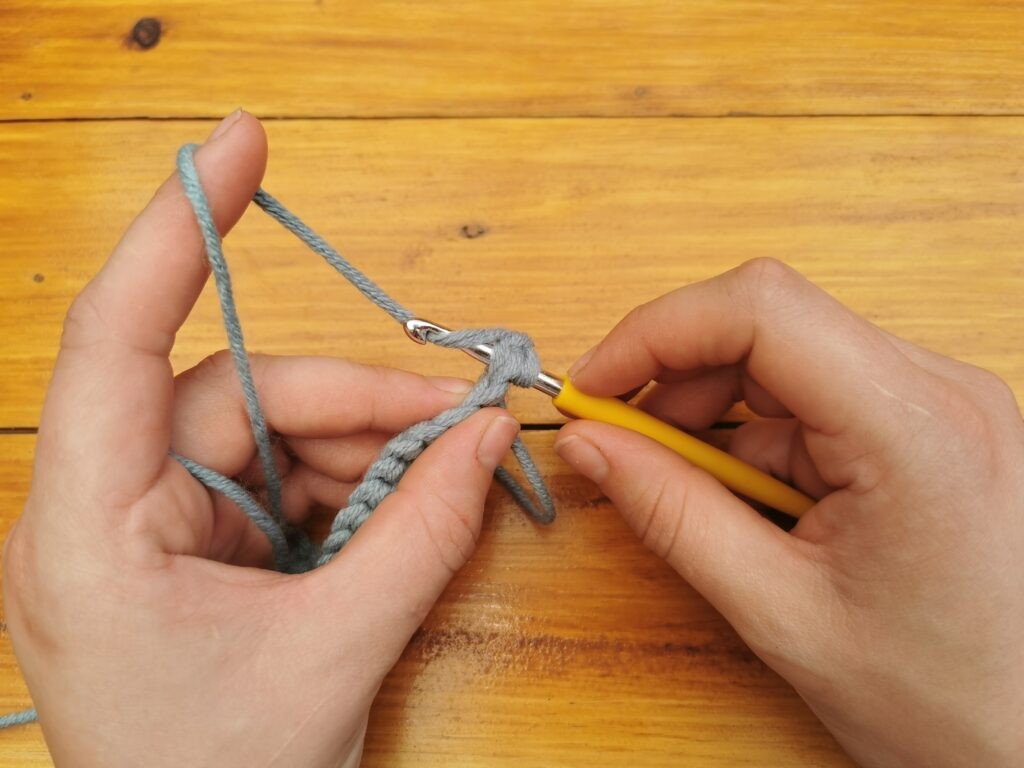
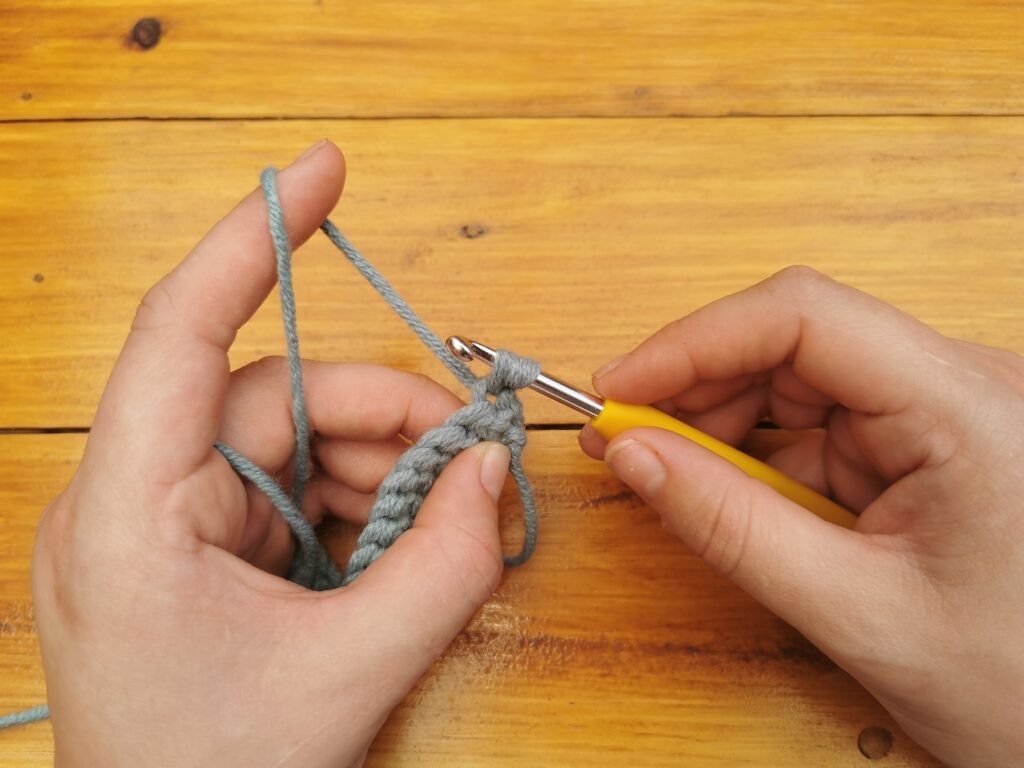
- Yarn over again.
- Pull the yarn through both loops on your hook. One loop remains on your hook. You’ve just made your first single crochet.
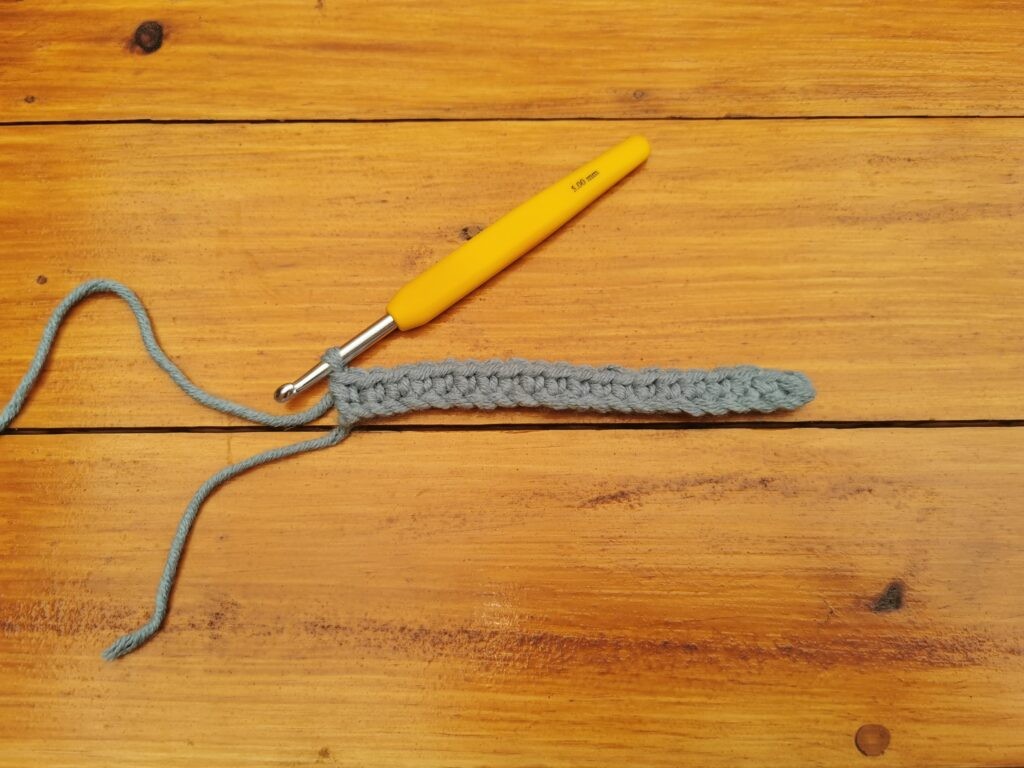
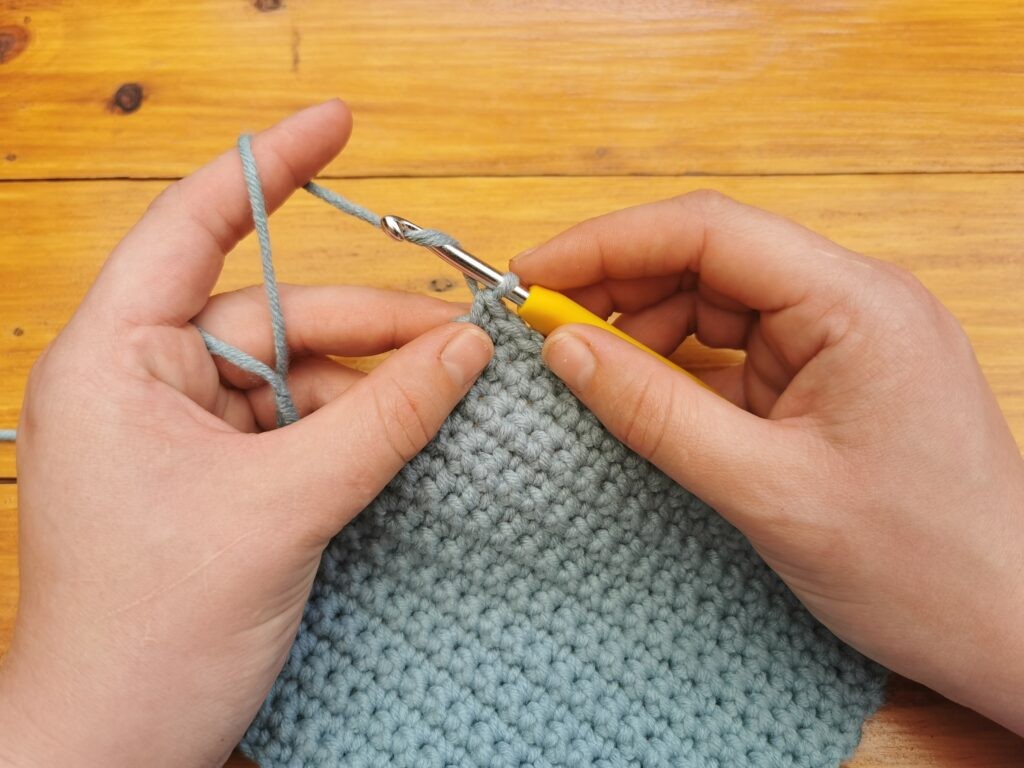
- Continue to make 19 single crochet down the entire chain. Your chain of single crochet should look something like this and you should have 20 single crochets in total.
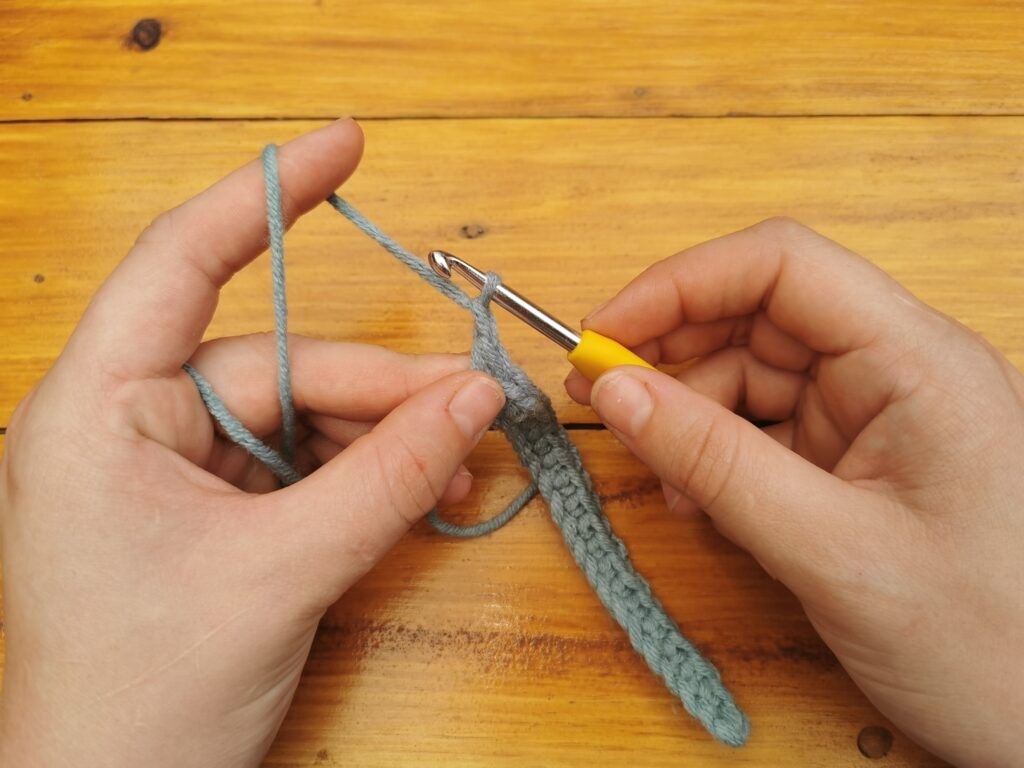
- Chain one to start with the second row.
- Turn your work.
- Insert the hook into the first stitch
- The stitch from the top shows the V-shape of the stitch.
- Yarn over the hook
- Two loops on the hook
- Yarn over once more
- Pull through both loops on the hook
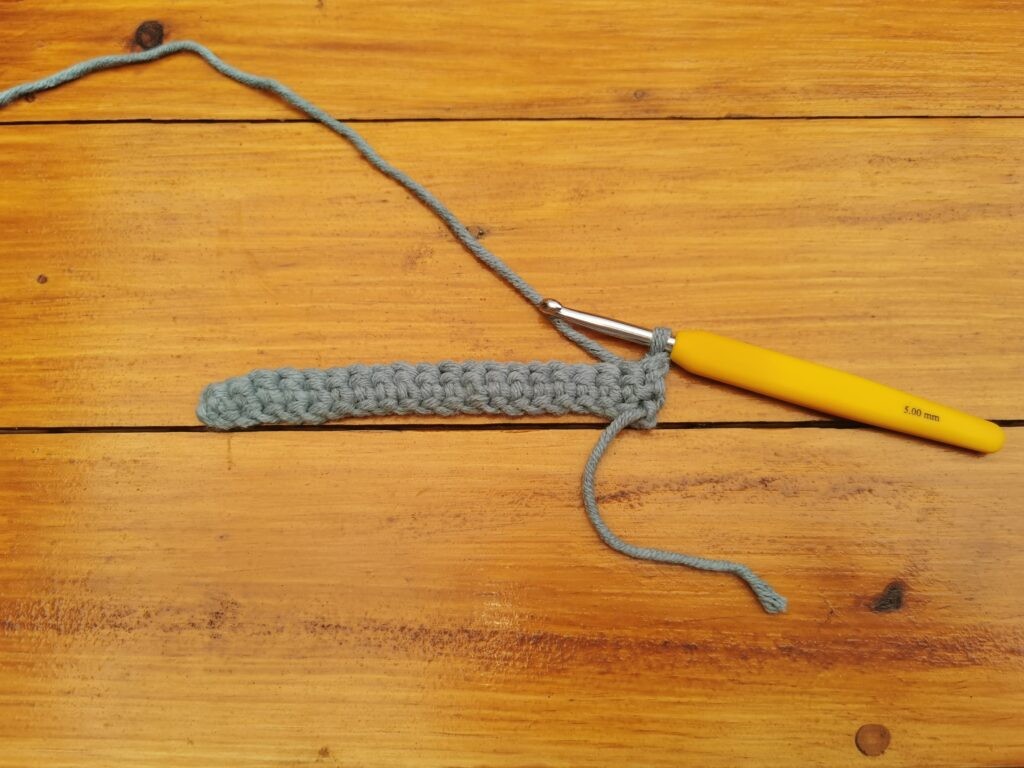
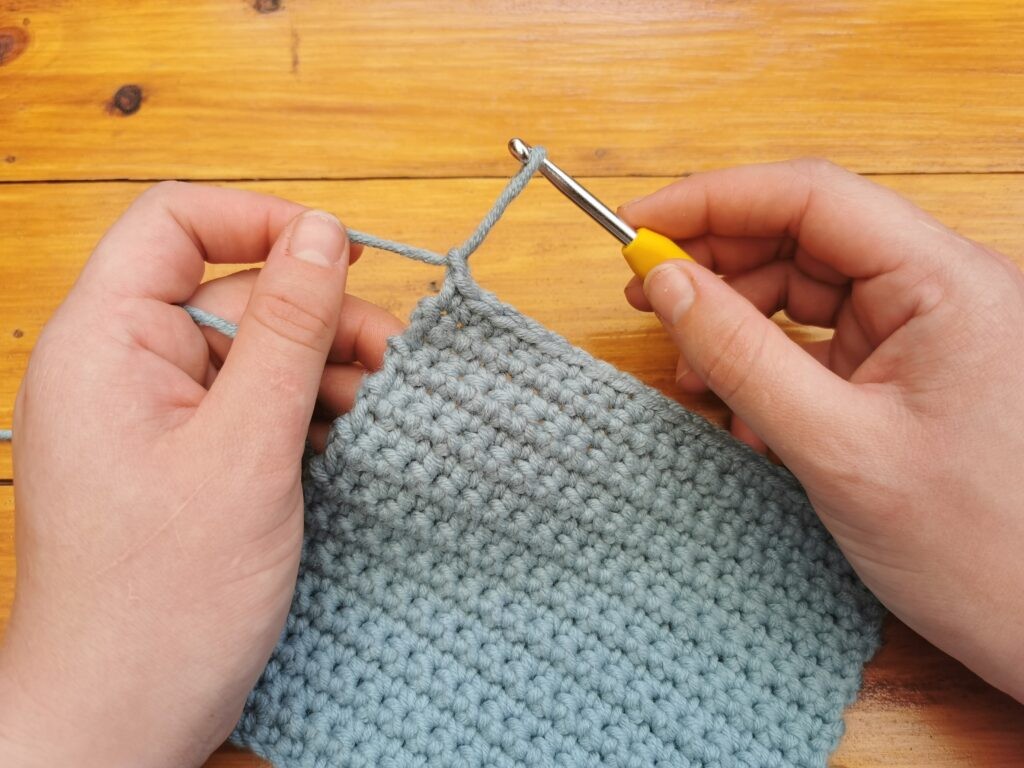
2.5. Finishing Off and Weaving in Ends
To secure your work and give it a polished look, you need to finish off and weave in the ends.
- At the end of your project, yarn over like for when you make a chain 1.
- Pull the loop about an inch outward.
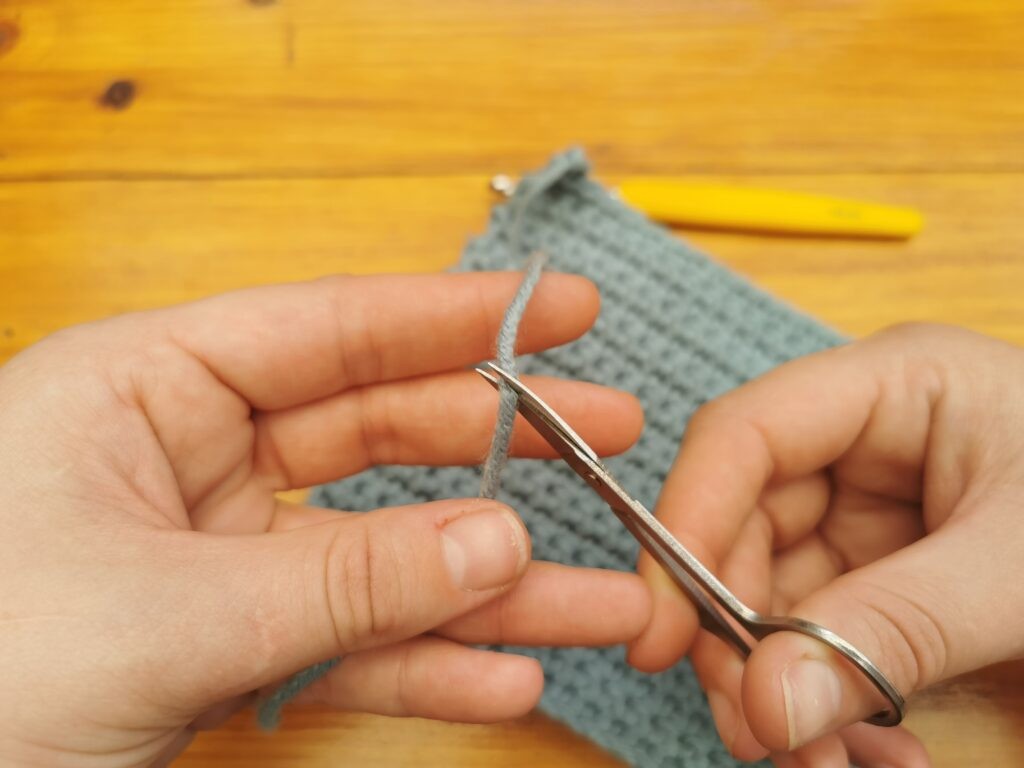
- Keeping your yarn on the hook, lay down your project and measure about 2 inches on the working yarn. Cut the yarn at the 2 inch mark.
- Now take your hook and pull the yarn completely through the loop.
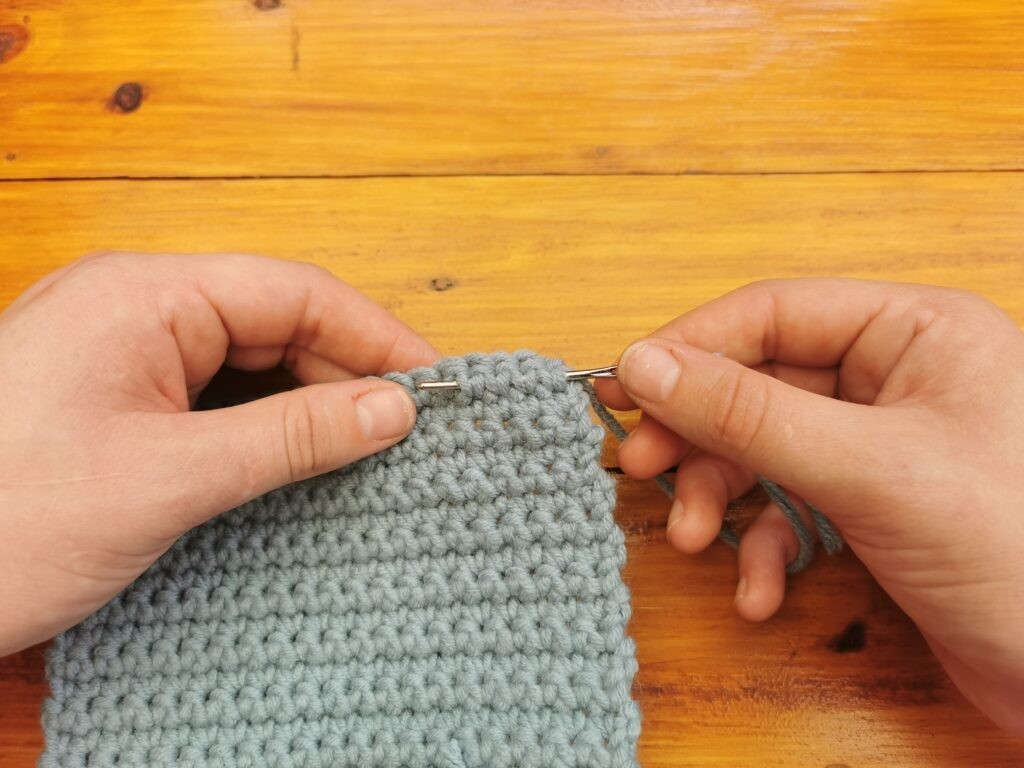
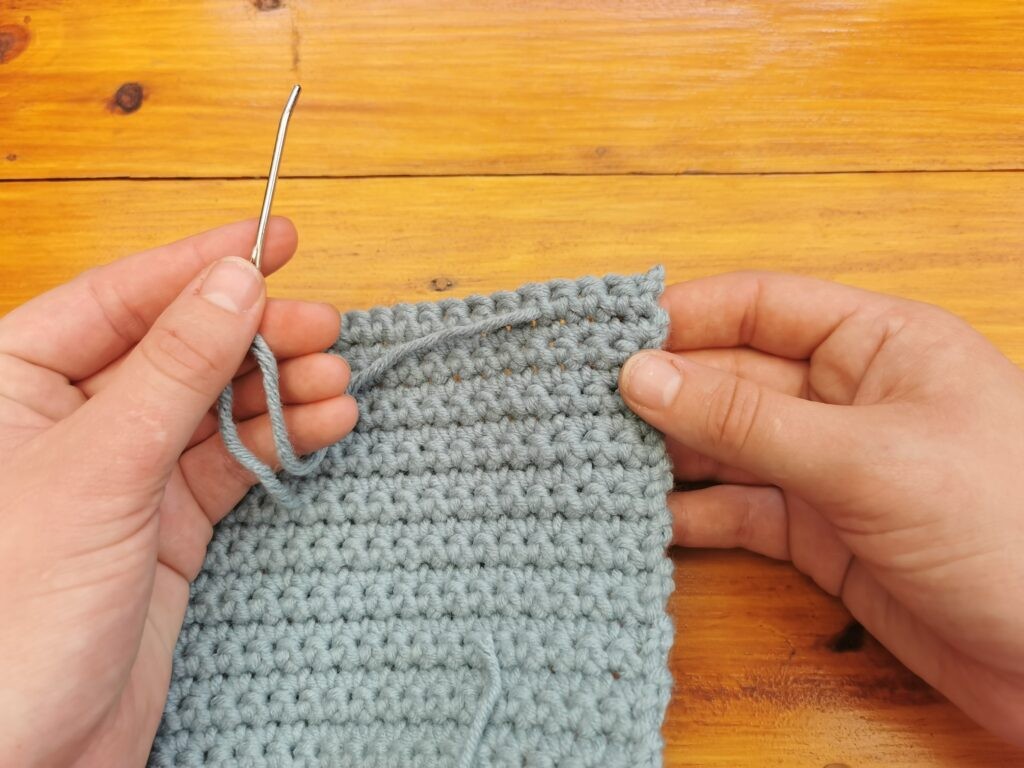
Weaving in the ends
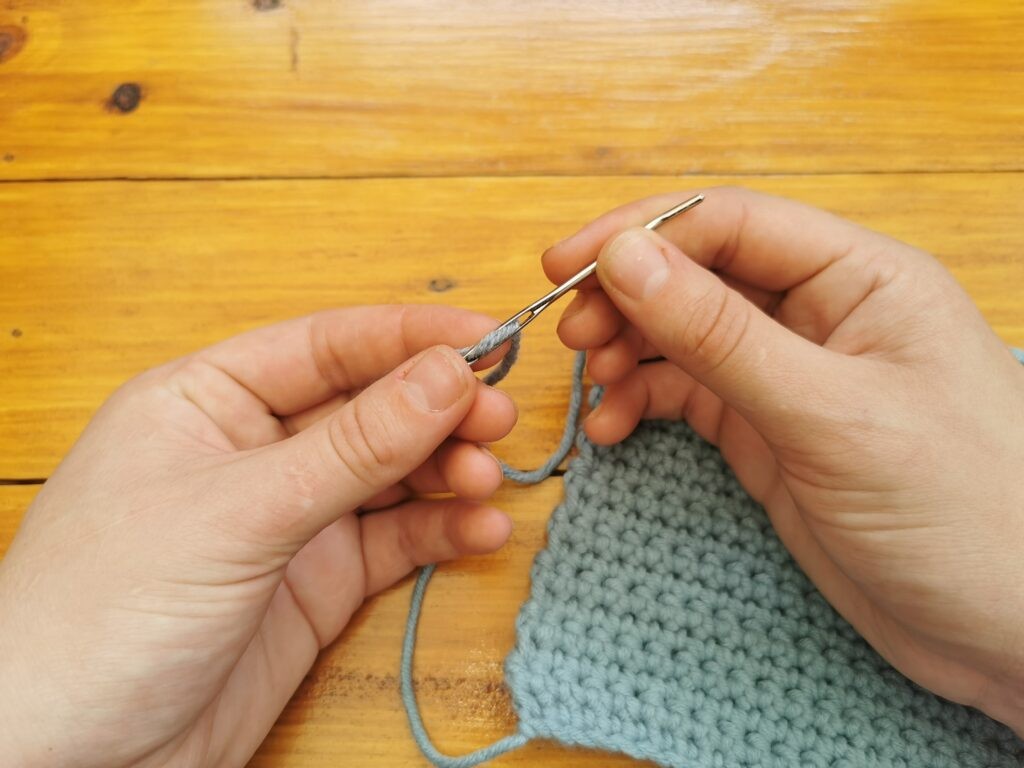
- To weave in the ends, push the piece of yarn through the eye of the yarn needle.
- Pull the yarn through enough so that it is long enough for you to grab a hold of.
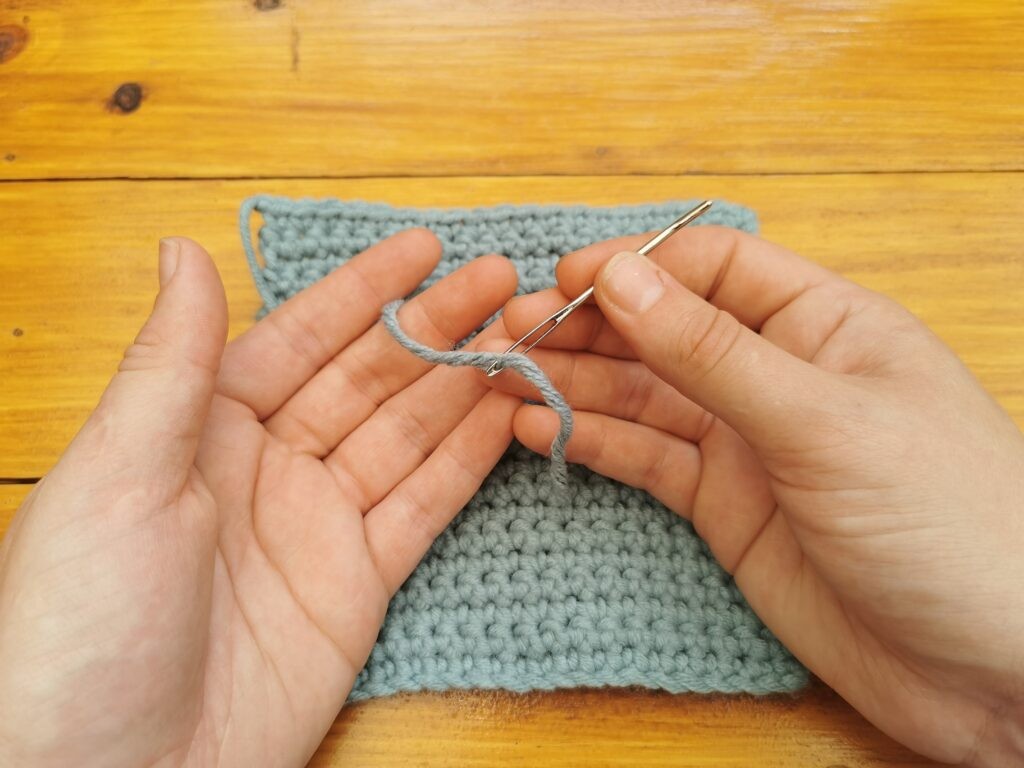
- I usually go through the back of the first stitch to get to the bottom row.
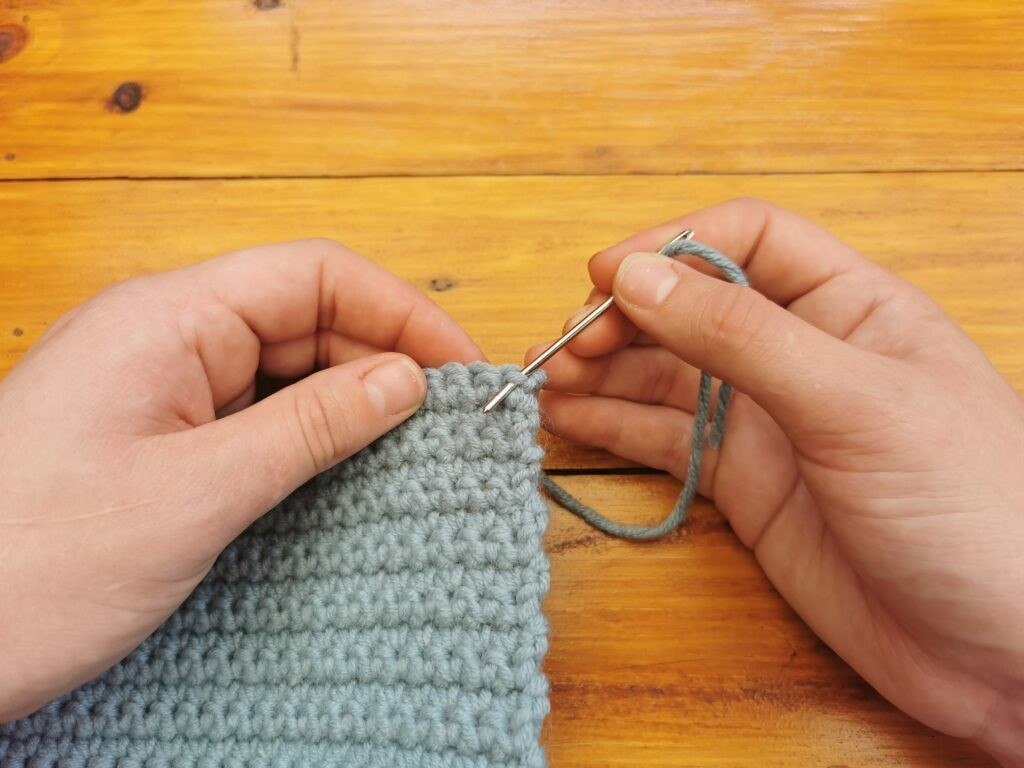
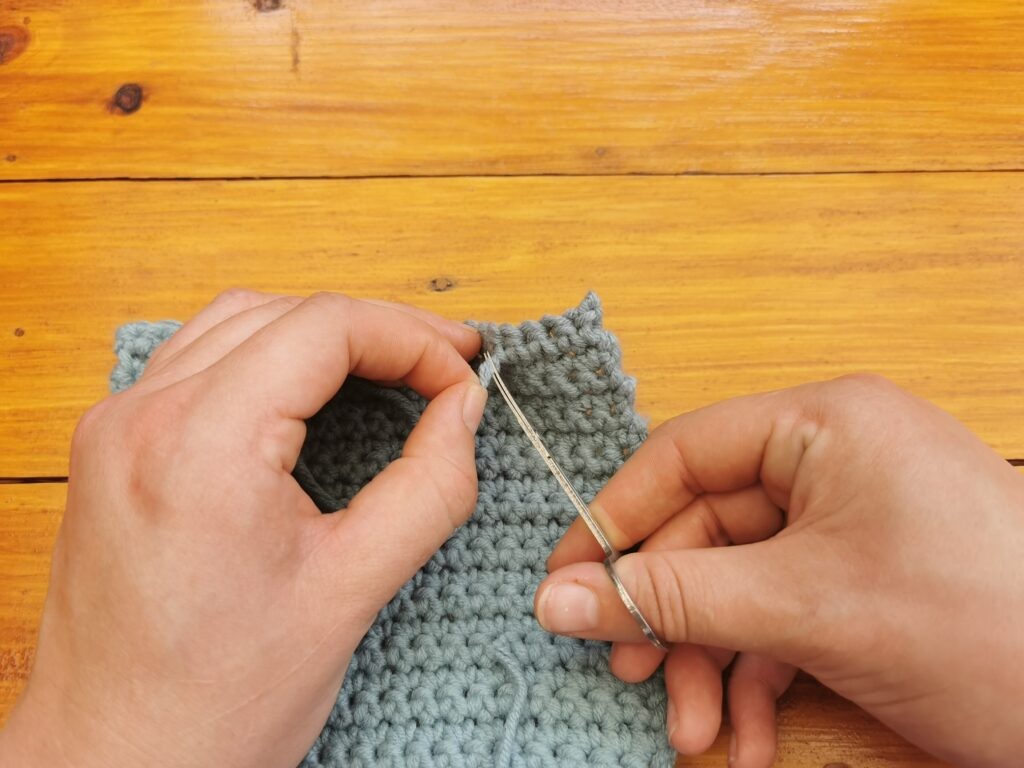
- Insert the needle through the top of the stitch downward, making sure to not go through the other side.
- Pull the needle through but not to tightly as you don’t want your work to curl.
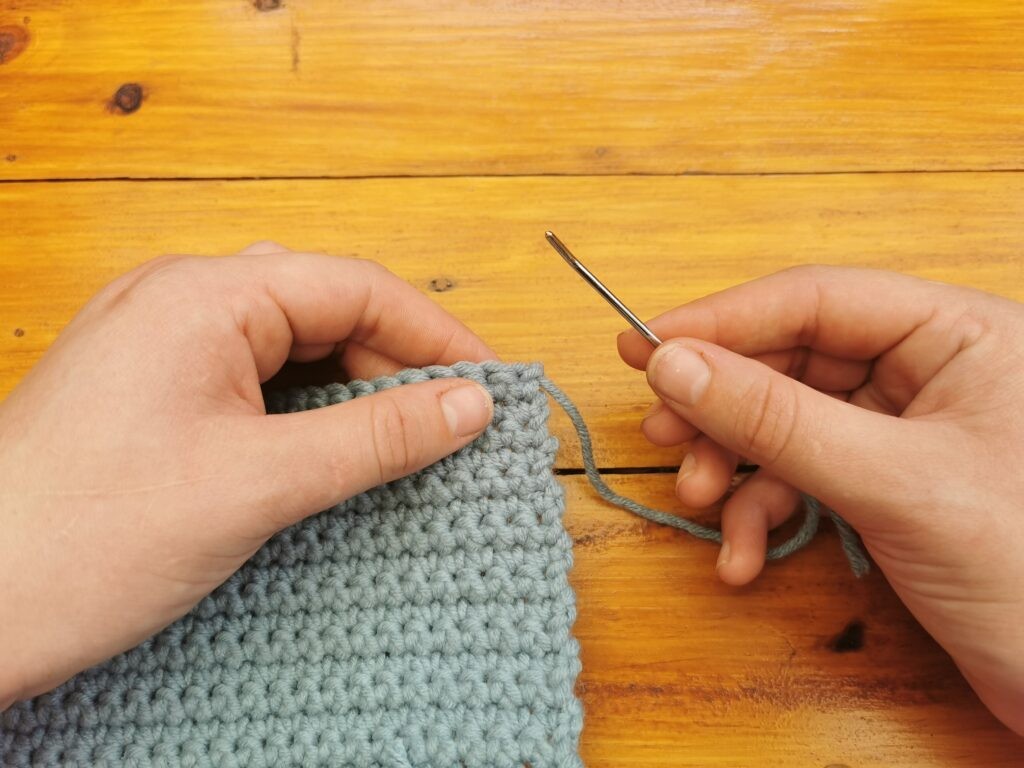
- Weave in the needle into the bottom row where your yarn came out.
- Pull the needle through, again not to tightly.
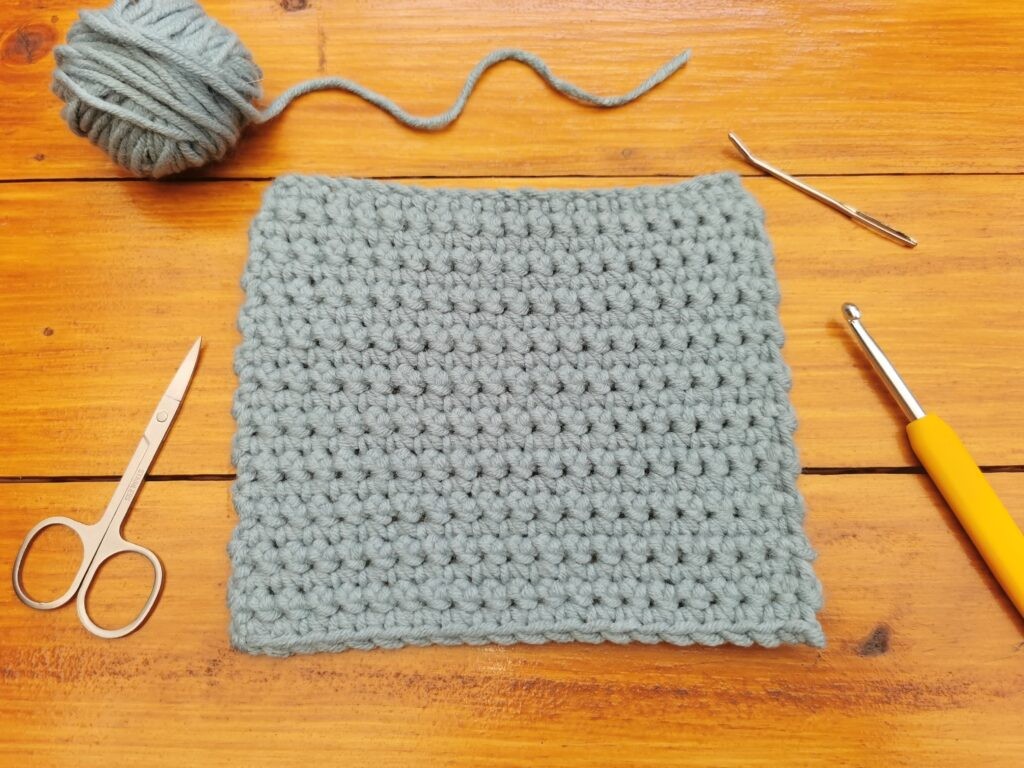
- Take our the needle from the yarn and cut the yarn close to your work. If a little piece shows, you can stretch the row a little until it disapears.
2.6. Practicing and Troubleshooting
Practice is key to mastering crochet. Start with small sample squares to get a feel for the hook and yarn. Don’t worry if your first attempts aren’t perfect. Common issues include:
- Tight Stitches: If your stitches are too tight, try using a larger hook or loosening your tension.
- Loose Stitches: If your stitches are too loose, try using a smaller hook or tightening your tension.
- Uneven Edges: Ensure you are maintaining the same number of stitches in each row and using consistent tension.
3. Essential Crochet Stitches for Beginners
Once you’ve mastered the basic techniques, you can start learning essential crochet stitches that form the foundation for many projects.
3.1. Double Crochet (dc)
The double crochet stitch is taller than the single crochet and creates a more open fabric.
- Yarn over (wrap the yarn around the hook from back to front).
- Insert the hook into the third chain from the hook (or the next stitch if working in a row).
- Yarn over and pull the yarn through the chain/stitch. There should be three loops on your hook.
- Yarn over and pull the yarn through the first two loops on the hook. There should be two loops remaining.
- Yarn over and pull the yarn through the remaining two loops on the hook. One loop remains.
3.2. Half Double Crochet (hdc)
The half double crochet stitch is between the single and double crochet in height and creates a dense fabric.
- Yarn over (wrap the yarn around the hook from back to front).
- Insert the hook into the third chain from the hook (or the next stitch if working in a row).
- Yarn over and pull the yarn through the chain/stitch. There should be three loops on your hook.
- Yarn over and pull the yarn through all three loops on the hook. One loop remains.
3.3. Treble Crochet (tr)
The treble crochet stitch is the tallest of the basic stitches, creating a very open and airy fabric.
- Yarn over twice (wrap the yarn around the hook from back to front twice).
- Insert the hook into the fourth chain from the hook (or the next stitch if working in a row).
- Yarn over and pull the yarn through the chain/stitch. There should be four loops on your hook.
- Yarn over and pull the yarn through the first two loops on the hook. There should be three loops remaining.
- Yarn over and pull the yarn through the next two loops on the hook. There should be two loops remaining.
- Yarn over and pull the yarn through the remaining two loops on the hook. One loop remains.
3.4. Slip Stitch (sl st)
The slip stitch is a very short stitch used for joining rounds, creating edgings, and moving across a row without adding height.
- Insert the hook into the next stitch.
- Yarn over (wrap the yarn around the hook from back to front).
- Pull the yarn through the stitch and through the loop on the hook in one motion.
4. Understanding Crochet Patterns
Crochet patterns provide instructions for creating specific projects. Learning how to read and follow patterns is essential for advancing your crochet skills.
4.1. Common Abbreviations
Crochet patterns use abbreviations to save space and make instructions more concise. Here are some common abbreviations:
| Abbreviation | Meaning |
|---|---|
| ch | Chain |
| sc | Single Crochet |
| dc | Double Crochet |
| hdc | Half Double Crochet |
| tr | Treble Crochet |
| sl st | Slip Stitch |
| rep | Repeat |
| inc | Increase |
| dec | Decrease |
| st | Stitch |
| sts | Stitches |
| beg | Beginning |
| rem | Remaining |
| tog | Together |
| rnd | Round |
4.2. Pattern Structure
A typical crochet pattern includes:
- Materials: A list of the yarn, hook, and other supplies you’ll need.
- Gauge: The number of stitches and rows per inch (or centimeter) to ensure your project turns out the correct size.
- Instructions: Step-by-step directions for creating the project, often divided into rows or rounds.
- Notes: Additional information or tips to help you with the project.
4.3. Reading a Row or Round
Each row or round in a crochet pattern is typically written as a series of instructions, indicating which stitches to make and where to place them. For example:
- Row 1: Ch 20, sc in second ch from hook and in each ch across, turn. (19 sc)
This means: Chain 20, single crochet in the second chain from the hook and in each chain across, then turn your work. You should have 19 single crochet stitches in total.
4.4. Following Charts
Some crochet patterns use charts to visually represent the stitches and their placement. Charts can be especially helpful for complex patterns like lace or textured designs.
- Symbols: Each symbol on the chart represents a specific stitch.
- Rows/Rounds: Charts are read from right to left for right-handed crocheters and left to right for left-handed crocheters.
- Repeats: Some charts include repeat sections, indicated by bold lines or brackets.
5. Simple Crochet Projects for Beginners
Starting with easy projects will help you build confidence and reinforce your skills.
5.1. Crochet Washcloth
A simple square or rectangular washcloth is an excellent first project. Use single crochet or half double crochet to create a dense, absorbent fabric.
Materials:
- Cotton yarn
-
- 0mm crochet hook
Instructions:
- Ch 30.
- Sc in second ch from hook and in each ch across, turn. (29 sc)
- Ch 1, sc in each st across, turn. (29 sc)
- Repeat step 3 until the washcloth is square.
- Finish off and weave in ends.
5.2. Crochet Scarf
A basic scarf is another great project for beginners. Choose a simple stitch pattern like single crochet or double crochet, and work in rows until the scarf is the desired length.
Materials:
- Worsted weight yarn
-
- 0mm crochet hook
Instructions:
- Ch 25.
- Dc in third ch from hook and in each ch across, turn. (23 dc)
- Ch 2, dc in each st across, turn. (23 dc)
- Repeat step 3 until the scarf is the desired length.
- Finish off and weave in ends.
5.3. Crochet Coaster
Coasters are quick and easy to make, providing instant gratification and a chance to practice different stitches.
Materials:
- Cotton yarn
-
- 0mm crochet hook
Instructions:
- Ch 2, 6 sc in second ch from hook. (6 sc)
- Rnd 1: 2 sc in each st around. (12 sc)
- Rnd 2: Sc in next st, 2 sc in next st; rep from around. (18 sc)
- Rnd 3: Sc in next 2 sts, 2 sc in next st; rep from around. (24 sc)
- Finish off and weave in ends.
6. Tips and Tricks for Successful Crocheting
To enhance your crochet experience and achieve better results, consider the following tips and tricks:
6.1. Maintaining Consistent Tension
Consistent tension is crucial for creating neat and even stitches. Practice holding the yarn with a comfortable but firm grip, allowing it to flow smoothly through your fingers. If you find your tension varies, try adjusting your grip or using a yarn guide.
6.2. Counting Stitches and Rows
Counting stitches and rows ensures accuracy and helps prevent mistakes. Use stitch markers to mark the beginning or end of a row, or to highlight specific stitches within a row. Regularly count your stitches to catch any errors early on.
6.3. Blocking Your Finished Projects
Blocking is a process that shapes and sets your finished crochet projects. Wet blocking involves dampening the project and pinning it to a flat surface until it dries. Steam blocking uses an iron to gently steam the project into shape. Blocking improves the drape and appearance of your crochet items.
6.4. Caring for Your Crochet Items
Proper care extends the life of your crochet projects. Follow the care instructions on the yarn label, which may include machine washing, hand washing, or dry cleaning. Store your crochet items in a clean, dry place, away from direct sunlight and pests.
7. Advancing Your Crochet Skills
Once you’ve mastered the basics and completed a few simple projects, you can start exploring more advanced techniques and patterns.
7.1. Learning New Stitches
Expand your stitch repertoire by learning more complex stitches, such as:
- Shell Stitch: Creates a decorative, scalloped edge.
- Puff Stitch: Produces a textured, three-dimensional effect.
- Cable Stitch: Mimics the look of knitted cables.
- Tunisian Crochet: Creates a dense, woven fabric.
7.2. Exploring Different Techniques
Discover various crochet techniques to add depth and interest to your projects, such as:
- Colorwork: Involves changing colors within a project to create patterns and designs.
- Tapestry Crochet: Uses single crochet stitches to create intricate, geometric patterns.
- Intarsia Crochet: Similar to tapestry crochet but allows for larger, isolated blocks of color.
- Filet Crochet: Creates lacy, grid-based designs using chains and double crochet stitches.
7.3. Designing Your Own Patterns
Challenge yourself by designing your own crochet patterns. Start with simple shapes and stitch patterns, and gradually increase the complexity as you gain experience. Sketch out your designs, calculate stitch counts, and test your patterns to ensure accuracy.
7.4. Joining a Crochet Community
Connect with other crocheters through online forums, social media groups, or local crochet clubs. Sharing your projects, asking questions, and exchanging tips and ideas with fellow enthusiasts can enhance your crochet journey and provide inspiration.
8. The Benefits of Learning to Crochet
Learning to crochet offers numerous benefits beyond creating beautiful items.
8.1. Stress Relief and Relaxation
The rhythmic and repetitive motions of crocheting can be incredibly soothing, helping to reduce stress and promote relaxation. Focusing on the stitches can provide a meditative escape from daily worries.
8.2. Creativity and Self-Expression
Crocheting allows you to express your creativity and create unique, personalized items. You can choose from a wide variety of colors, textures, and patterns to bring your ideas to life.
8.3. Cognitive Benefits
Crocheting engages multiple areas of the brain, improving concentration, memory, and problem-solving skills. The act of following patterns and creating intricate designs can help keep your mind sharp and active.
8.4. Sense of Accomplishment
Completing a crochet project, whether it’s a simple coaster or a complex blanket, provides a sense of accomplishment and pride. Seeing your hard work transform into a tangible item can boost your self-esteem and motivation.
8.5. Handmade Gifts and Charity
Crocheted items make thoughtful and personalized gifts for friends and family. You can also use your crochet skills to create items for charity, such as blankets for hospitals or hats for homeless shelters.
9. Top Resources for Crochet Learners
To further support your crochet journey, here are some valuable resources that offer tutorials, patterns, and inspiration:
9.1. Online Tutorials and Websites
- learns.edu.vn: Offers a variety of educational resources and skill-building courses, including crochet tutorials.
- YouTube: Channels like Bella Coco Crochet, The Crochet Crowd, and TL Yarn Crafts provide video tutorials for beginners and advanced crocheters.
- Ravelry: A popular online platform for knitters and crocheters, offering a vast library of patterns, forums, and project galleries.
- Craftsy: Provides online classes and workshops on various crafts, including crochet.
- LoveCrafts: An online marketplace for yarn, patterns, and craft supplies, with a wealth of free tutorials and patterns.
9.2. Books and Magazines
- “Crochet for Dummies” by Karen Manthey and Susan Brittain
- “Stitch ‘n Bitch Crochet: The Happy Hooker” by Debbie Stoller
- “The Complete Idiot’s Guide to Crochet” by June Gilbank
- “Interweave Crochet” magazine
- “Crochet World” magazine
9.3. Crochet Apps
- Stitchly: A pattern management app that allows you to track your progress, store your patterns, and access helpful resources.
- Row Counter: A simple and effective app for counting rows and stitches in your crochet projects.
- Knit and Crochet Buddy: A versatile app that includes a row counter, stitch guide, and pattern organizer.
9.4. Influencers and Content Creators
- **@Bellacococrochet (Instagram