Windows Spotlight is a well-loved feature, first introduced in Windows 10, that graces your lock screen with stunning, automatically updated wallpapers. Windows 11 takes this visual treat a step further by bringing Spotlight to your desktop background. This means you can enjoy breathtaking landscapes and scenery directly on your desktop without needing to lock your screen. However, with this desktop integration comes a persistent icon labeled “Learn more about this picture,” which some users might find distracting or unnecessary.
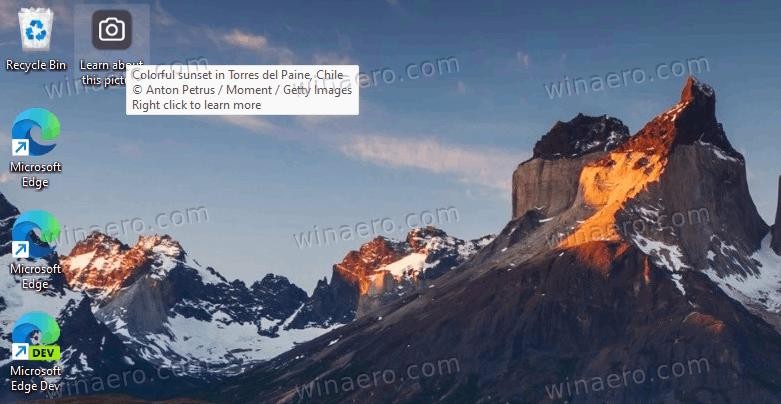
This icon, the “Learn more about this picture” Windows Spotlight icon, is designed to provide additional information about the current wallpaper image, even if it’s a standard Windows background. Clicking it reveals details about the photo, and its context menu allows you to switch to the next image or vote on the current one.
Currently, Windows 11 doesn’t offer a straightforward setting to hide this icon. Once you enable Spotlight for your desktop wallpaper, the icon remains visible. If you’re looking for a cleaner desktop experience without this icon, this guide will show you how to disable the “Learn more about this picture” icon in Windows 11 using several methods, including Registry tweaks, ready-to-use files, and third-party tools.
Method 1: Removing the Spotlight Icon Using Registry Editor
For those comfortable with system settings, the Registry Editor provides a direct way to disable the Spotlight desktop icon. Here’s how:
-
Open Registry Editor: Press
Win + Rto open the Run dialog. Typeregeditand press Enter. -
Navigate to the Key: In the Registry Editor, navigate to the following key using the left-hand pane:
HKEY_CURRENT_USERSoftwareMicrosoftWindowsCurrentVersionExplorerHideDesktopIconsNewStartPanel -
Create a New DWORD Value: Right-click on the
NewStartPanelkey, selectNew > DWORD (32-bit) Value. -
Name the Value: Rename the new value to
{2cc5ca98-6485-489a-920e-b3e88a6ccce3}. -
Modify Value Data: Double-click on the newly created
{2cc5ca98-6485-489a-920e-b3e88a6ccce3}value to edit its data. -
Change Value Data to 1: In the “Value data” field, change the value from
0to1. Click “OK”. -
Refresh Desktop: Right-click on your desktop and select
Refresh. The “Learn more about this picture” icon should now be gone.
After refreshing, your desktop should appear cleaner without the Spotlight icon.
To restore the icon later, simply delete the {2cc5ca98-6485-489a-920e-b3e88a6ccce3} value from the Registry Editor.
Method 2: Using Ready-to-Use Registry Files
If you prefer a quicker, less manual approach, you can use pre-made Registry files to disable or re-enable the Spotlight icon.
-
Download Registry Files: Download this ZIP archive containing the ready-made Registry files. Extract the contents to a convenient location.
-
Run the “Remove” File: To disable the icon, open the
remove windows spotlight icon from desktop.regfile. Windows User Account Control may prompt you for permission; click “Yes” to continue. -
Refresh Desktop: After running the file, refresh your desktop by right-clicking and selecting “Refresh.” The icon will be removed.
-
Run the “Add” File to Restore: To bring the icon back, run the
add windows spotlight icon to desktop.regfile and refresh your desktop.
Method 3: Utilizing Winaero Tweaker
For a user-friendly graphical interface to manage this and many other Windows settings, Winaero Tweaker is an excellent tool.
-
Download and Install Winaero Tweaker: Download Winaero Tweaker from here. Install and launch the application.
-
Navigate to Spotlight Setting: In Winaero Tweaker, navigate to
Windows 11 > Windows Spotlight Desktop Iconin the left-hand navigation pane. -
Disable the Icon: On the right side, check the box next to “Disable Windows Spotlight Desktop Icon.”
-
Apply Changes: You might need to manually refresh your desktop or sign out and back into your user account for the change to take effect.
Winaero Tweaker makes it easy to toggle the icon’s visibility by simply checking or unchecking the option. Beyond this, Winaero Tweaker offers a wide array of customization options for Windows 11, enhancing various aspects of the operating system.
Method 4: Employing ExplorerPatcher
Another versatile tool, ExplorerPatcher, is a free and open-source application that provides extensive customization capabilities for Windows 11, including hiding the Spotlight desktop icon.
-
Download and Install ExplorerPatcher: Download the latest version of ExplorerPatcher from its GitHub page. Run the downloaded installer and follow the on-screen instructions.
-
Open ExplorerPatcher Properties: After installation, you may notice your taskbar resembles the Windows 10 style. Right-click on the taskbar and select “Properties.”
-
Navigate to Spotlight Settings: In the ExplorerPatcher Properties window, go to the “Spotlight” section on the left.
-
Hide the Icon: Select the option “Hide the ‘Learn about this picture’ icon.”
-
(Optional) Revert Taskbar Style: If you prefer the Windows 11 taskbar, you can switch back to it in the “Taskbar” section of ExplorerPatcher Properties.
ExplorerPatcher offers a comprehensive suite of customization options, and hiding the Spotlight icon is just one of its many features. If you decide to remove ExplorerPatcher, you can uninstall it like any other application through the “Apps > Installed apps” section in Windows Settings.
Conclusion
Removing the “Learn more about this picture” icon from your Windows 11 desktop can create a cleaner, less cluttered visual experience. Whether you choose the manual Registry Editor method, the convenience of ready-made Registry files, the user-friendliness of Winaero Tweaker, or the extensive customization offered by ExplorerPatcher, you have several effective options to achieve this. Select the method that best suits your comfort level and enjoy a more streamlined desktop.
RЕCOMMENDED: Click here to fix Windоws issues and optimize system performance