Craftsman garage door openers are a staple in many homes, known for their reliability and ease of use. They provide convenience and enhanced security, allowing homeowners to control access to their garages with the click of a button. However, situations arise where reprogramming your Craftsman garage door opener becomes necessary. Whether you are moving into a new house, upgrading your security system, or simply replacing a lost remote, understanding how to reprogram your Craftsman garage door opener, specifically using the “learn button,” is a valuable skill.
This guide provides a comprehensive, step-by-step approach to reprogramming your Craftsman garage door opener, focusing on utilizing the learn button effectively. We will walk you through the process of clearing old codes and programming new remotes and keypads, ensuring your garage door system remains secure and functional. This process is crucial for maintaining your home’s security and ensuring seamless operation of your garage door.
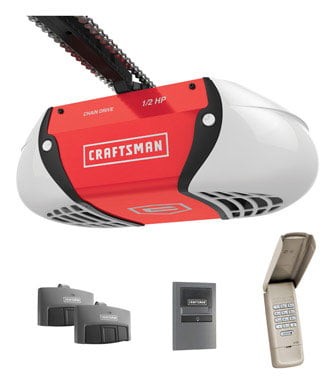 Craftsman Garage Door Opener
Understanding the Learn Button on Your Craftsman Garage Door Opener
The “learn button” is a critical component of your Craftsman garage door opener, acting as the key to programming and synchronizing your remotes and keypads with the opener unit itself. This button, typically located on the garage door opener motor unit in your garage, initiates the process of learning new security codes.
Locating the learn button is your first step in reprogramming. It is usually found on the back or side panel of the motor housing, the unit affixed to your garage ceiling. The learn button is often small and circular, and it can be various colors such as red, yellow, purple, or green, depending on the model and year of your Craftsman garage door opener. Next to the button, you may find an LED indicator that illuminates or blinks during the programming process, providing visual cues.
The learn button serves a vital security function. When you press this button, it puts the garage door opener into a ‘learn mode’ for a short period, usually around 30 seconds. During this time, it is receptive to learning a new security code from a remote or keypad. This system ensures that only devices programmed during this learning window can operate your garage door, significantly enhancing security by preventing unauthorized access. By using a rolling code technology, Craftsman openers ensure that each time the remote is used, a new, unique code is transmitted, making it extremely difficult for anyone to intercept and replicate the signal. Understanding the function and location of this learn button is essential for anyone looking to manage or update their Craftsman garage door opener system.
Step-by-Step Guide to Reprogramming with the Learn Button
Reprogramming your Craftsman garage door opener using the learn button is a straightforward process. Follow these steps carefully to ensure successful reprogramming of your remotes and keypads.
Step 1: Locating the Learn Button
The first step is to physically access your garage door opener unit. This unit is mounted on the ceiling inside your garage. You might need a step ladder to reach it safely. Once you can access the unit, visually inspect it to find the learn button. As mentioned earlier, this button is typically labeled “Learn” and can be identified by its small size and color (often red, yellow, or purple). It’s commonly located on the back or side of the motor unit housing. Sometimes, it may be behind a light lens cover, which you might need to remove carefully. Refer to your Craftsman garage door opener manual if you are having trouble locating it for your specific model.
Step 2: Clearing Existing Codes for Security
Before programming new devices, it’s a good security practice to clear any previously programmed codes from the garage door opener’s memory. This is especially important if you’ve just moved into a new home or are concerned about unauthorized access. To clear the existing codes, press and hold the learn button for approximately six seconds. You’ll typically see the LED indicator next to the learn button turn off, or blink rapidly, indicating that the memory has been cleared. After clearing the codes, it’s advisable to test with any old remotes or keypads you have to confirm they no longer operate the garage door. This step ensures that you are starting with a clean slate and enhancing your garage security.
Step 3: Programming Your Remote Control
With the old codes cleared, you are now ready to program your remote control.
- Activate Learn Mode: Press and release the learn button on the garage door opener unit. Once pressed, an LED indicator light (usually near the learn button) will illuminate, indicating that the opener is in learn mode. You typically have about 30 seconds from pressing the learn button to complete the next step, as the opener will only stay in learn mode for a limited time for security reasons.
- Transmit Remote Code: Immediately after pressing the learn button, take your remote control and press and hold the button you wish to use to operate the garage door. Hold the remote button down until the garage door opener lights blink, or you hear two distinct clicks from the opener unit. These are confirmation signals that the opener has received and learned the new remote code.
- Test the Remote: After hearing the clicks or seeing the lights blink, release the button on your remote and wait a few seconds. Then, press the button on the remote again to test if it successfully opens or closes the garage door. If the door responds, your remote has been successfully programmed.
- Program Additional Remotes: If you have multiple remotes to program, repeat this process for each remote. Remember to press the learn button each time before programming a new remote.
Step 4: Programming Your Wireless Keypad (If Applicable)
If your Craftsman garage door opener system includes a wireless keypad, programming it is similar to programming a remote.
- Enter Desired Code: On your wireless keypad, first enter the new personal identification number (PIN) you wish to use to operate your garage door.
- Activate Learn Mode: Just as with remote programming, press and release the learn button on the garage door opener unit to put it into learn mode.
- Transmit Keypad Code: Within 30 seconds of pressing the learn button, press the “Enter” or “Program” button on your keypad. Some keypads might require you to press the PIN again followed by the “Enter” button. Hold the button until the garage door opener lights blink or you hear two clicks, signaling successful code learning.
- Test the Keypad: After programming, test the keypad by entering your newly programmed PIN and pressing “Enter”. The garage door should activate if the programming was successful.
Step 5: Testing the New Settings is Crucial
After programming your remotes and keypads, thorough testing is essential. Test each remote and keypad to ensure they reliably open and close the garage door. Walk through different locations within and around your garage to check the operational range of your remotes. This step confirms that all programmed devices are working correctly and that your garage door system is functioning as expected and securely. If any device fails to operate the door, repeat the programming steps for that specific device, ensuring each step is followed precisely.
Troubleshooting and Tips for Learn Button Programming
While the reprogramming process is generally straightforward, you might encounter some issues. Here are some troubleshooting tips and best practices:
- Fresh Batteries: Ensure the batteries in your remote and keypad are fresh and have sufficient charge. Weak batteries are a common cause of programming failures. Replace batteries as a first step in troubleshooting.
- Time Sensitivity: Remember that the learn mode is only active for about 30 seconds after pressing the learn button. Ensure you complete the remote or keypad programming steps within this timeframe. If you exceed this time, you will need to press the learn button again.
- Interference: Electronic interference from nearby devices, especially certain types of LED lights or radio equipment, can sometimes disrupt the programming signal. Try turning off any potential sources of interference or moving them away from the garage door opener unit during programming.
- Resetting the Opener: If you face persistent issues, try resetting the garage door opener by unplugging it from the power outlet for a minute, and then plugging it back in. This can sometimes resolve minor electronic glitches. After resetting, attempt the reprogramming process again.
- Check the Manual: Always refer to your specific Craftsman garage door opener model’s manual for detailed instructions and troubleshooting specific to your unit. Manuals often contain model-specific tips and diagrams that can be very helpful.
- Obstructions: Ensure there are no obstructions blocking the signal path between the remote/keypad and the garage door opener unit.
- Multiple Devices: When programming multiple remotes or keypads, program them one at a time, repeating the learn button activation step before programming each device.
- Seek Professional Help: If you continue to experience difficulties or are unsure about any step, it’s always best to seek professional assistance from a garage door technician. They have the expertise to diagnose and resolve complex issues.
Why Reprogram Your Craftsman Garage Door Opener?
Reprogramming your Craftsman garage door opener is not just about convenience; it’s a crucial aspect of home security and maintenance. Here are key reasons why you might need to reprogram your opener:
- Enhanced Security After Moving: When you move into a new home, especially if it has an existing garage door system, reprogramming the opener is paramount. You don’t know who had access to the previous codes. Clearing old codes and programming your own ensures that only your devices can operate the garage door, safeguarding your home and belongings.
- Lost or Stolen Remotes: If a remote control or keypad is lost or stolen, reprogramming is essential to prevent unauthorized access to your garage. Clearing the old codes and reprogramming the remaining remotes and keypads with new codes immediately secures your garage.
- Adding New Devices: When you purchase additional remotes or a new wireless keypad, you need to reprogram your garage door opener to recognize these new devices. The learn button process is how you integrate these new devices into your existing system.
- Updating Security Codes: Periodically updating your garage door opener codes can be a proactive security measure. Although Craftsman openers use rolling code technology, regularly reprogramming can add an extra layer of security and peace of mind.
- Malfunctions or System Reset: In some cases, after a power surge or system malfunction, your garage door opener might need to be reset and reprogrammed to restore normal operation.
Conclusion
Mastering the process of reprogramming your Craftsman garage door opener using the learn button is a valuable skill for any homeowner. It empowers you to maintain control over your garage door security, ensuring that your home remains safe and accessible only to authorized users. By following this step-by-step guide, you can confidently reprogram your remotes and keypads, troubleshoot common issues, and understand the importance of regular maintenance of your garage door operating system. Remember, keeping your garage door opener properly programmed is a key component of overall home security and convenience. When in doubt, always consult your Craftsman garage door opener manual or seek professional help to ensure the safety and security of your home.