Are you a College of Western Idaho (CWI) student looking to sharpen your research skills for class assignments? The CWI Library offers an excellent resource right within your Blackboard account: the Information Literacy Badging Program. These badges are designed to guide you through the essential library services and resources, helping you become proficient in finding, evaluating, and utilizing information effectively.
Accessing Library Badges in Blackboard: Your Step-by-Step Guide
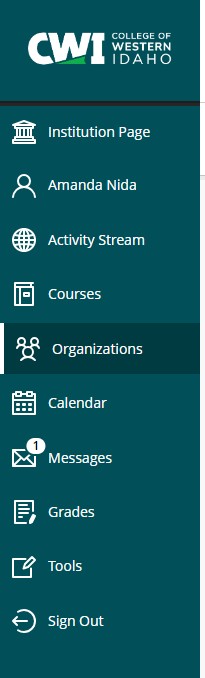
Finding the Library Badges is straightforward once you know where to look within Blackboard. They are located in “myCommons,” which you can access through the “Organizations” tab on your Blackboard dashboard.
First, navigate to the “Organizations” menu on the left-hand side of your Blackboard interface.
Within the “Organizations” section, you will find “myCommons” listed. Click on “myCommons” to proceed.
Once you are in myCommons, look for the “Academic Skills & Support Badges” area on the homepage. You will see “Library” listed among the available badges.
The Library Badges are arranged alphabetically. Scroll down to find them – they are typically located around the middle of the page.
If you cannot find the Badging site in your myCommons, don’t worry! Simply submit a quick HelpDesk ticket requesting its addition. It should appear in your Blackboard within one business day.
What Will You Learn From CWI Library Badges?
The CWI Library Badging Program covers key aspects of information literacy, broken down into four specific badges:
- Crossed the Threshold Badge: This badge offers a virtual tour of the physical library and introduces you to the CWI Library website, ensuring you know where to start your research journey.
- Source Sifter Badge: Master the crucial skill of evaluating sources for academic projects. This badge teaches you how to discern credible and relevant information for your assignments.
- Found It! Badge: Learn effective strategies for searching books and articles using the Library’s resources. This badge empowers you to efficiently locate the materials you need.
- Asked a Librarian Badge: Discover the invaluable resource that librarians are! This badge highlights how librarians can provide expert assistance and support throughout your research process.
How to Earn Your Library Badges on Blackboard
Earning each badge is based on successfully completing a quiz with a score of 90% or higher. The quizzes vary in length depending on the badge content, but the 90% passing threshold remains consistent across all badges.
Here’s a breakdown of the required points to achieve 90% or more on each quiz:
- Asked a Librarian: Achieve 90 out of 100 points.
- Crossed the Threshold: Aim for 126 out of 140 points.
- Found It!: Score 108 out of 120 points.
- Source Sifter: Get 126 out of 140 points.
Once you conquer all four of these badges with a 90% or higher, you unlock the Research Basics Mega Badge! This special badge, personalized with your name, recognizes your achievement in mastering the Research Basics Badge Set and signifies your progress toward becoming a research pro! 💪🧠
Proving You’ve Earned Your CWI Library Badges
Blackboard automatically generates proof of your earned badges. Upon achieving a 90% or higher on a badge quiz, Blackboard should create a display showing your name and the badge name. You can also find this proof listed under “Academic Skills and Support Badges” in your “My Badge Book” within Blackboard.
However, some students have reported that this proof may not appear immediately. If you don’t see your badge proof right away, simply log out of Blackboard and then log back in. This often resolves the issue and prompts the proof to appear.
For each badge you’ve earned, the proof will display the badge name, your name, and a brief description of the badge’s focus.
Screenshot Instructions for Sharing Your Achievement
To share proof of your badge completion with your professors or for your records, you can easily take a screenshot of your badge display in Blackboard.
Here’s how to take a screenshot on different operating systems:
- Using Built-in Tools: Utilize the Snipping Tool for Windows or the Screenshot app for Mac.
- Save the Screenshot: Save the captured image as a file on your computer.
- Upload and Share: Upload the image to Blackboard or share it as requested by your professor to demonstrate your badge completion.
Quick Screenshot Guides:
- Windows: Search for “snipping tool” in the Windows search bar (Windows key + S) to find and use the Snipping Tool.
- Mac: Press Shift + Command + 5 simultaneously to activate the Screenshot app on macOS.
If these methods are not accessible, you can also take a photo of your screen with your smartphone as an alternative way to capture proof of your earned badges.
Embrace the CWI Library Badges on Blackboard to enhance your information literacy skills and excel in your academic endeavors! They are a valuable, accessible resource designed to support your learning journey at CWI.