Are you eager to discover How Do You Learn To Crochet and create beautiful, handmade items? Look no further! This comprehensive guide from learns.edu.vn will walk you through the fundamental techniques of crochet, from holding your hook and yarn to mastering the single crochet stitch. Discover the joy of turning yarn into wonderful creations, develop a relaxing new hobby, and enhance your fine motor skills. Ready to explore fiber arts, textile crafts, and yarn crafts?
1. Essential Crochet Tools and Materials
Before embarking on your crochet journey, gathering the right tools and materials is essential for a smooth and enjoyable learning experience. Having high-quality supplies not only makes the process easier but also ensures that your finished projects look professional.
1.1. Must-Have Crochet Supplies
Here’s a list of the fundamental items you’ll need to get started:
- Yarn: Choose a smooth, light-colored yarn in a medium weight (worsted weight) for your first project. Acrylic or cotton yarns are excellent options because they are easy to work with and relatively inexpensive.
- Crochet Hook: Select a crochet hook size that corresponds to your chosen yarn weight. The yarn label will usually recommend a specific hook size. For worsted weight yarn, a 5.0 mm (H-8) hook is a good starting point.
- Scissors: A pair of sharp scissors is necessary for cutting yarn.
- Yarn Needle (or Tapestry Needle): This needle, with a large eye and blunt tip, is used to weave in the ends of your yarn to create a neat and secure finish.
- Stitch Markers: These small plastic or metal markers are extremely useful for marking important stitches, such as the beginning or end of a row, or for marking increases or decreases in a pattern.
- Measuring Tape: A flexible measuring tape helps you check your gauge and ensure that your project is the correct size.
1.2. Understanding Yarn Weights and Hook Sizes
Yarn comes in various weights, each requiring a specific crochet hook size. Using the correct combination is crucial for achieving the desired look and feel of your project. The Craft Yarn Council provides standardized yarn weight categories, which are helpful when selecting the right yarn and hook for your project.
| Yarn Weight Category | Weight (Ply) | Recommended Hook Size (US) | Recommended Hook Size (Metric) | Common Uses |
|---|---|---|---|---|
| 0 – Lace | 1 ply | B-1 | 2.25 mm | Delicate projects such as doilies, lace edgings, and fine shawls |
| 1 – Super Fine | 2-3 ply | B-1 to E-4 | 2.25 mm – 3.5 mm | Baby clothes, socks, lightweight scarves |
| 2 – Fine | 4 ply | E-4 to 7 | 3.5 mm – 4.5 mm | Lightweight garments, shawls, and baby items |
| 3 – Light (DK) | 8 ply | 7 to I-9 | 4.5 mm – 5.5 mm | Versatile for a wide range of projects including garments, blankets, and accessories |
| 4 – Medium (Worsted) | 10 ply | I-9 to K-10.5 | 5.5 mm – 6.5 mm | Popular choice for afghans, sweaters, and hats |
| 5 – Bulky | 12 ply | K-10.5 to M-13 | 6.5 mm – 9 mm | Quick projects like chunky blankets, scarves, and hats |
| 6 – Super Bulky | 14+ ply | M-13 and up | 9 mm and larger | Extra warm and cozy projects like thick blankets and rugs |

1.3. Choosing the Right Yarn for Beginners
For your initial crochet projects, it’s best to select yarn that is easy to handle and shows stitch definition clearly. Here are some suggestions:
- Worsted Weight Acrylic Yarn: This is an excellent choice for beginners. It’s affordable, comes in a wide range of colors, and is machine washable.
- Worsted Weight Cotton Yarn: Cotton yarn is also a good option, especially for projects like dishcloths or market bags. It has good stitch definition and is durable.
- Light-Colored Yarn: Lighter shades make it easier to see your stitches, which is particularly helpful when you’re first learning.
- Smooth Yarn: Avoid fuzzy or textured yarns initially, as they can make it difficult to see and count your stitches.
2. Mastering the Basics: Holding the Hook and Yarn
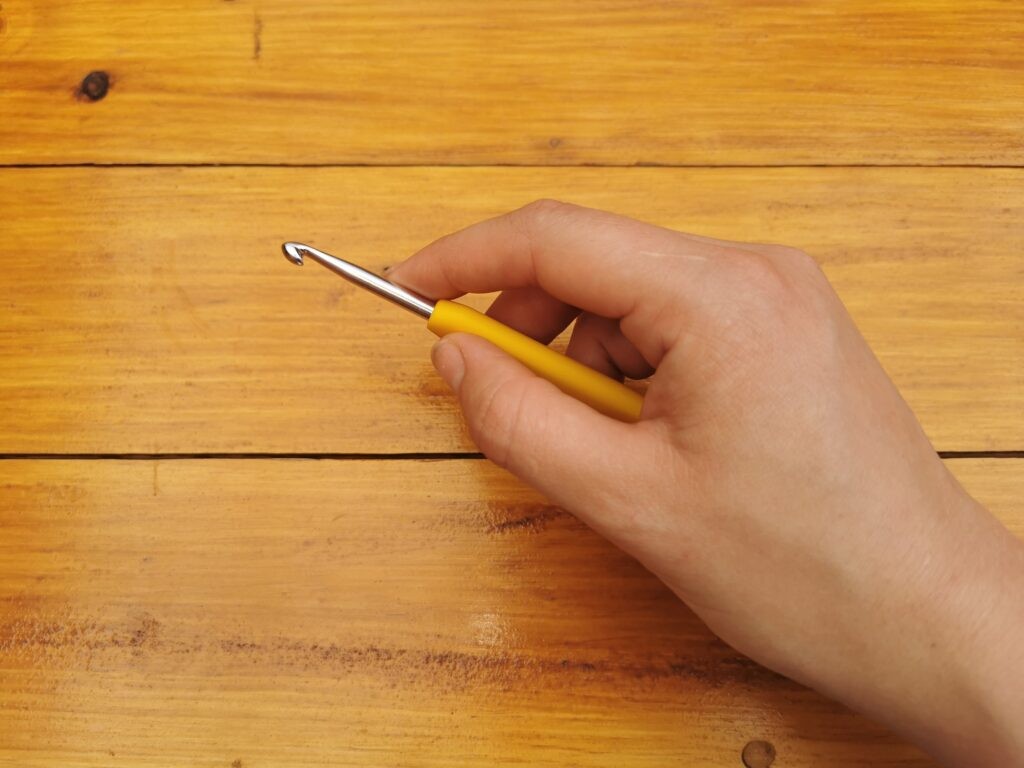
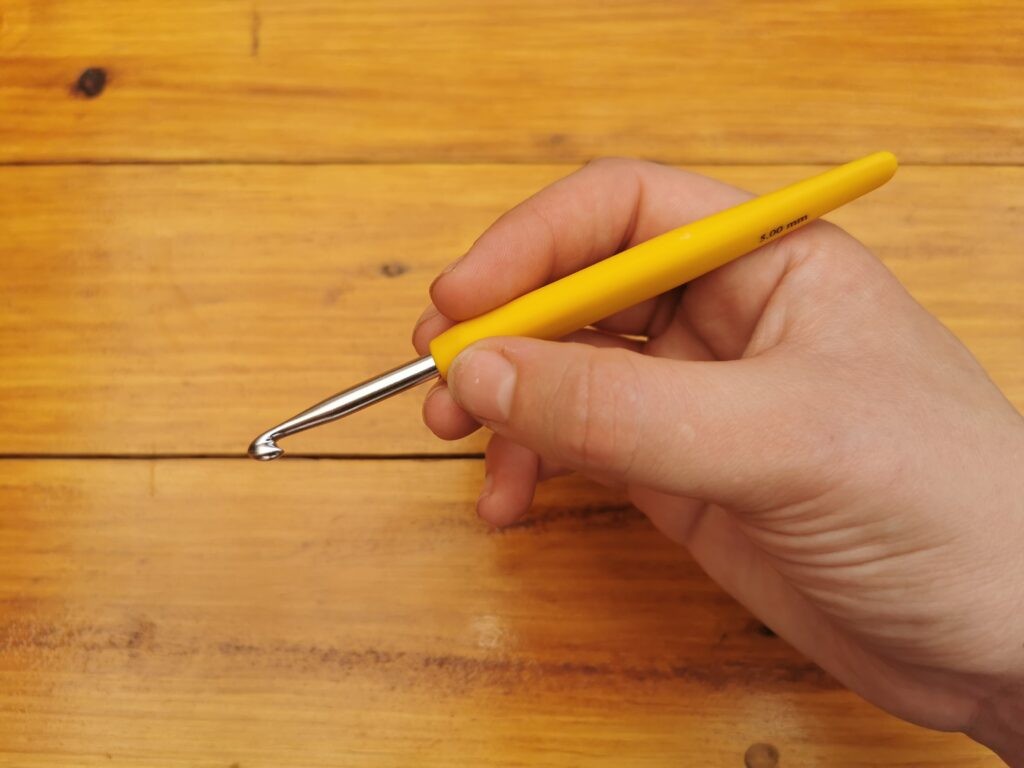
Before diving into stitches, understanding how to hold your crochet hook and yarn is crucial for comfort and efficiency. There are two common methods for holding the hook: the knife hold and the pencil hold.
2.1. The Knife Hold
The knife hold involves gripping the crochet hook as you would hold a knife. Here’s how to do it:
- Hold the hook in your dominant hand.
- Grip the hook with your thumb and index finger, resting the handle against your palm.
- Use your other fingers to stabilize the hook and guide your stitches.
2.2. The Pencil Hold
The pencil hold involves holding the crochet hook as you would hold a pencil. Here’s how to do it:
- Hold the hook in your dominant hand.
- Rest the hook on your middle finger and grip it with your thumb and index finger.
- Use your other fingers to stabilize the hook and guide your stitches.
2.3. Techniques for Yarn Tension
Maintaining consistent yarn tension is key to creating even and professional-looking crochet projects. Here are some tips for managing your yarn tension:
- Wrap the Yarn: Drape the yarn over your index finger and weave it through your other fingers to create tension.
- Relax Your Hand: Keep your hand relaxed to avoid pulling the yarn too tightly or loosely.
- Experiment: Try different methods to find what works best for you. Some crocheters prefer to wrap the yarn around their pinky finger, while others find it easier to simply hold the yarn between their fingers.
- Practice: Consistent practice will help you develop a feel for the right amount of tension.
3. Getting Started: Creating a Slip Knot
The slip knot is the foundation of most crochet projects. It’s a simple loop that secures the yarn to your hook.
3.1. Step-by-Step Guide to Making a Slip Knot
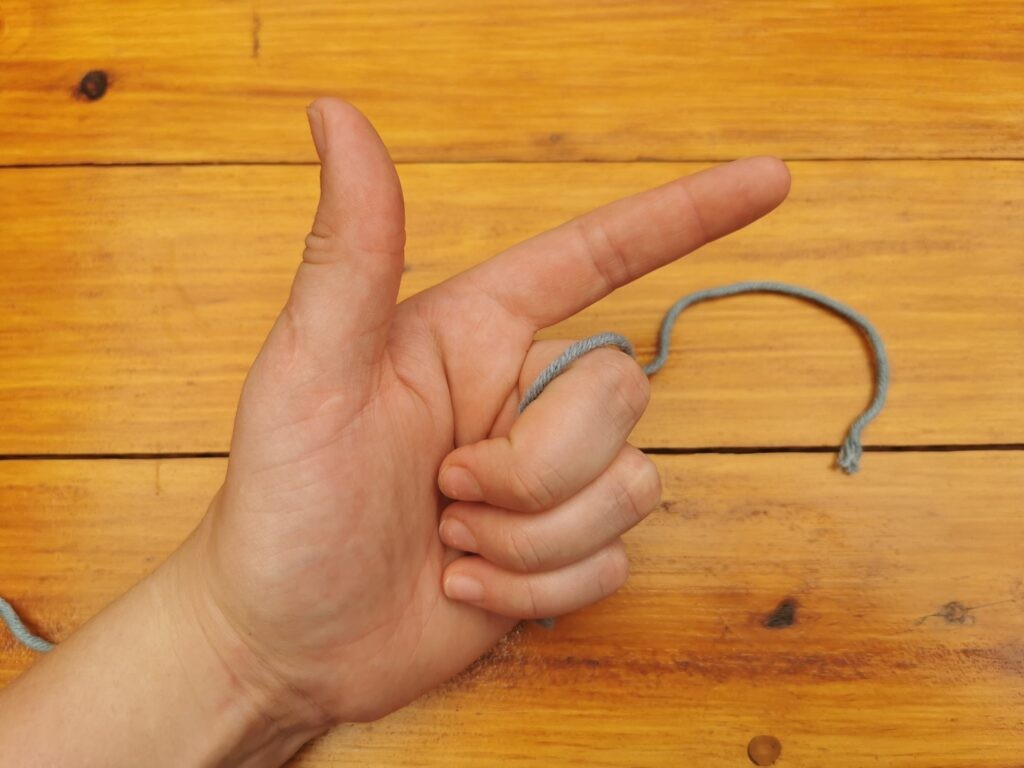
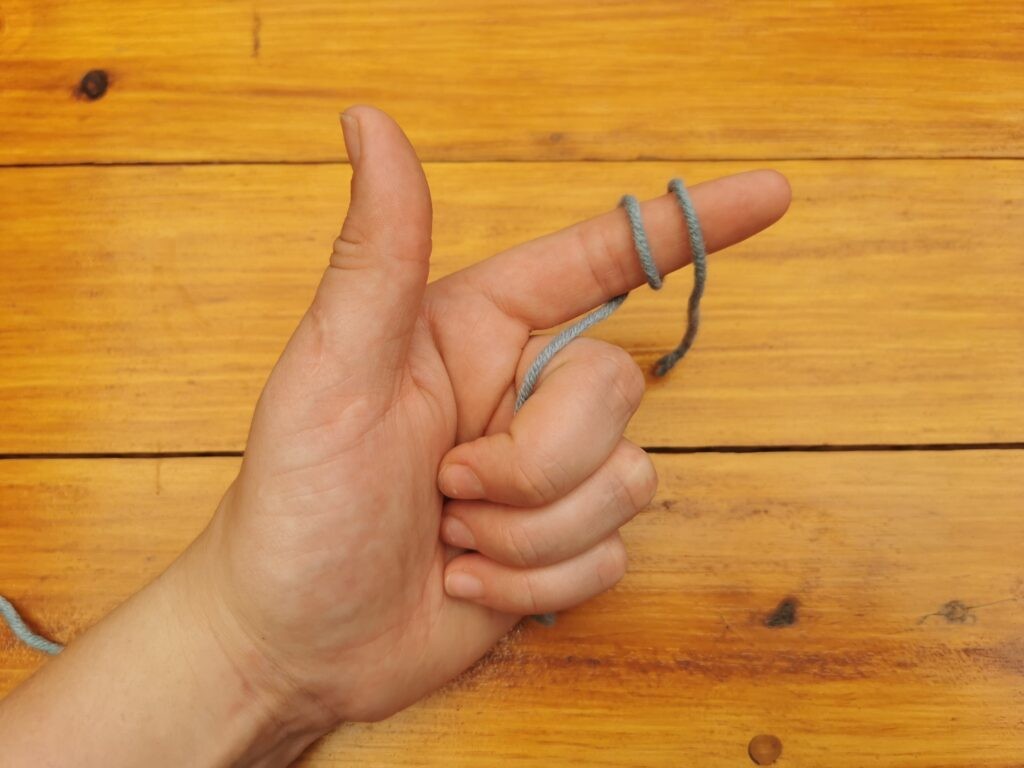
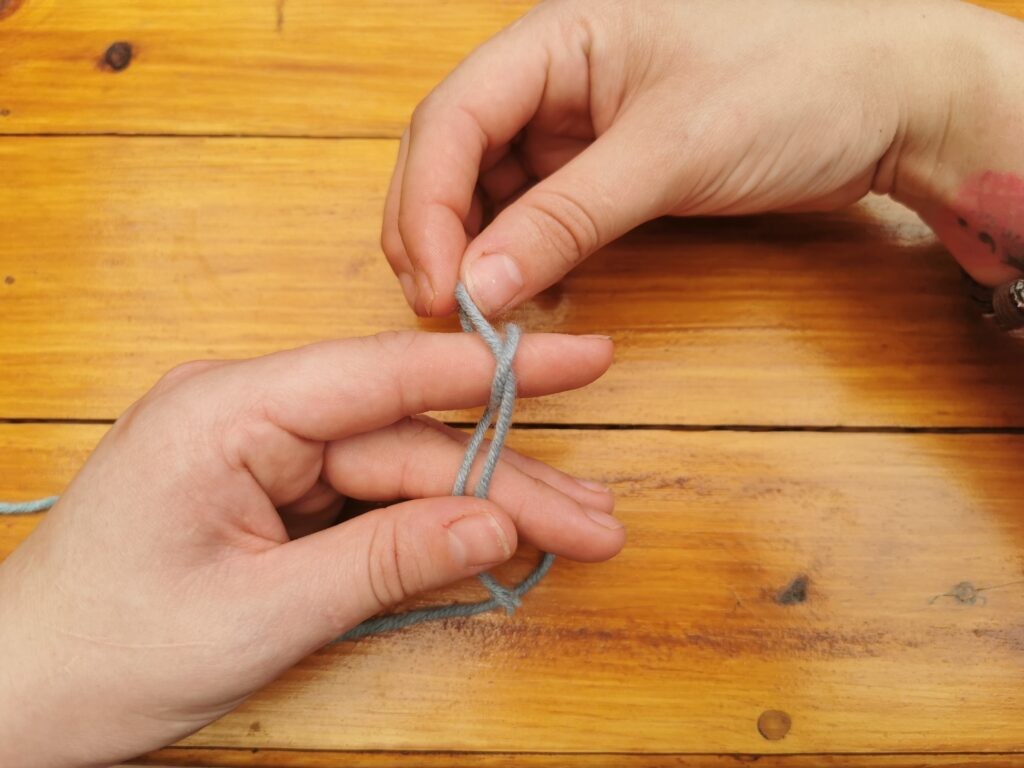
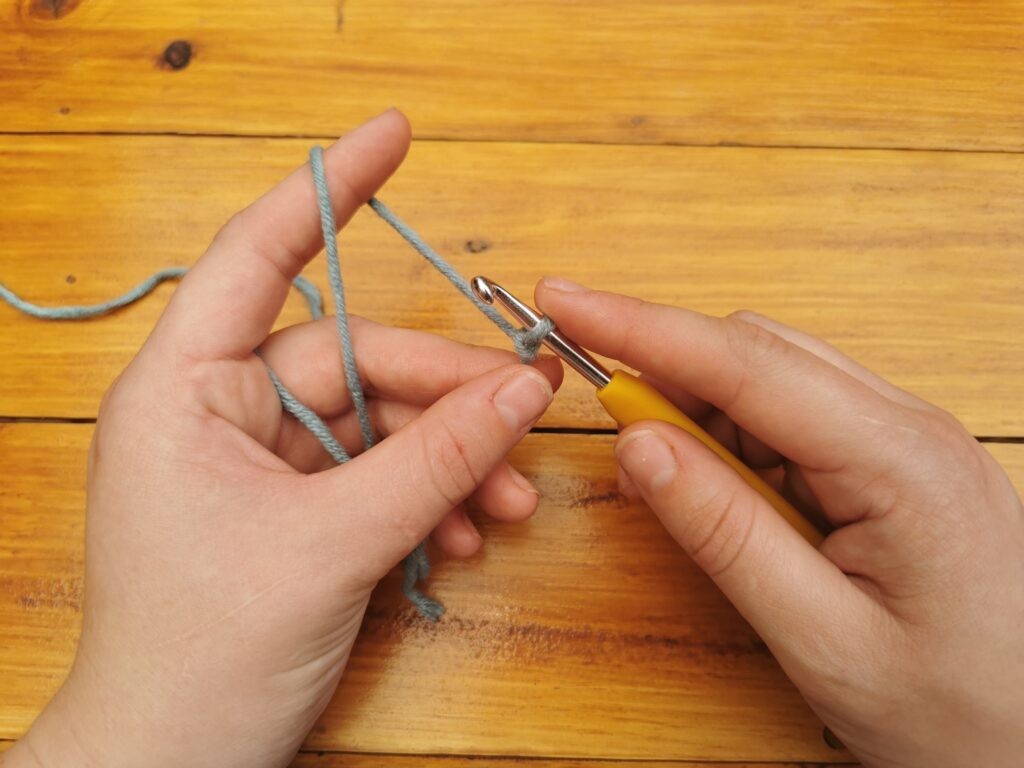
- Hold the yarn about 3 inches from the end.
- Form a loop with the yarn, keeping the tail end in front.
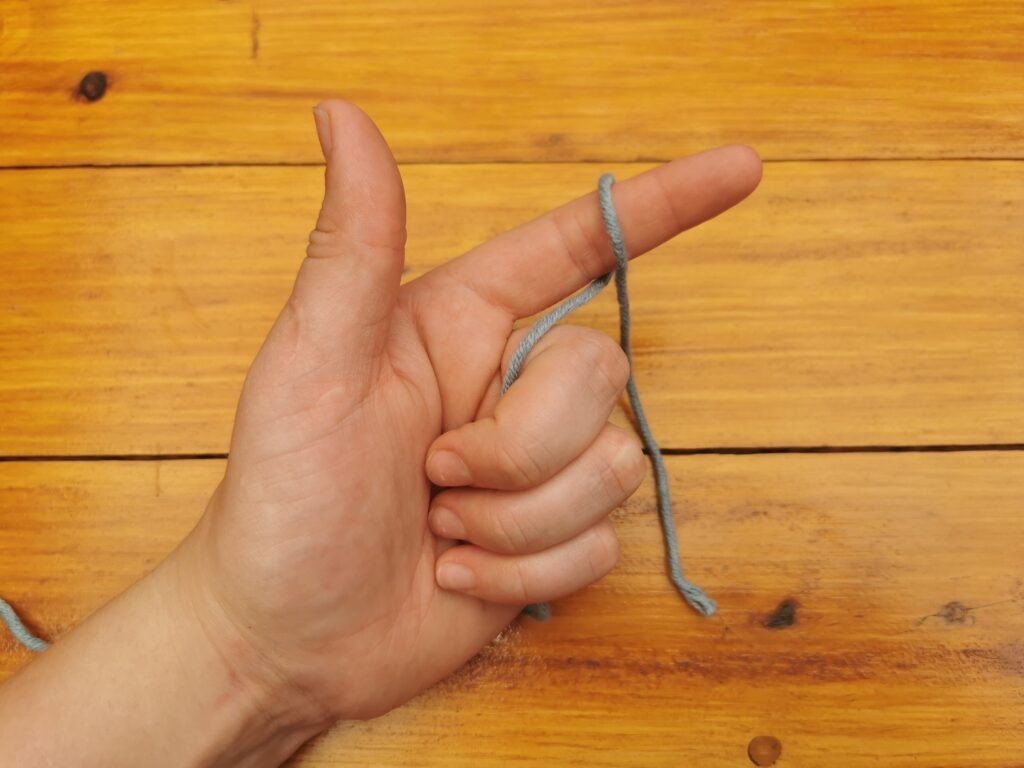
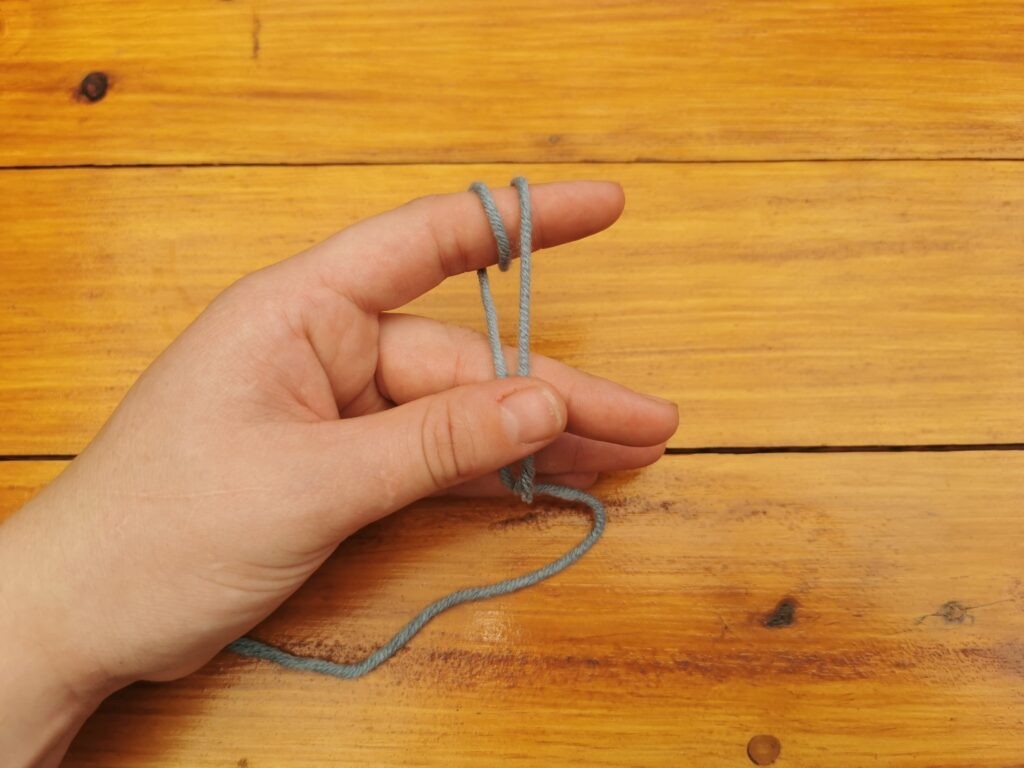
- Bring the yarn over your index finger once with the short end at the front of your finger.
- Wrap the yarn around your finger once again, so that you have two loops around your finger.
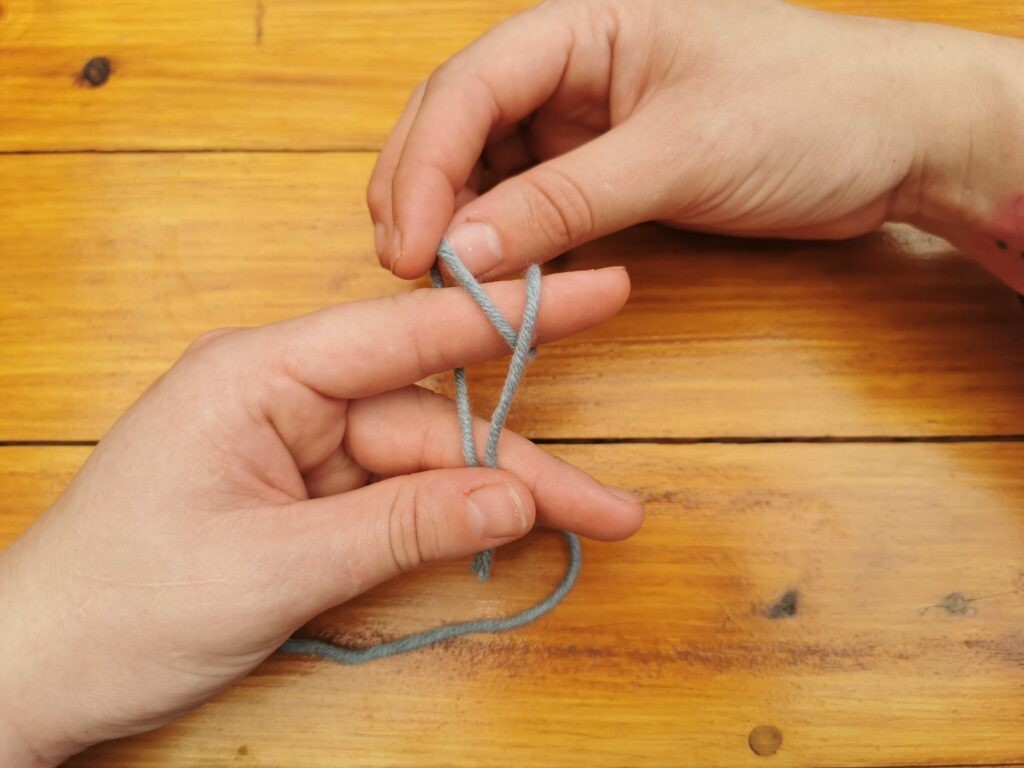
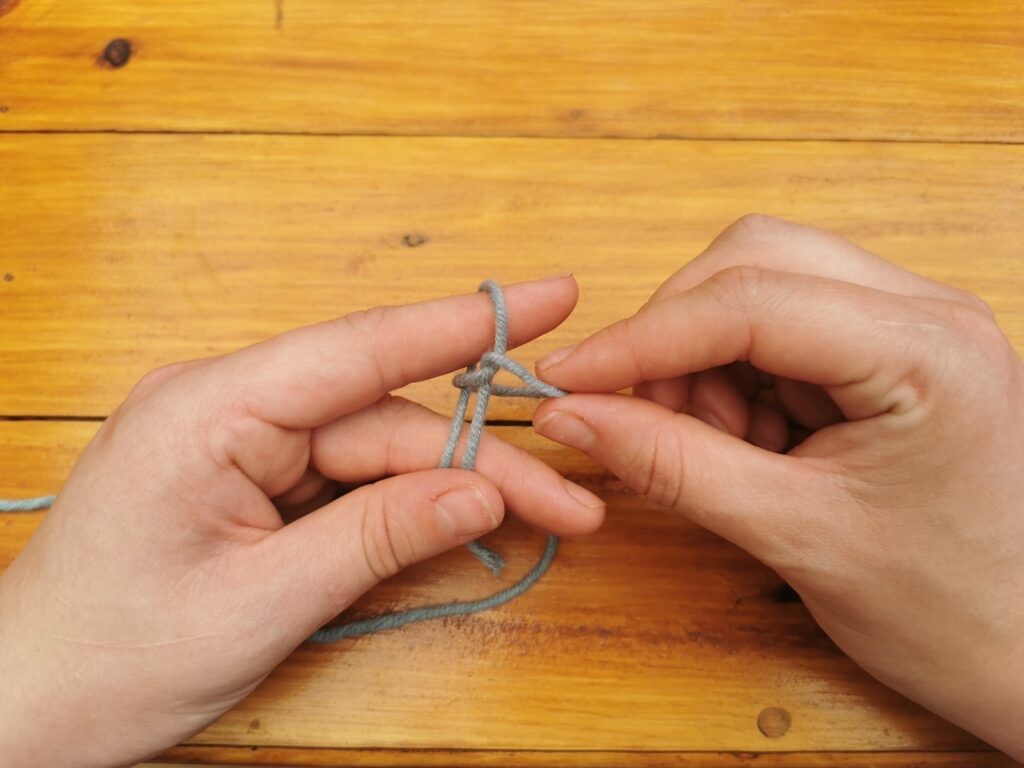
- Hold both ends, the short tail and the long tail (attached to the ball of yarn), also known as the working yarn, with your thumb and middle finger.
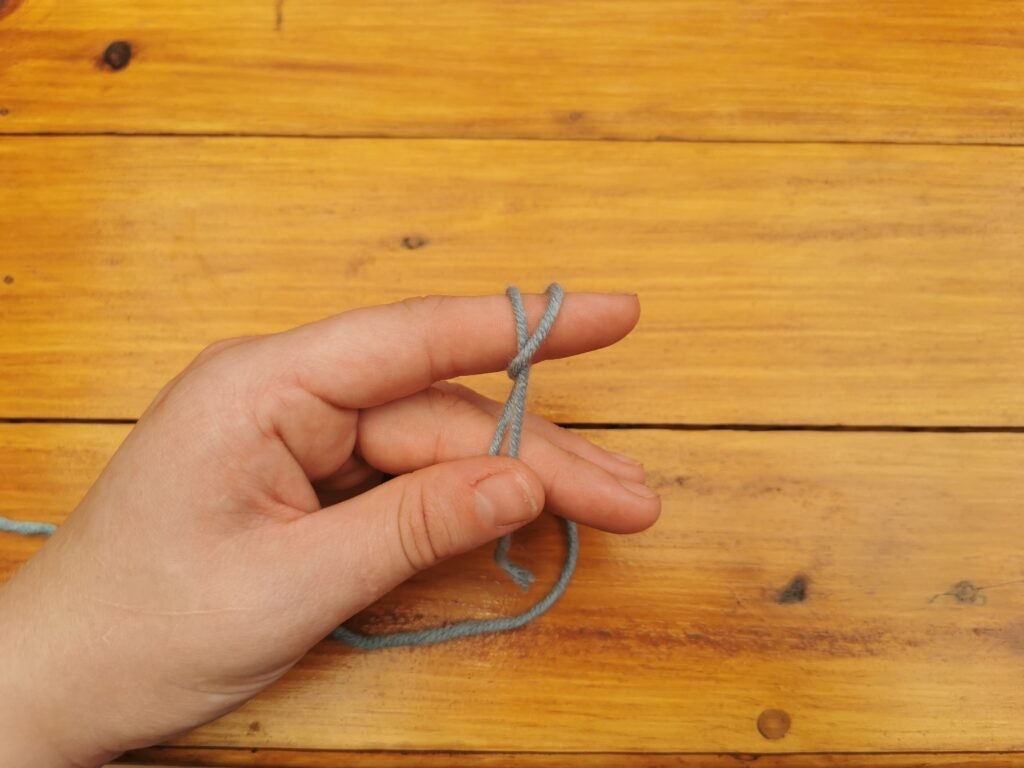
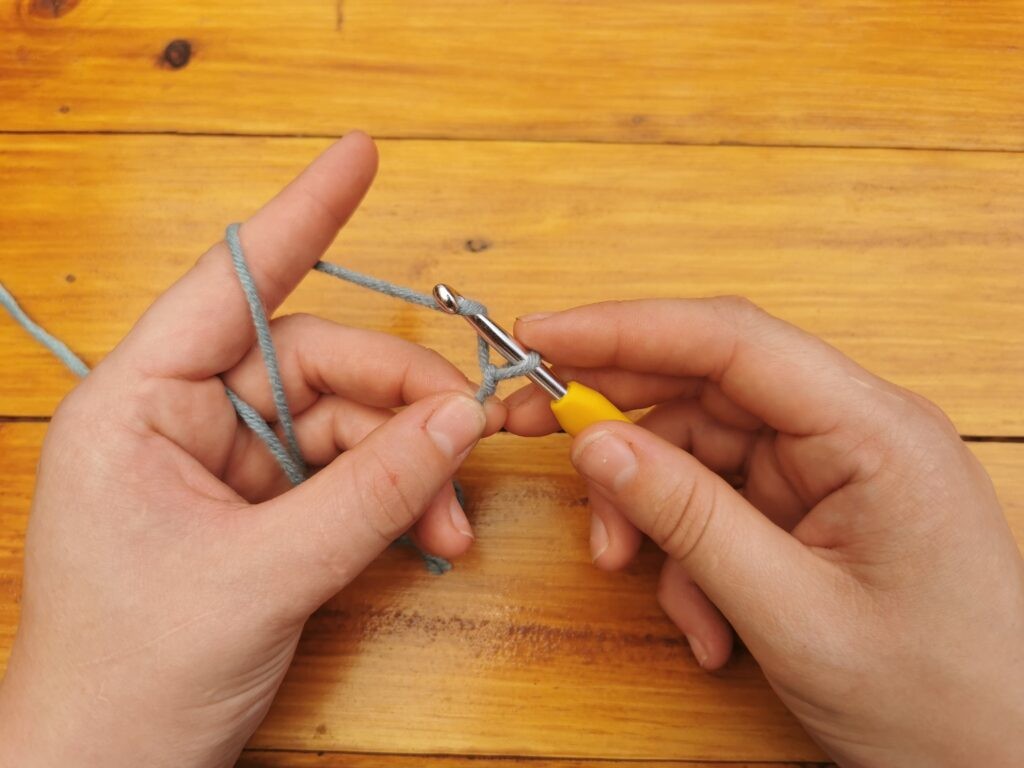
- Take the back loop and pull it over the front loop, but don’t pull it off all the way.
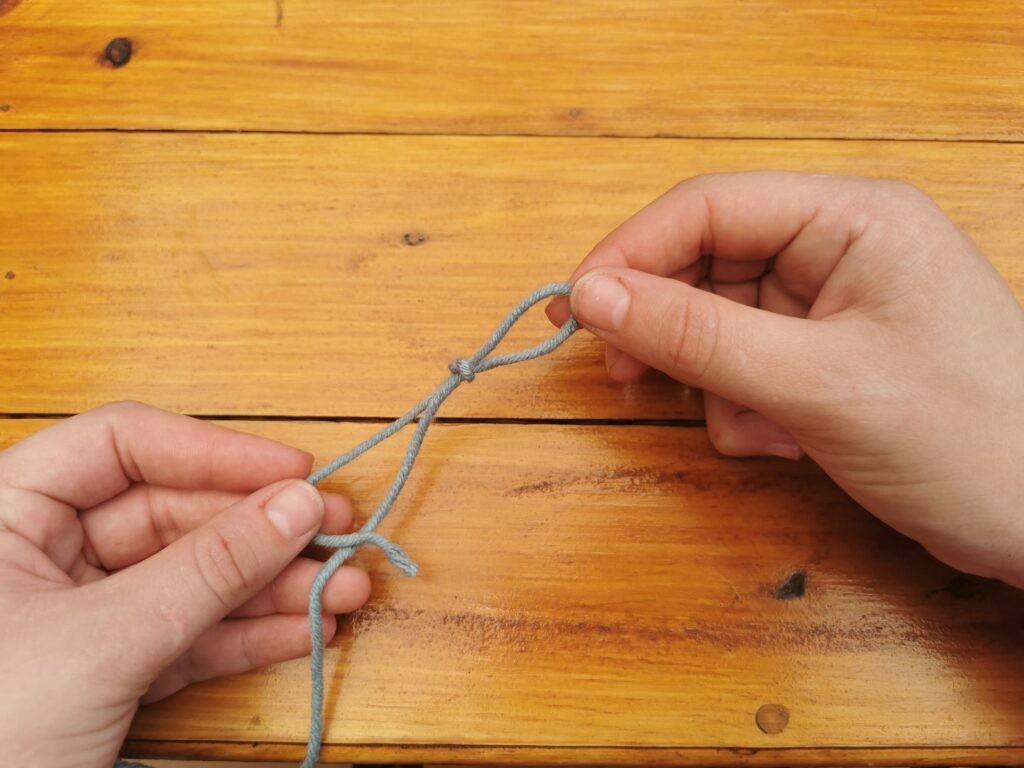
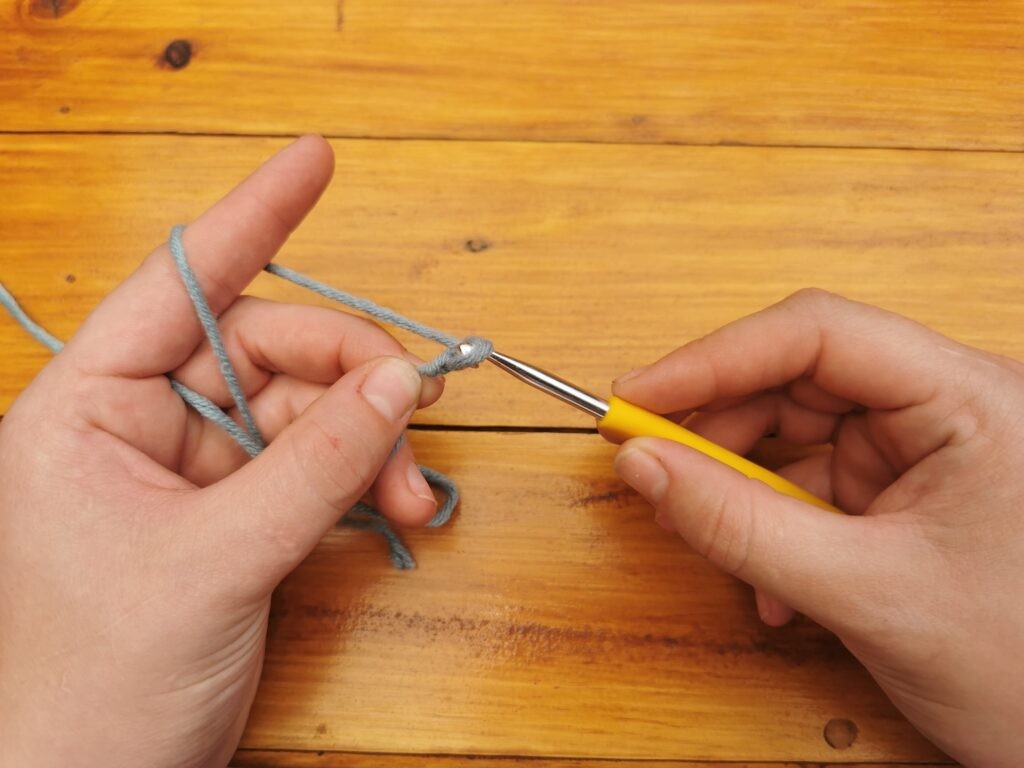
- Now take the back loop and pull it off your finger completely and tighten the knot. Make sure not to make it super tight because you want the slip knot to be able to slip up and down.
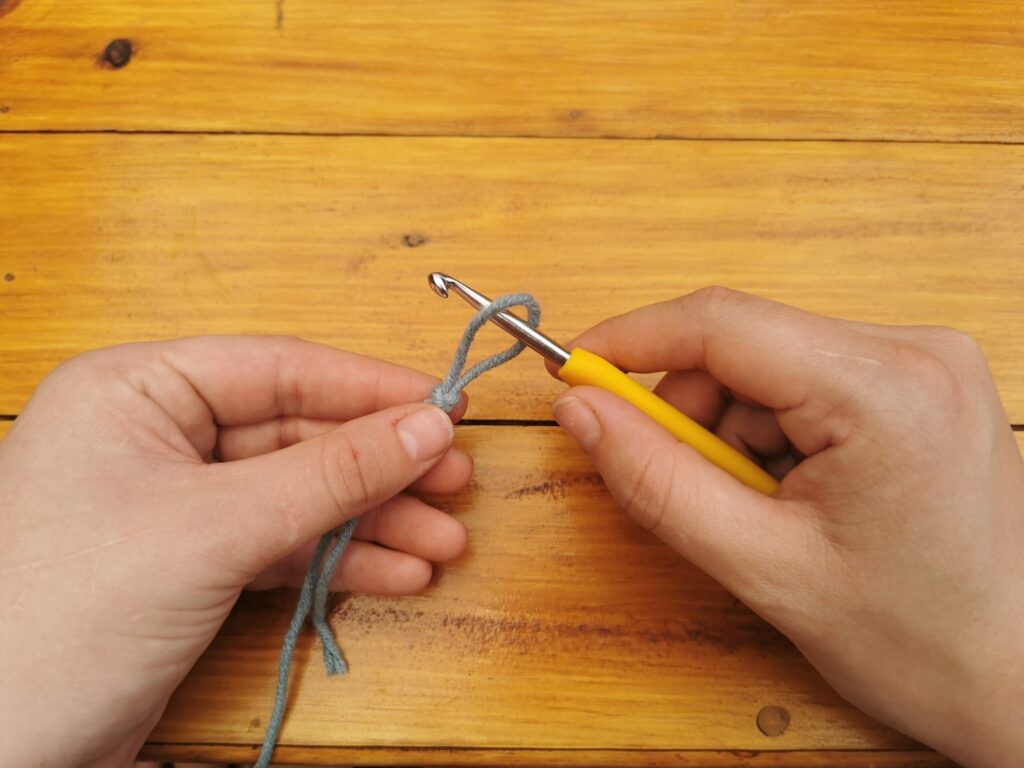
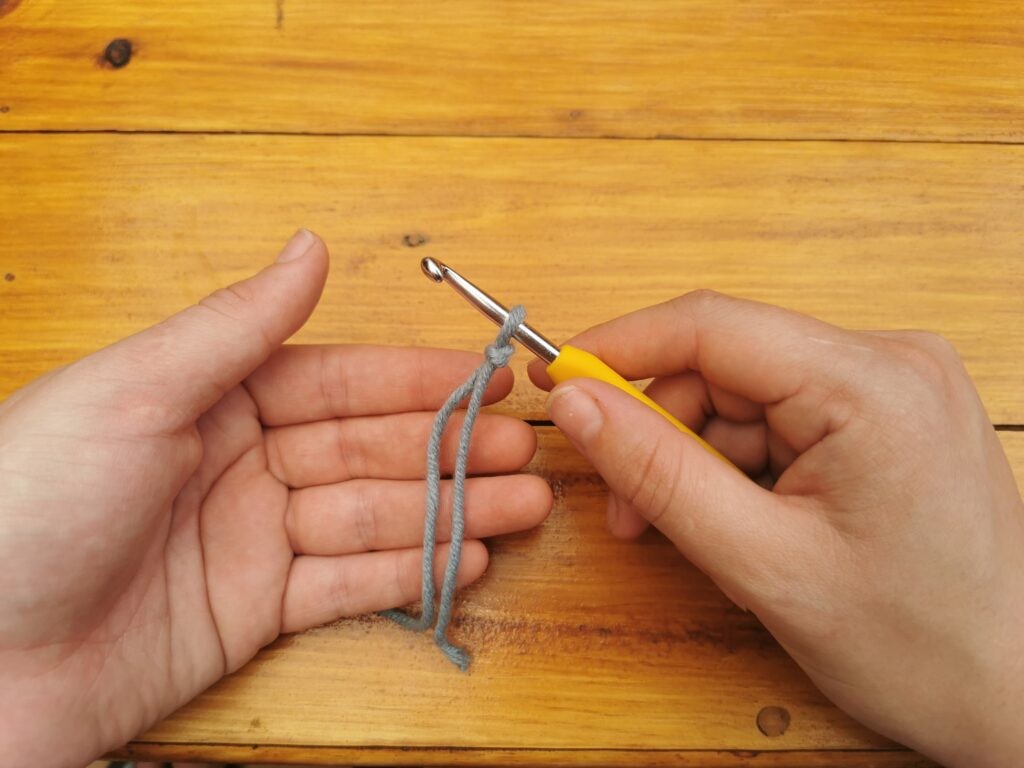
- Insert your hook into the slip knot and pull on the working yarn. Make sure the tail end faces towards the hook.
3.2. Common Mistakes to Avoid
- Making the Knot Too Tight: Ensure the slip knot is loose enough to slide easily on the hook.
- Placing the Knot Incorrectly: The knot should be positioned on the hook so that you can easily work the first chain.
4. Creating a Foundation: The Crochet Chain
The chain stitch is the basis for most crochet projects. It forms the foundation row upon which you will build your stitches.
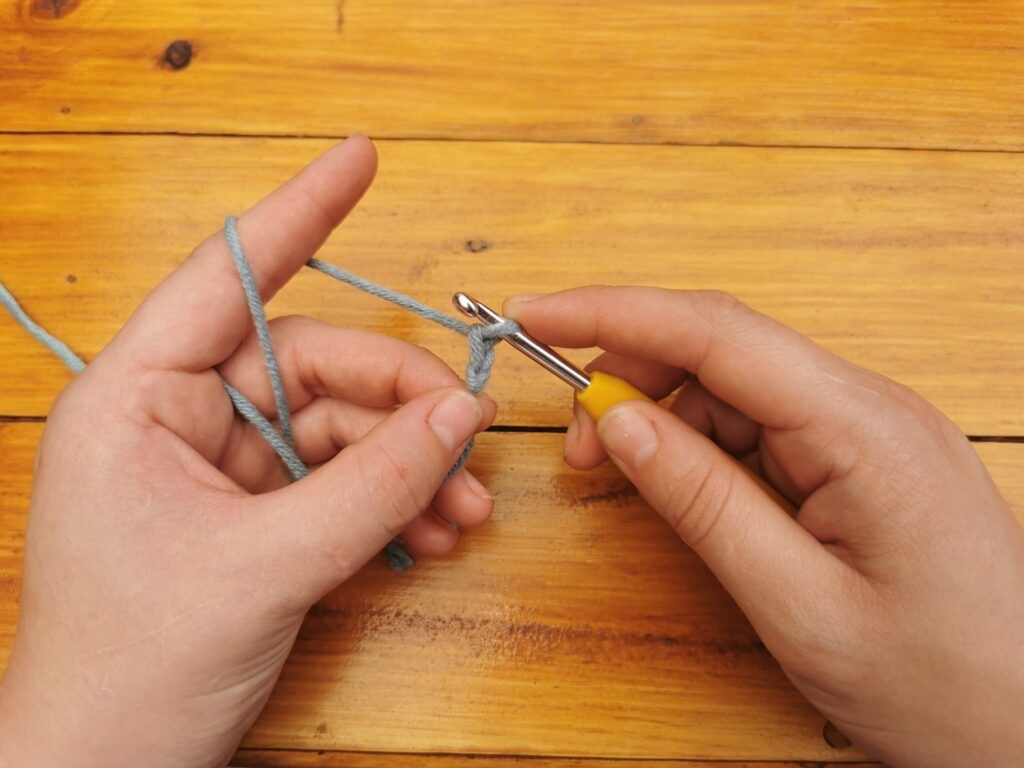
4.1. Detailed Steps for Crocheting a Chain
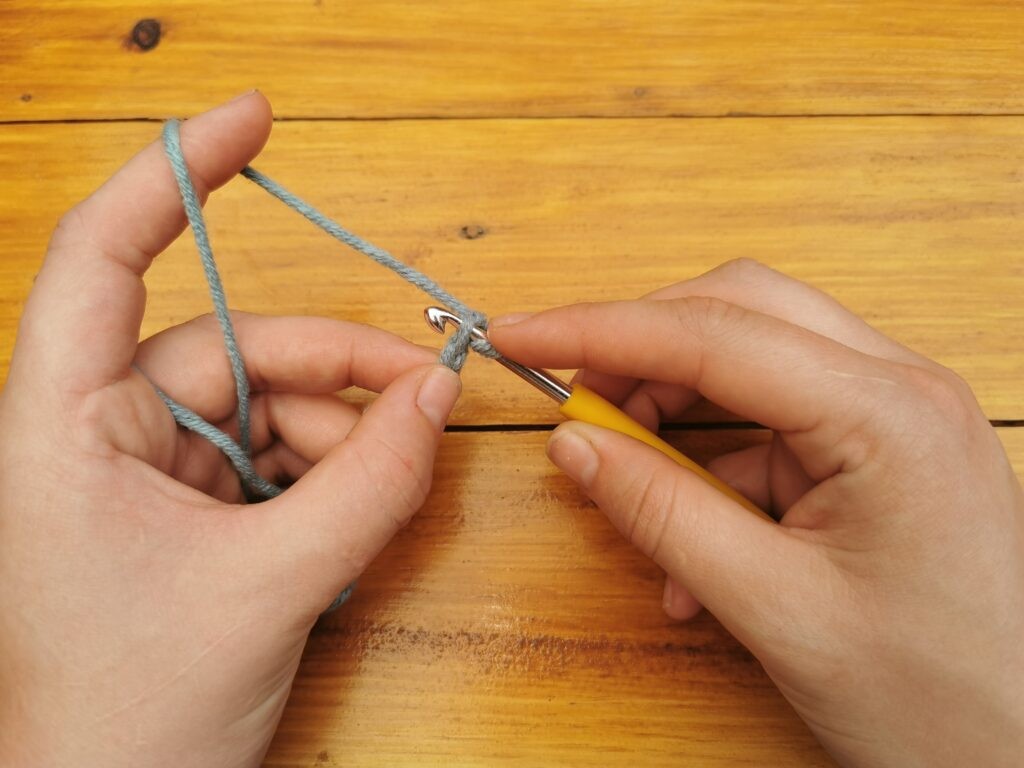
- Hold the hook with the slip knot in your dominant hand.
- Hold the slip knot in place with your thumb and middle finger against your hook.
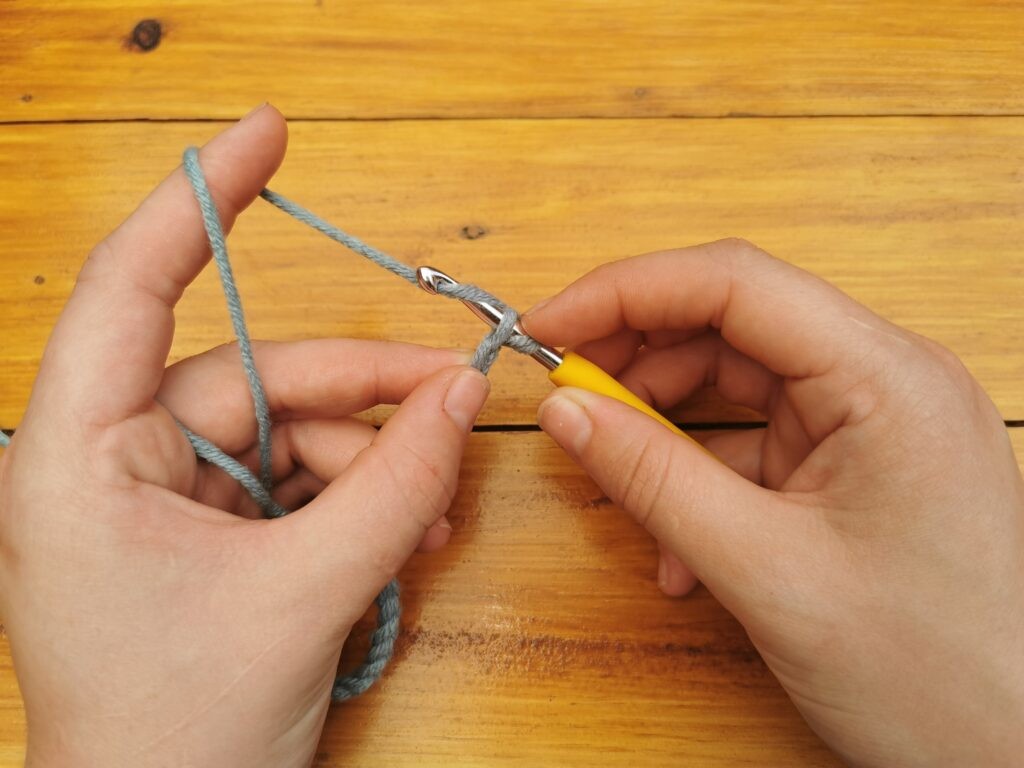
- To make a chain, bring your yarn over your hook from back to front and grab it with your hook. Pull the hooked yarn through the slip knot.
- Pull it through the loop on your hook.
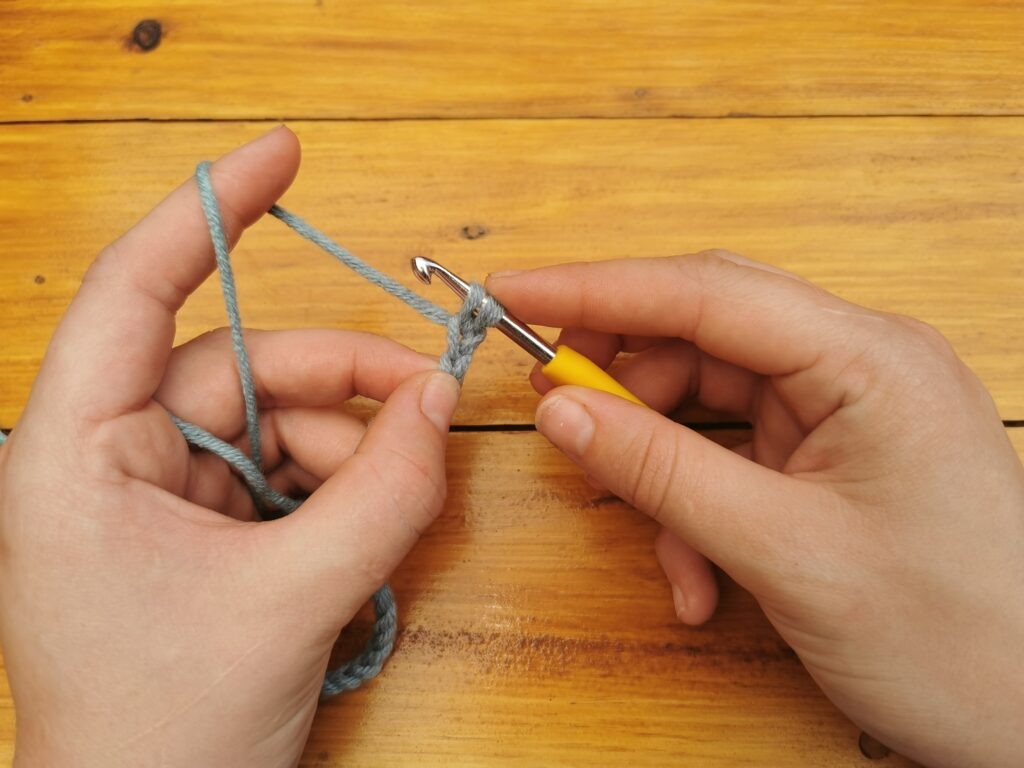
- The first chain on your hook.
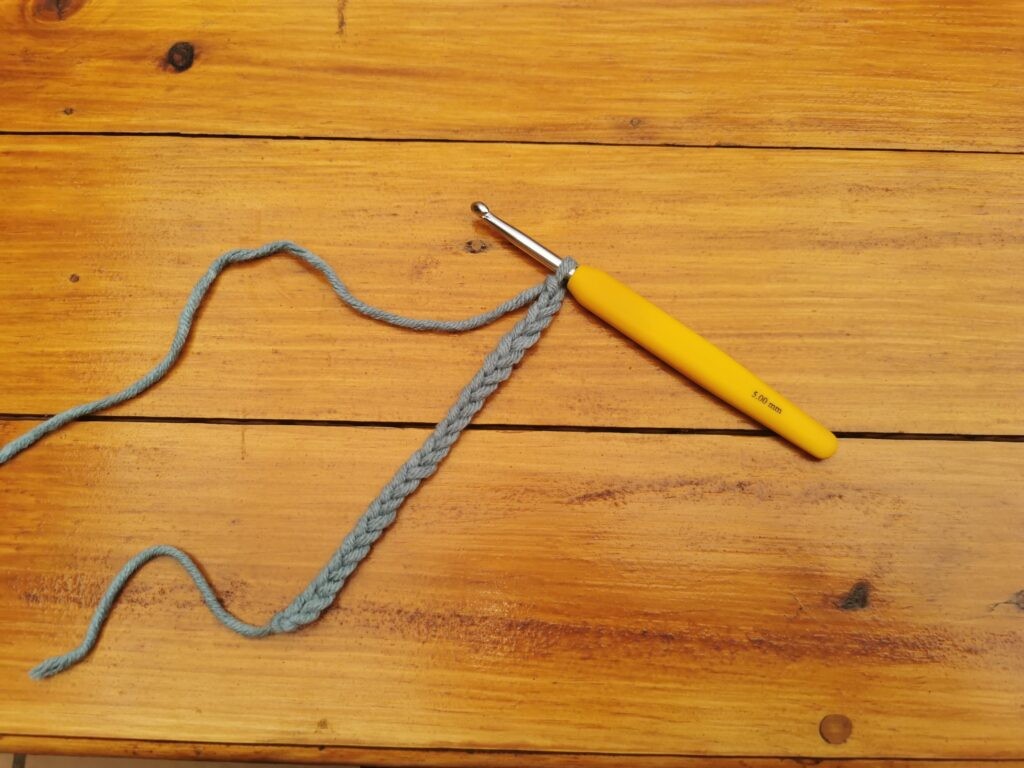
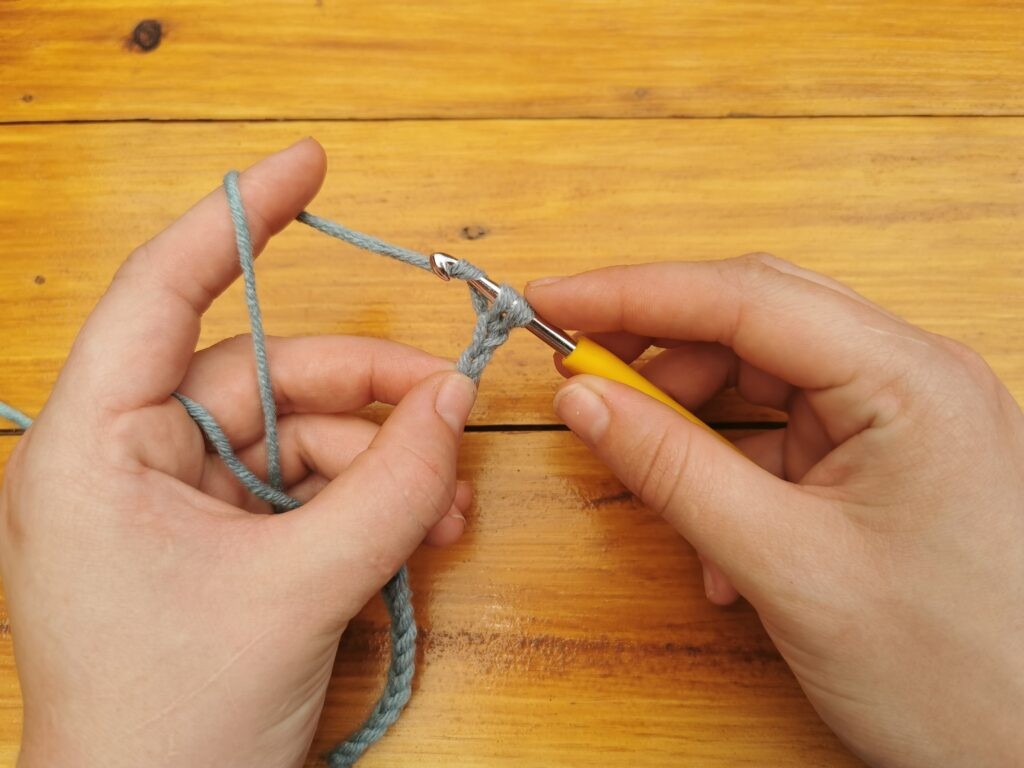
- Repeat the “yarn over and pull through” step to create a chain of the desired length.
4.2. Tips for Maintaining Even Chain Tension
- Consistent Movement: Keep your movements smooth and consistent to maintain even tension.
- Hook Size: If your chains are too tight, try using a slightly larger hook. If they are too loose, try a smaller hook.
- Practice: Consistent practice is essential for developing a feel for the right tension.
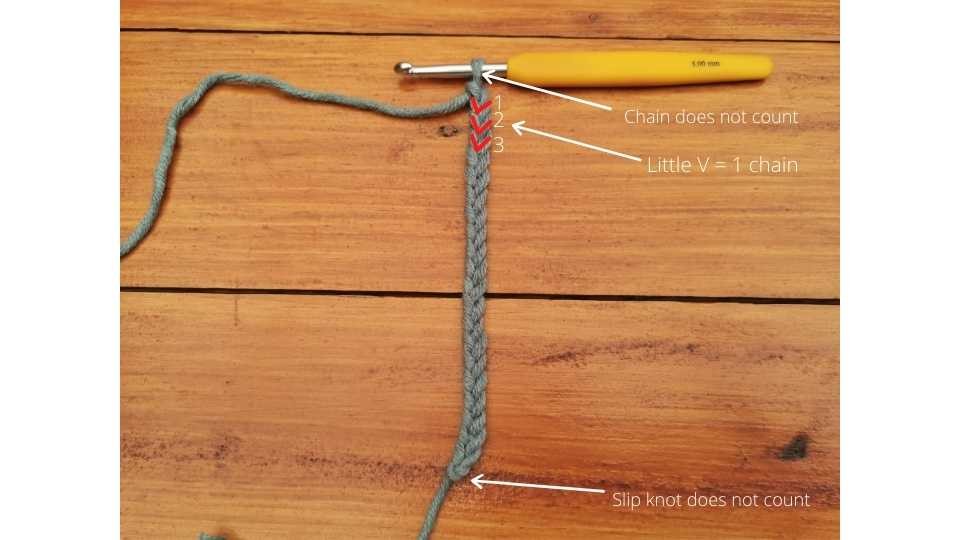
4.3. Counting Chains Accurately
Counting your chains accurately is crucial for ensuring your project turns out the correct size. The loop on your hook does not count as a chain.
5. Mastering the Single Crochet Stitch
The single crochet (sc) is one of the most basic and versatile crochet stitches. Once you’ve mastered the chain, learning the single crochet is the next logical step.
5.1. Step-by-Step Instructions for Single Crochet
- Start with a chain of the desired length. For this tutorial, we will start with 21 chains.
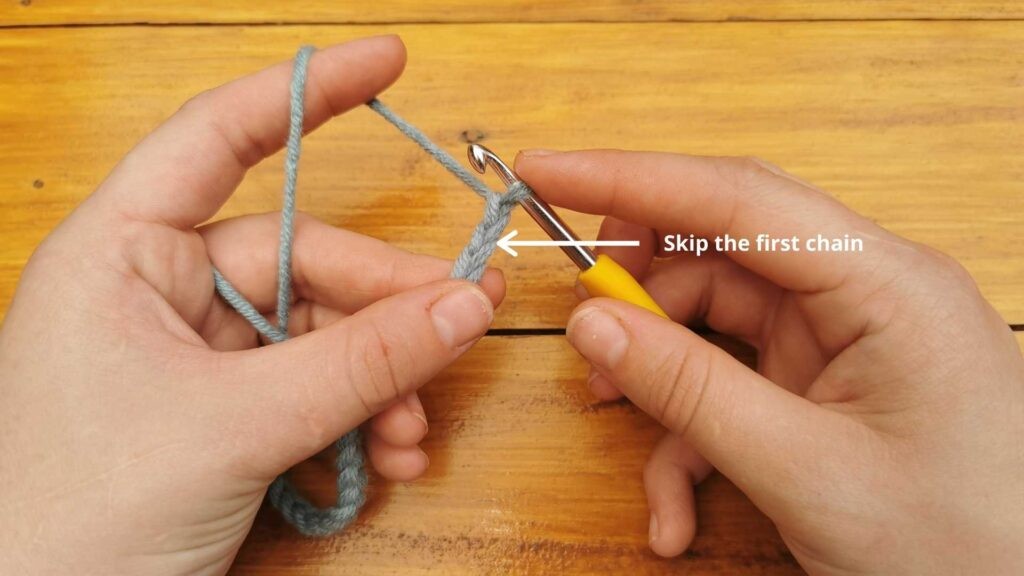
- Skip the first chain (the chain closest to the hook).
- Insert your hook into the center of the next chain.
- Bring your yarn over your hook from back to front and grab it with your hook (also known as Yarn over).
- Pull through the chain and up your hook. There should be two loops on your hook.
- Bring your yarn over your hook from back to front and grab it with your hook, and pull through both loops on your hook.
- Pull through both loops on the hook. One loop remains on your hook. You’ve just made your first single crochet.
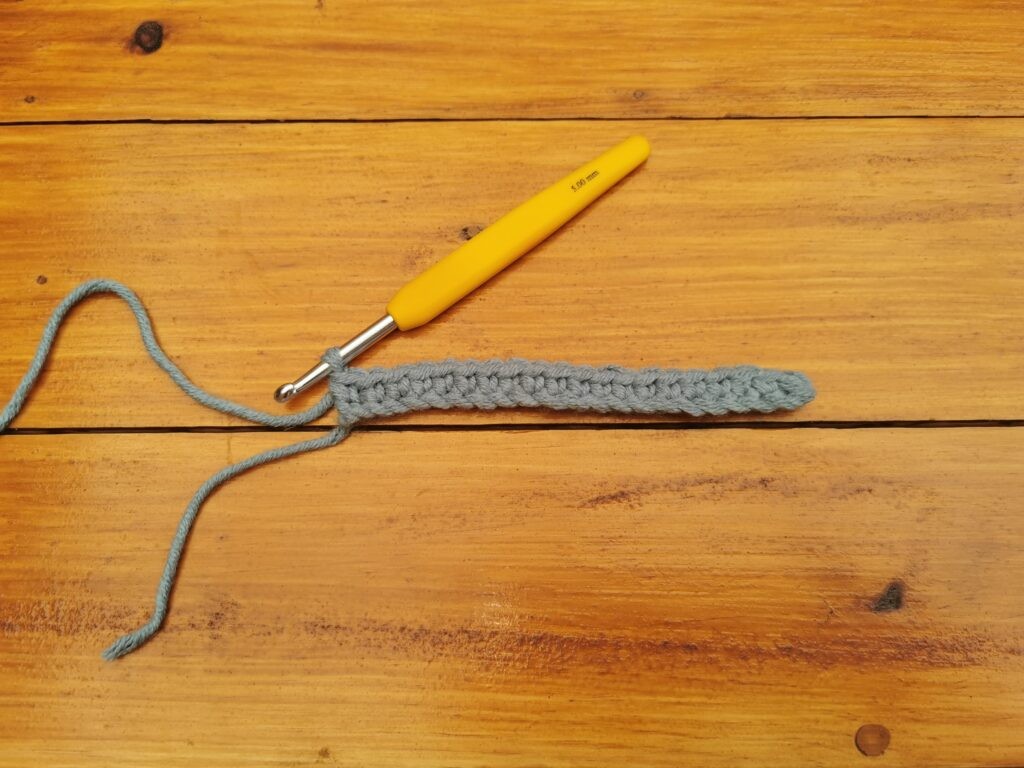
- Continue to make 19 single crochet down the entire chain. Your chain of single crochet should look something like this and you should have 20 single crochets in total:
5.2. Tips for Consistent Single Crochet Stitches
- Consistent Tension: Maintaining even tension is essential for creating uniform stitches.
- Hook Placement: Make sure to insert your hook into the correct part of the chain.
- Counting Stitches: Count your stitches at the end of each row to ensure you have the correct number.
5.3. Common Mistakes and How to Avoid Them
- Skipping the First Chain: Always skip the first chain after the slip knot unless the pattern instructs otherwise.
- Working into the Wrong Stitch: Make sure to insert your hook into the correct stitch on each row.
- Tight Stitches: If your stitches are too tight, try using a larger hook or consciously loosen your tension.
- Loose Stitches: If your stitches are too loose, try using a smaller hook or consciously tighten your tension.
5.4. Moving on to the next row:
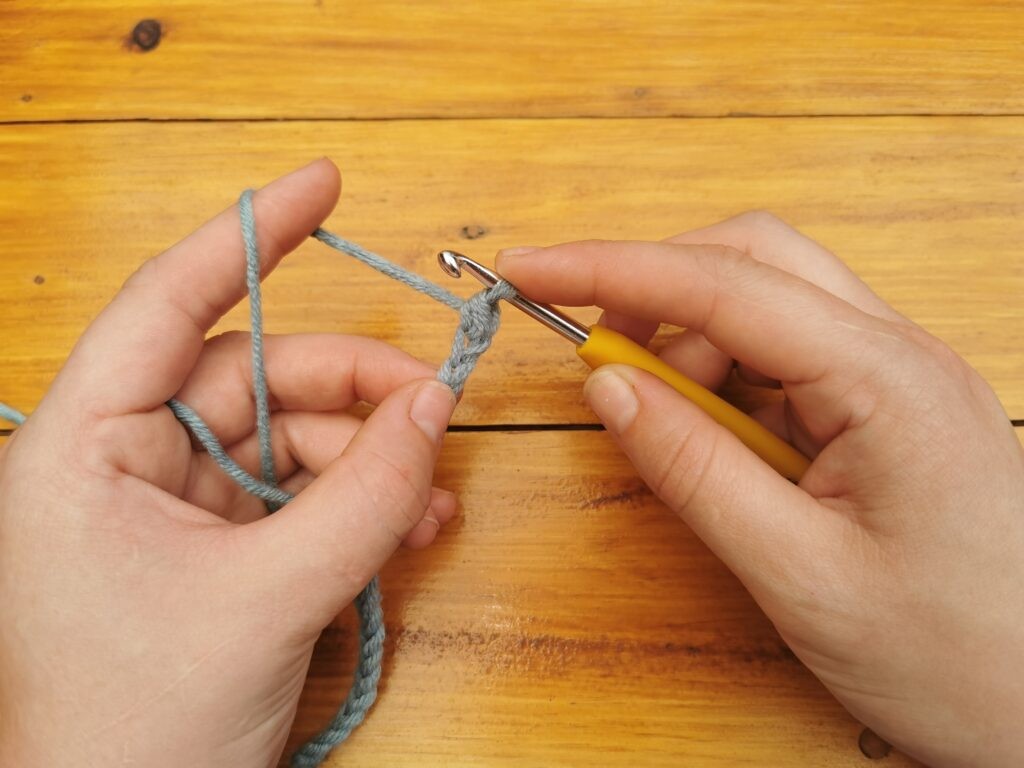
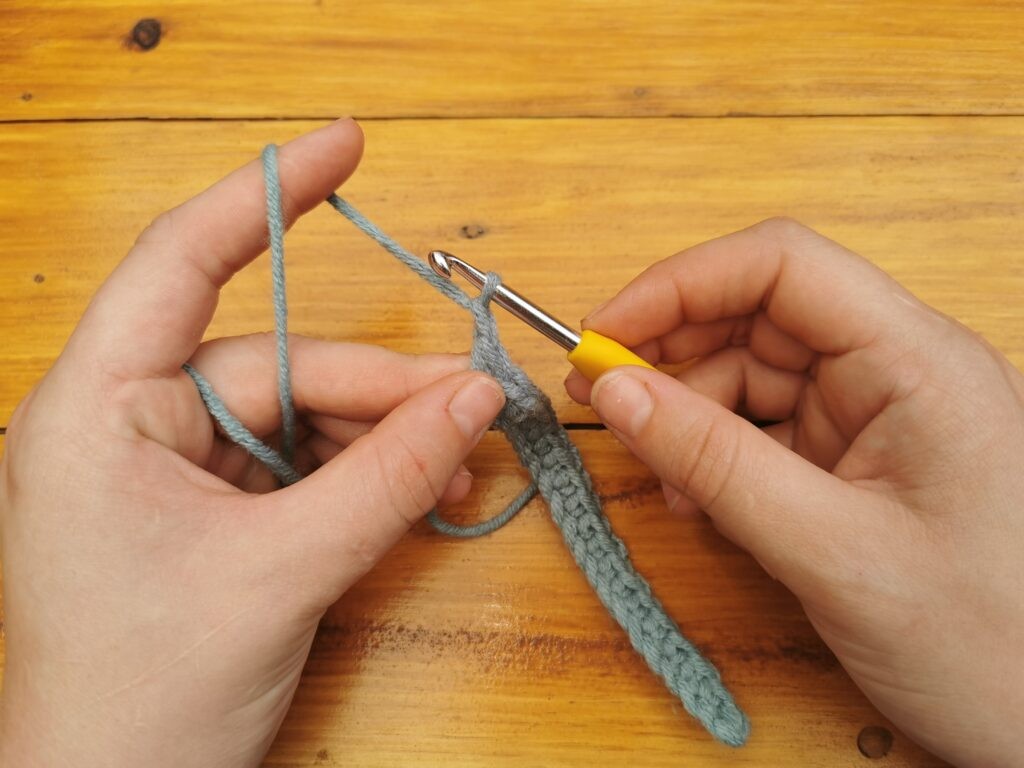
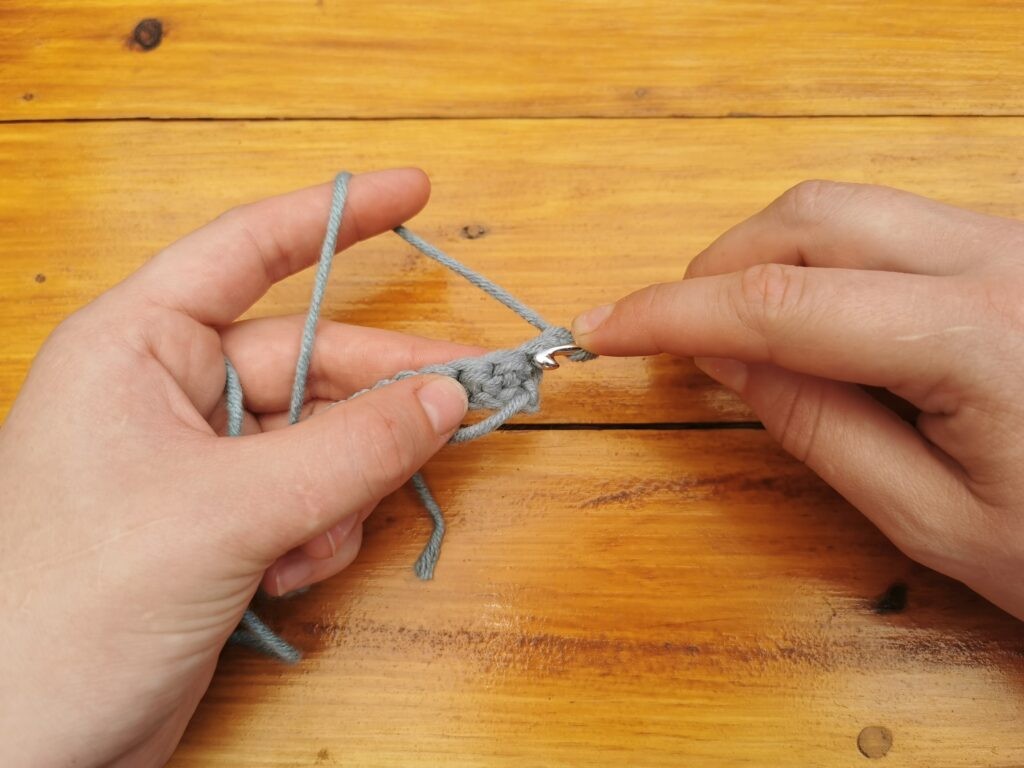
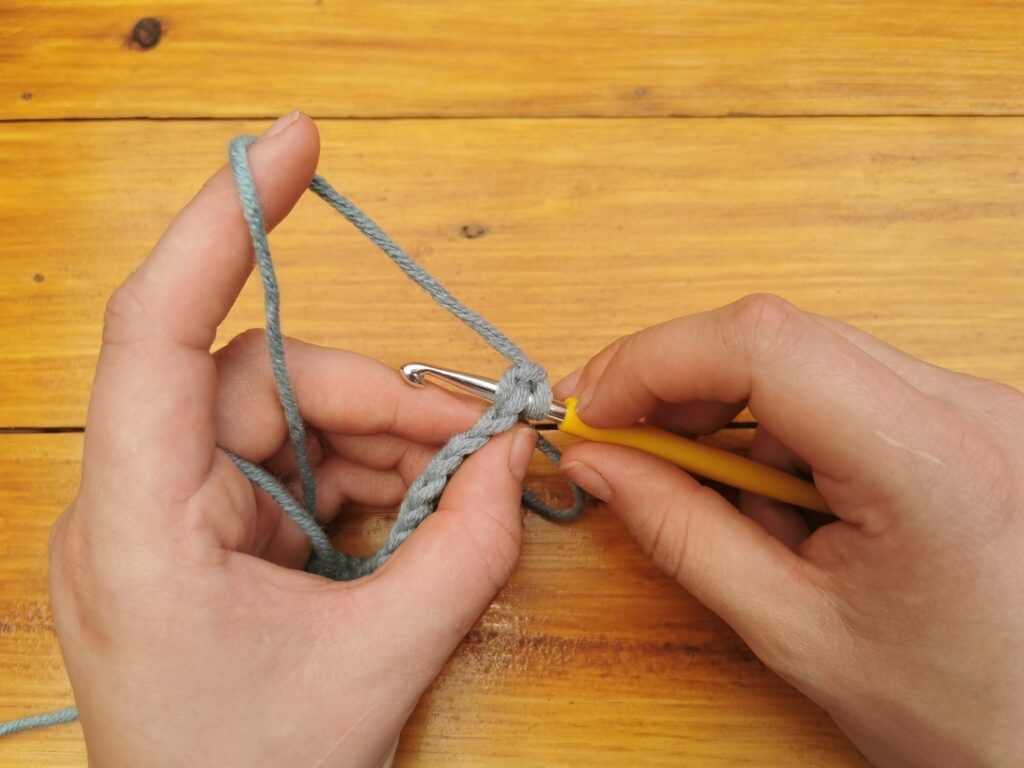
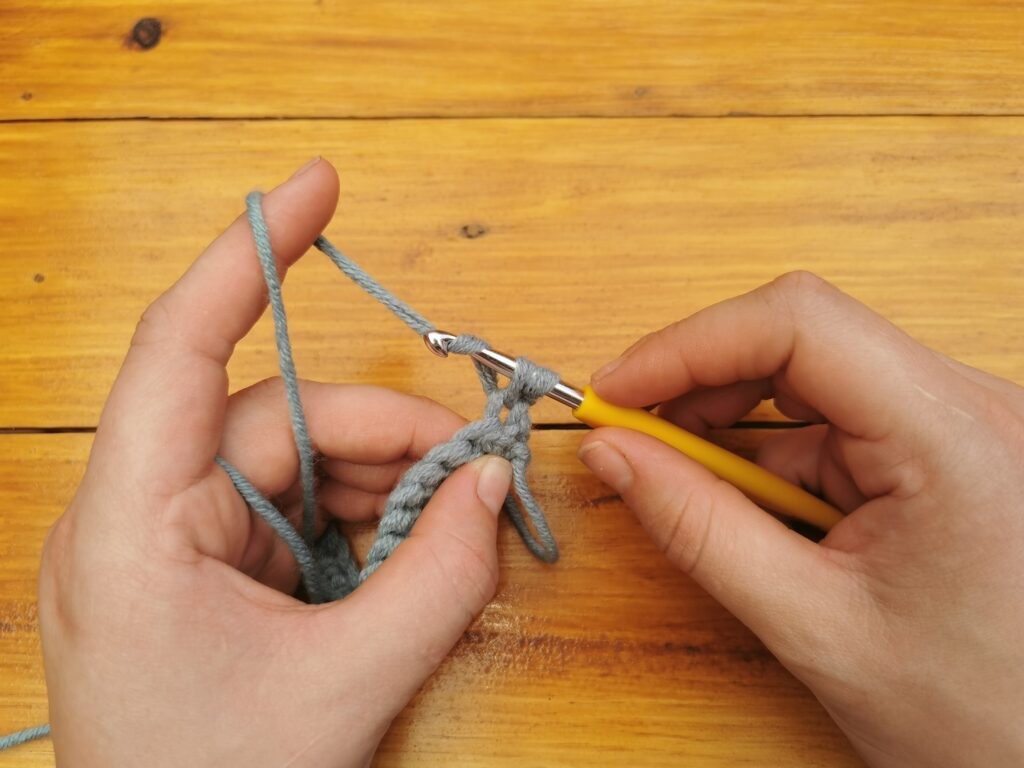
- To start crocheting on the top of the chain you need to chain 1 (yarn over, pull through the loop on your hook). This chain 1 is the turning chain. The turning chain helps to keep your sides of your work straight.
- Turn your work the same way every time. It doesn’t matter which way you turn your work, as long as you turn it the same way every time.
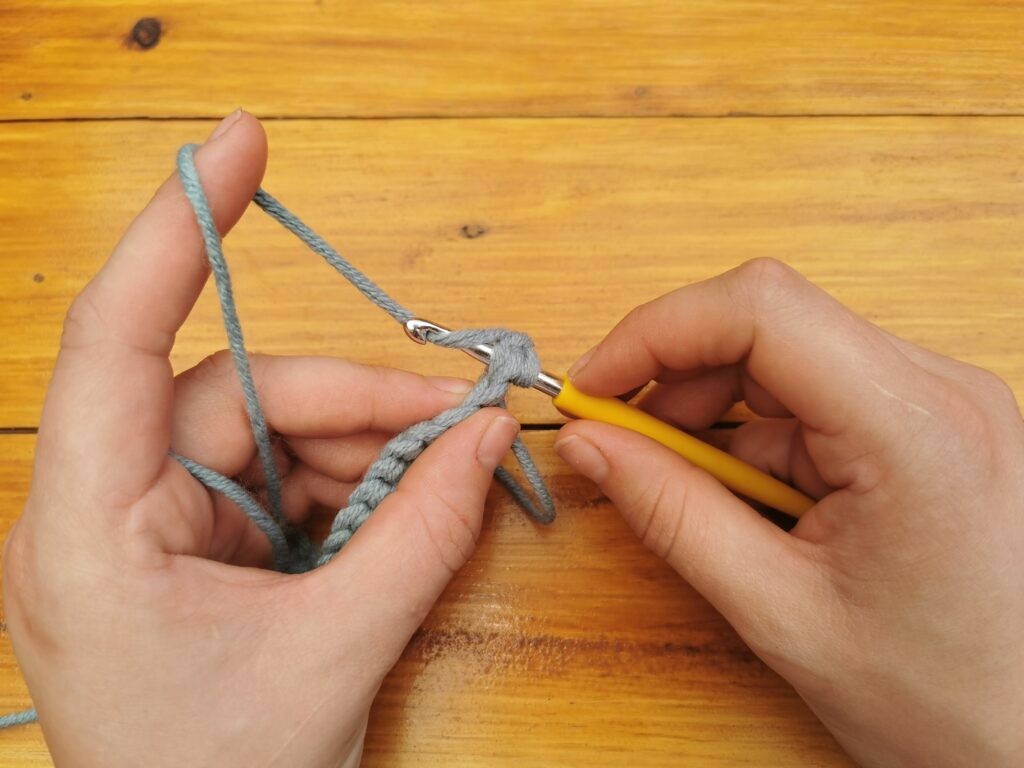
- To continue down the row, insert your hook into the last single crochet you made in the previous row. Have a look down below. you will see that this is the single crochet next to the chain 1.
- The stitch from the top shows the V-shape of the stitch.
- Notice in the picture above, how the stitch looks. You should put your hook through both the front and back loop of the stitch. You will see that it looks like a V.
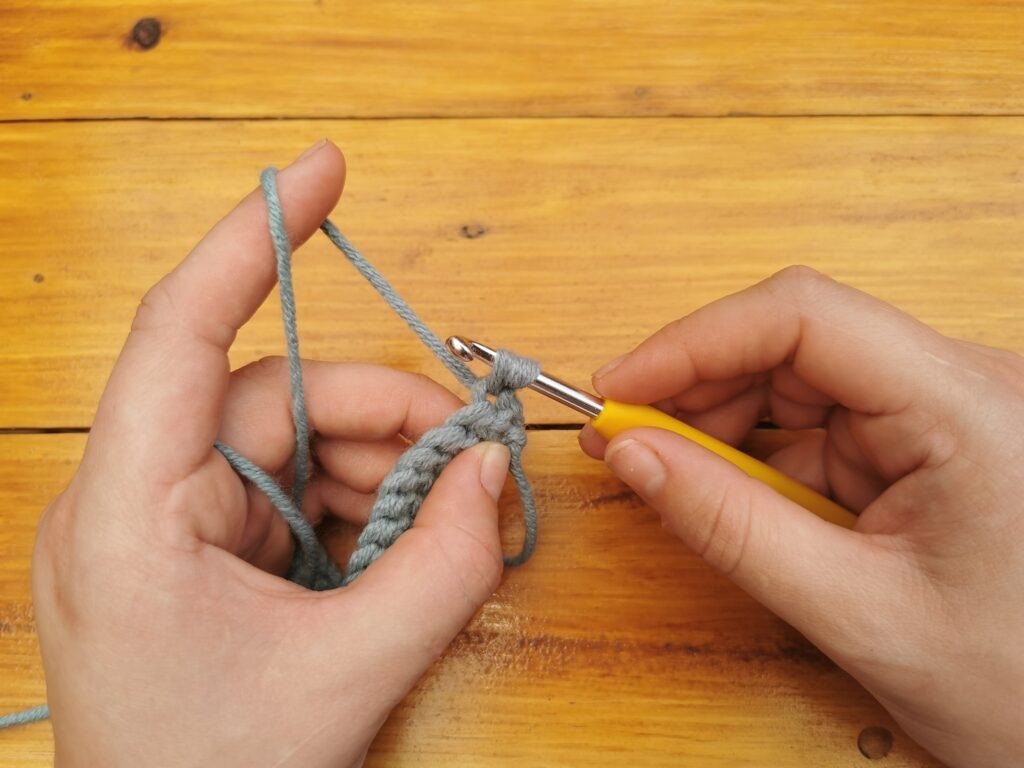
- Yarn over and pull through the stitch, you have two loops on your hook.
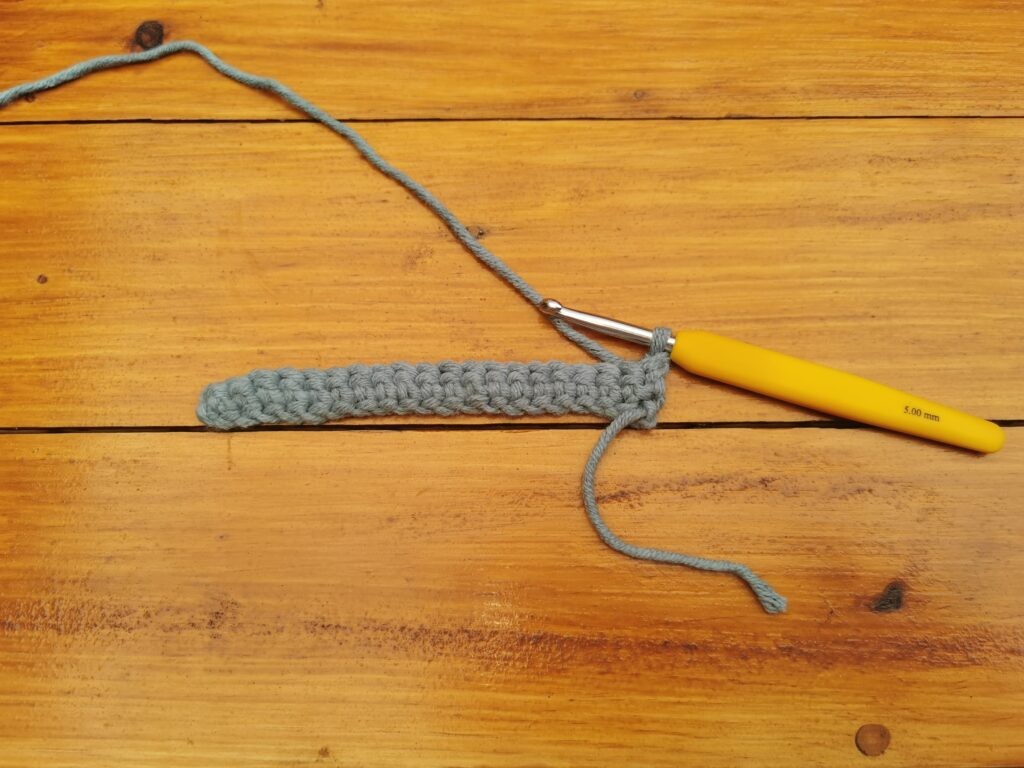
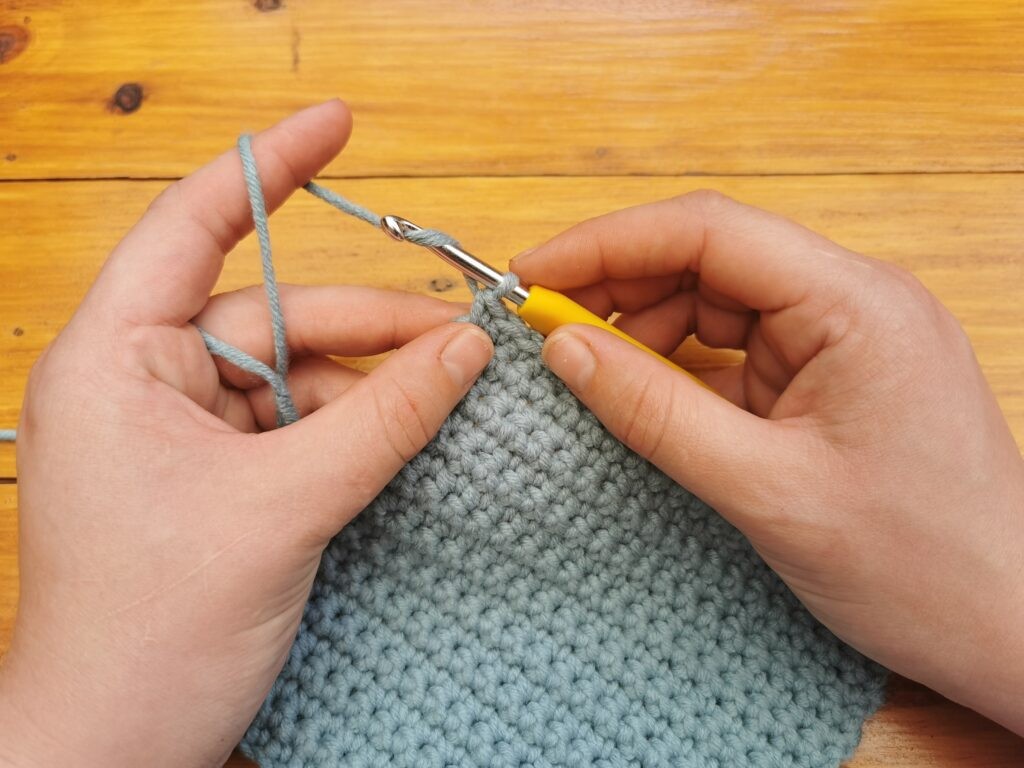
- Yarn over and pull through, and you’ve completed your single crochet on the second row.
6. Finishing and Weaving in Ends
Once you’ve completed your crochet project, finishing it properly is essential for a neat and polished look. This involves securing your last stitch and weaving in the yarn ends.
6.1. How to Finish Off Securely
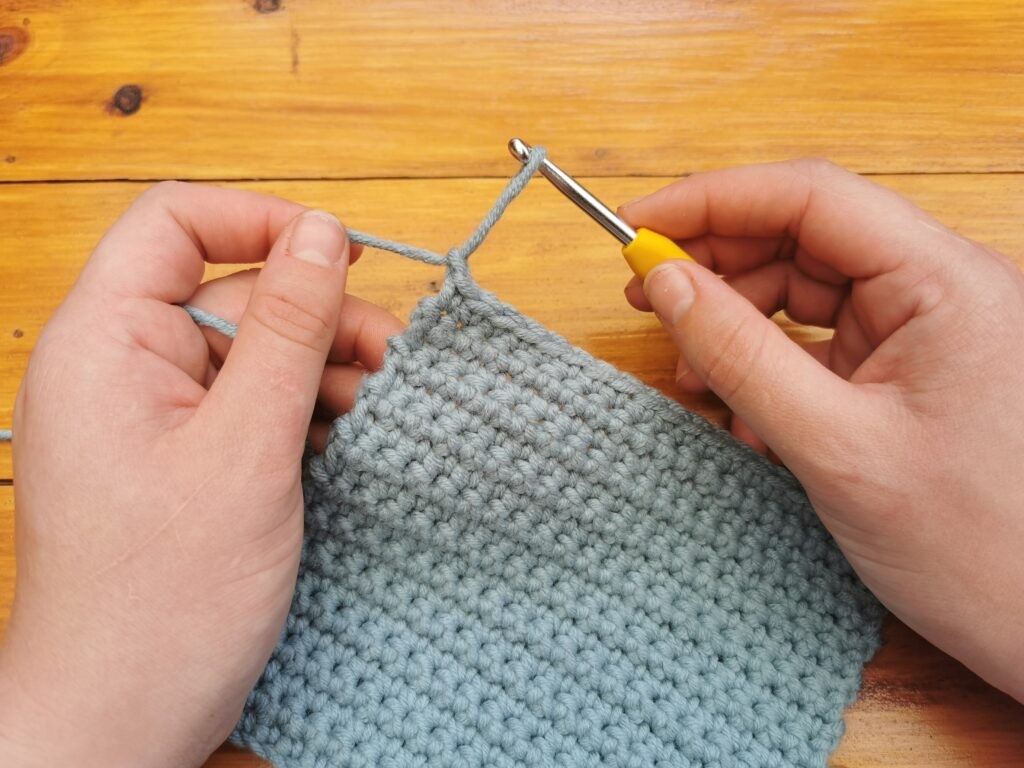
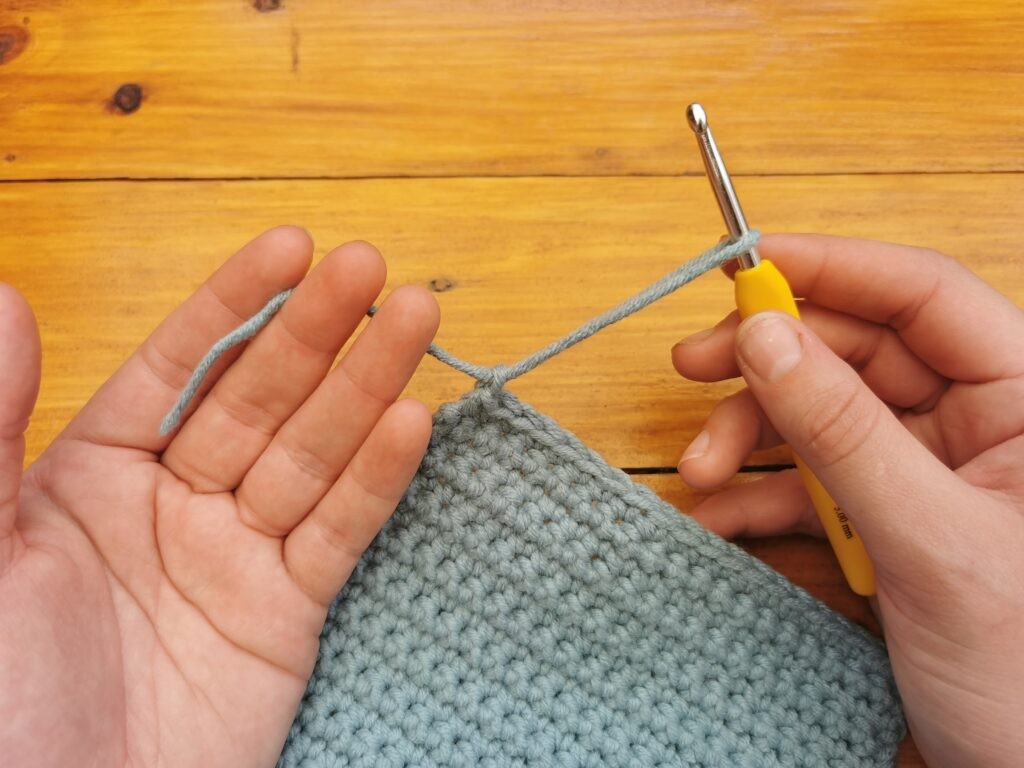
- At the end of your project, yarn over like for when you make a chain 1.
- Pull the loop about an inch outward.
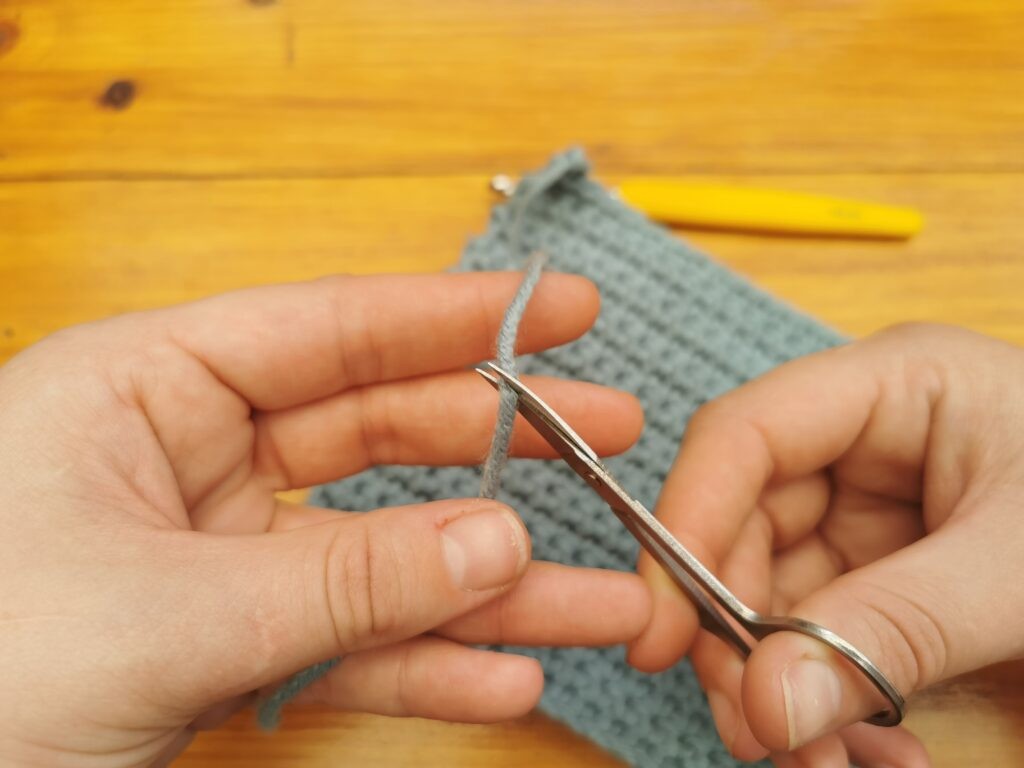
- Keeping your yarn on the hook, lay down your project and measure about 2 inches on the working yarn. Cut the yarn at the 2 inch mark.
- Now take your hook and pull the yarn completely through the loop.
- Pull the end tight to secure the knot.
6.2. Step-by-Step Guide to Weaving in Ends
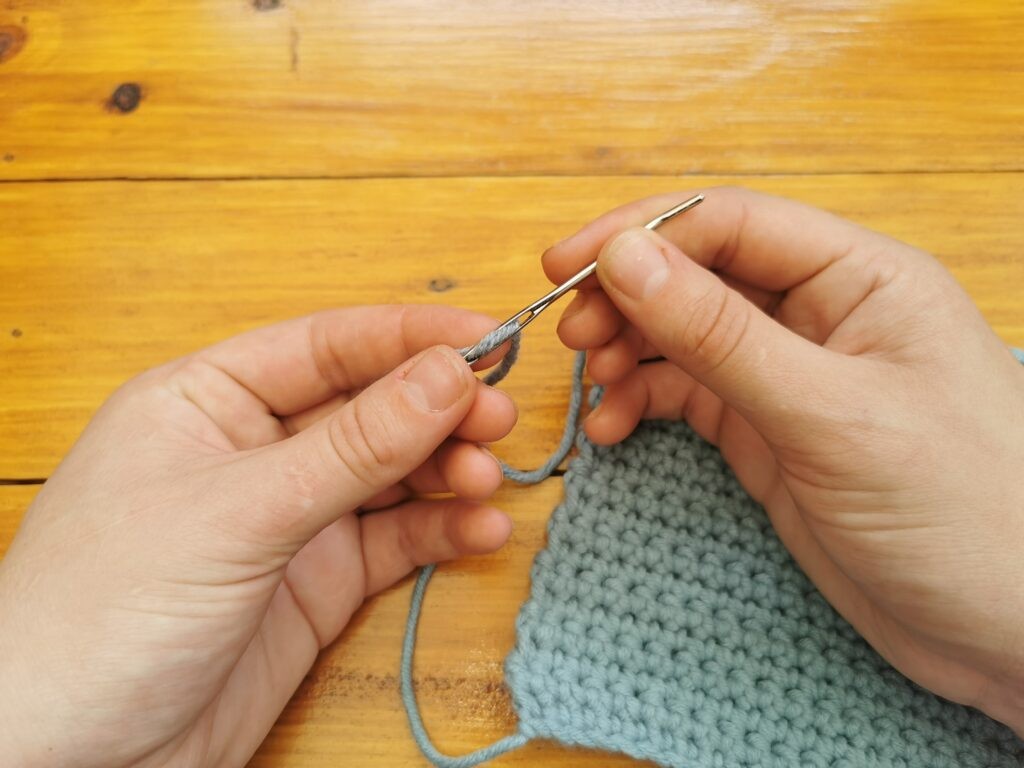
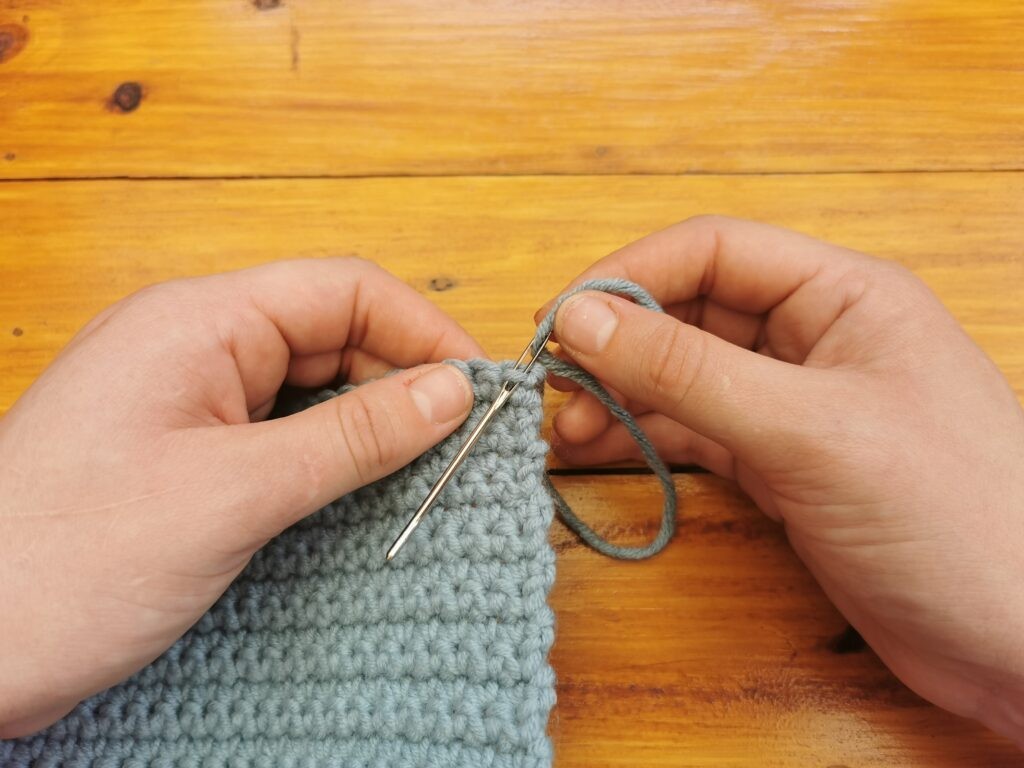
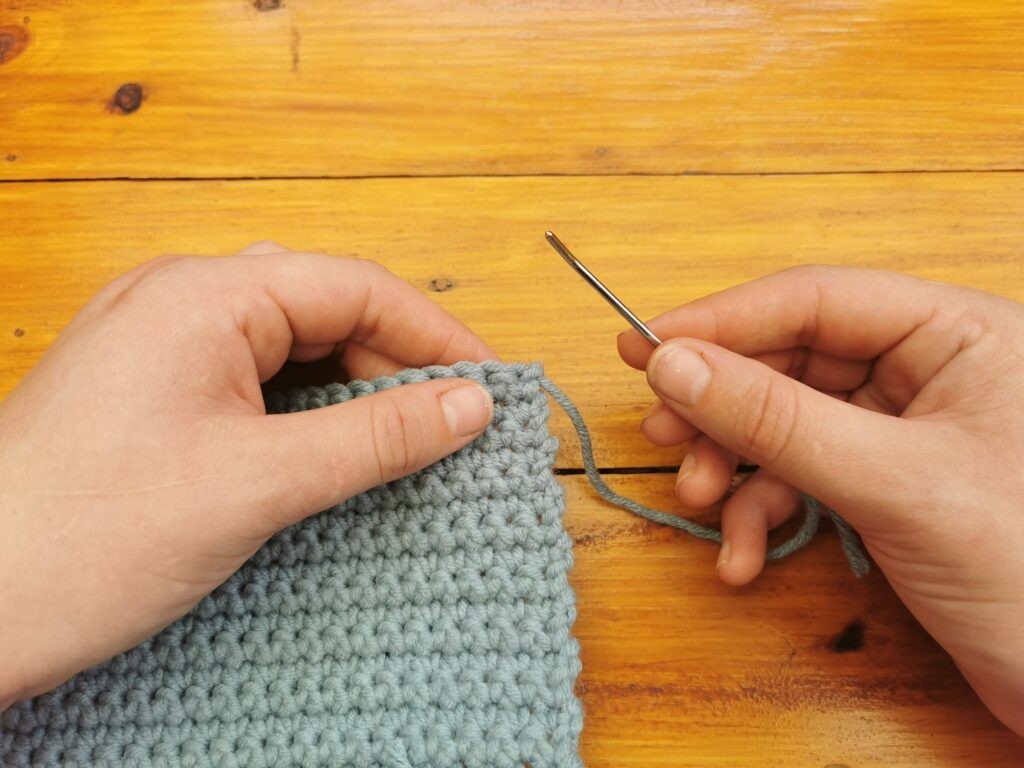
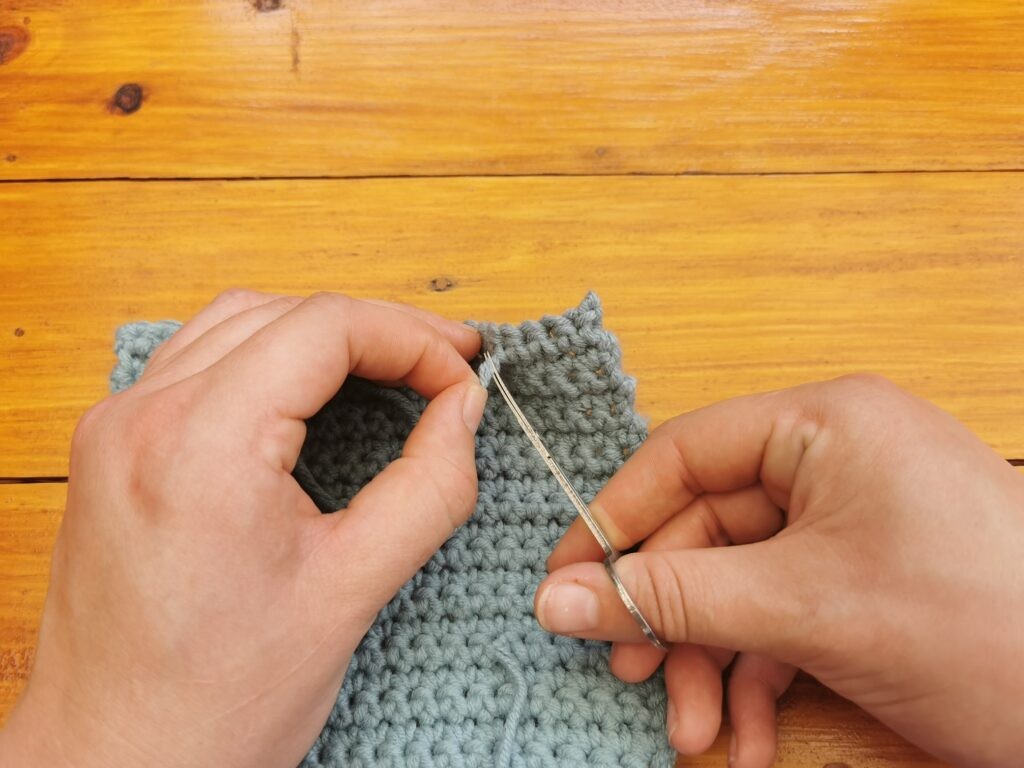
- Thread the yarn tail onto a yarn needle.
- Pull the yarn through the eye of the needle enough so that it is long enough for you to grab a hold of.
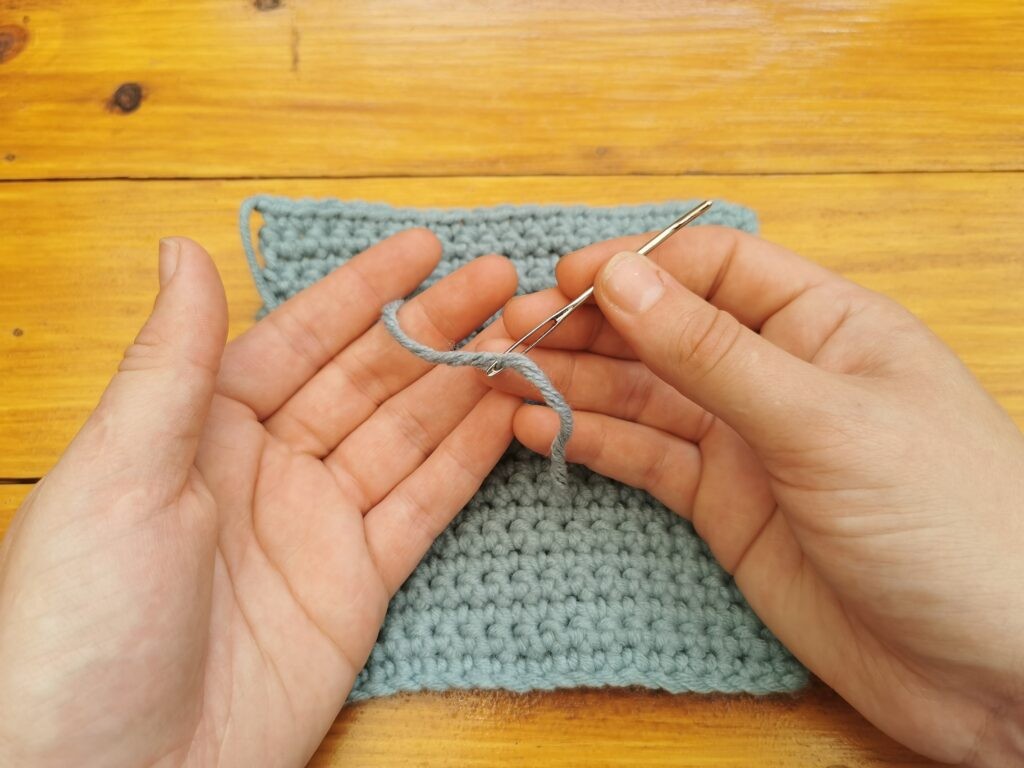
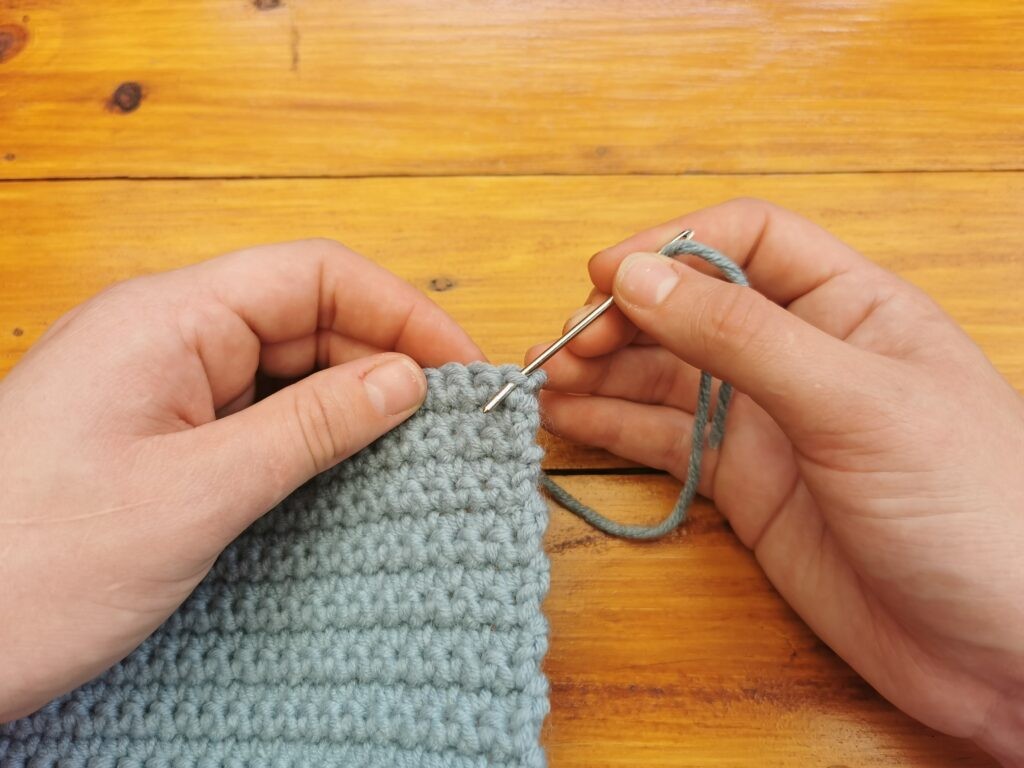
- Insert the darning needle into bottom row.
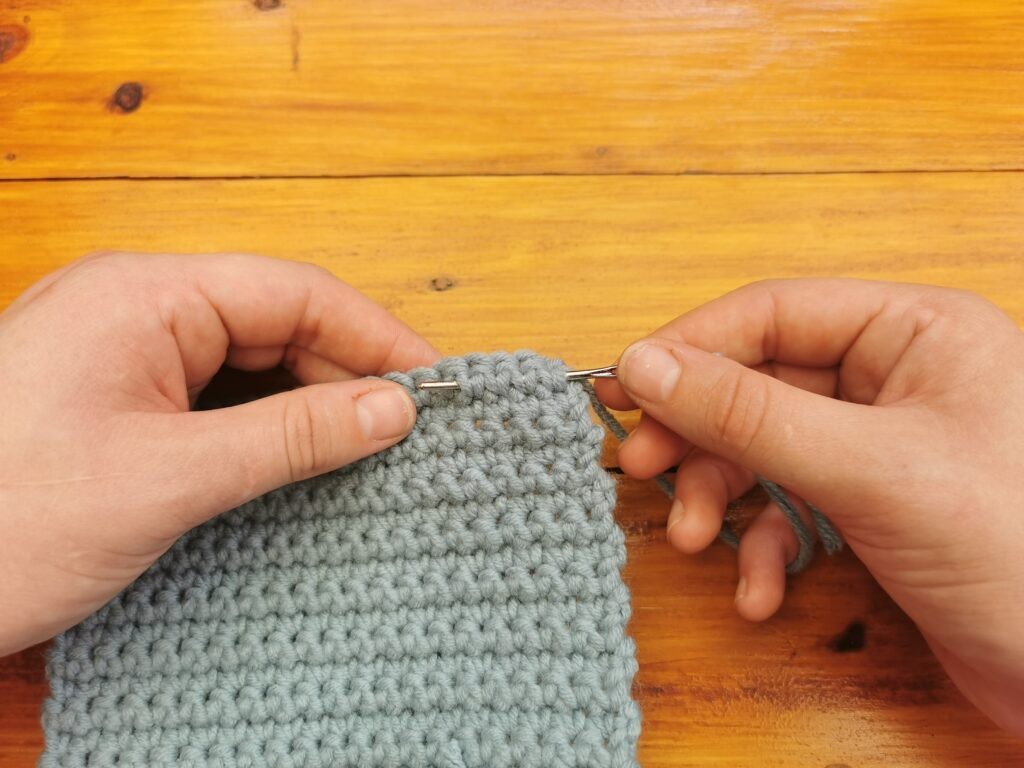
- Insert the needle through the top of the stitch downward, making sure to not go through the other side.
- Pull the needle through but not to tightly as you don’t want your work to curl.
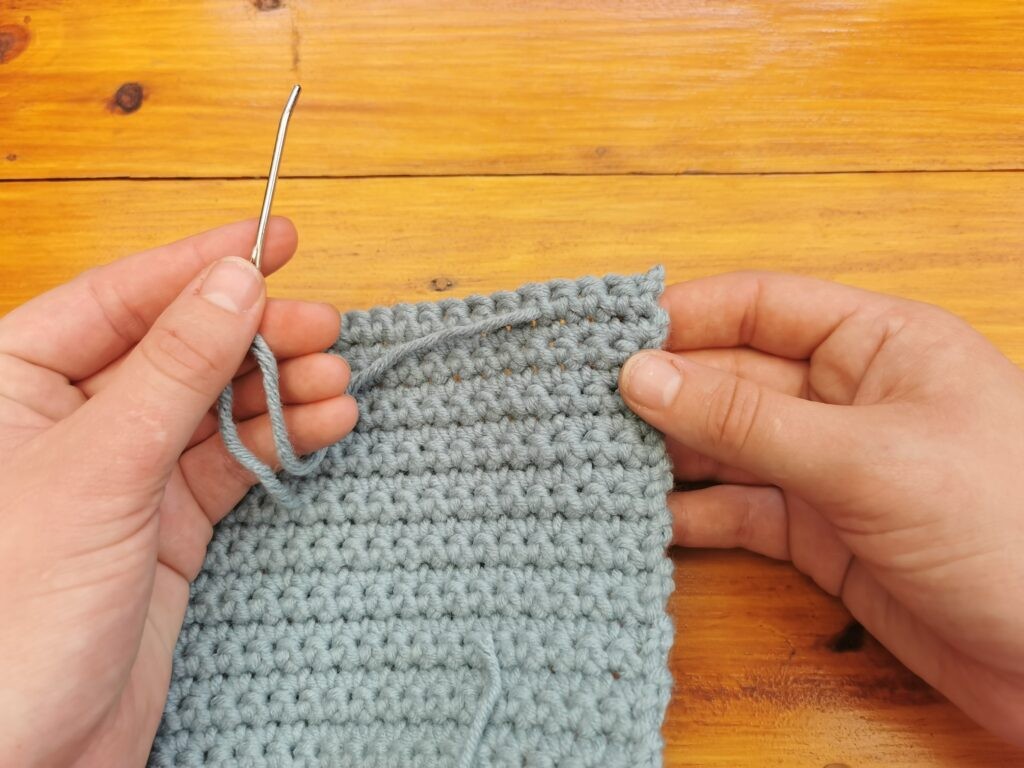
- Weave in the needle into the bottom row where your yarn came out.
- Pull the needle through, again not to tightly.
- Cut the yarn close to the work. If a little piece shows, you can stretch the row a little until it disapears.
- Repeat this process in different directions to secure the end.
- Trim any excess yarn close to the fabric.
6.3. Tips for Securely Weaving in Ends
- Weave in Different Directions: Weaving the yarn end in different directions helps to secure it and prevent it from unraveling.
- Avoid Weaving Through the Front: Weave the yarn end through the back of the stitches to hide it and prevent it from being visible on the front of your work.
- Stretch the Fabric: After weaving in the end, gently stretch the fabric to help the yarn end blend in.
7. Level Up: Exploring Different Crochet Techniques
As you gain confidence in the basics, there are many other crochet stitches and techniques to explore. Here are a few to get you started:
7.1. Double Crochet Stitch
The double crochet stitch is taller than the single crochet and creates a looser fabric. It’s often used for blankets, scarves, and garments.
- Yarn over, insert hook into stitch, yarn over, pull through (3 loops on hook).
- Yarn over, pull through 2 loops (2 loops on hook).
- Yarn over, pull through remaining 2 loops.
7.2. Half Double Crochet Stitch
The half double crochet stitch is a middle ground between the single and double crochet, creating a dense but flexible fabric.
- Yarn over, insert hook into stitch, yarn over, pull through (3 loops on hook).
- Yarn over, pull through all 3 loops.
7.3. Treble Crochet Stitch
The treble crochet stitch is even taller than the double crochet, creating a very open and lacy fabric.
- Yarn over twice, insert hook into stitch, yarn over, pull through (4 loops on hook).
- Yarn over, pull through 2 loops (3 loops on hook).
- Yarn over, pull through 2 loops (2 loops on hook).
- Yarn over, pull through remaining 2 loops.
7.4. Increase and Decrease Stitches
Increasing and decreasing stitches allows you to shape your crochet fabric, creating curves, angles, and three-dimensional forms.
- Increase: Work two or more stitches into the same stitch.
- Decrease: Work two or more stitches together into one stitch.
7.5. Colorwork Techniques
Colorwork techniques such as stripes, intarsia, and tapestry crochet allow you to incorporate multiple colors into your projects, creating intricate patterns and designs.
- Stripes: Change colors at the end of a row or round to create horizontal stripes.
- Intarsia: Use different balls of yarn for each color block, twisting the yarns together to avoid gaps.
- Tapestry Crochet: Carry multiple colors of yarn along the row, working over the unused colors to create detailed patterns.
8. Finding Crochet Patterns and Inspiration
Once you’ve mastered the basic crochet stitches and techniques, you’ll want to start working on projects. There are countless crochet patterns available online and in print, ranging from simple beginner projects to complex and intricate designs.
8.1. Free Online Resources
- Ravelry: Ravelry is a popular online community for knitters and crocheters, offering a vast database of patterns, forums, and project ideas.
- Yarnspirations: Yarnspirations provides a wide range of free crochet patterns, along with video tutorials and yarn recommendations.
- AllFreeCrochet: AllFreeCrochet offers a curated collection of free crochet patterns from various designers and websites.
- Craftsy: Craftsy offers a variety of online crochet classes and patterns, both free and paid.
8.2. Crochet Books and Magazines
- “Crochet Stitch Dictionary” by Sarah Hazell: This comprehensive stitch dictionary features hundreds of crochet stitches, along with detailed instructions and photos.
- “The Complete Idiot’s Guide to Crochet” by June Gilbank: This beginner-friendly guide covers all the basics of crochet, along with a variety of simple projects.
- “Interweave Crochet Magazine”: This magazine features a variety of crochet patterns, articles, and designer interviews.
8.3. Designing Your Own Crochet Projects
Once you’ve gained experience with crochet, you may want to try designing your own projects. This allows you to create unique and personalized items that perfectly match your style and preferences.
- Start with Simple Designs: Begin by modifying existing patterns or creating simple geometric shapes.
- Sketch Your Ideas: Draw out your design ideas on paper to visualize the finished product.
- Choose Your Yarn and Hook: Select the appropriate yarn weight and hook size for your project.
- Calculate Your Gauge: Crochet a gauge swatch to determine how many stitches and rows you need per inch.
- Write Out Your Pattern: Document each step of your design process, including the number of stitches and rows, increases, decreases, and color changes.
- Test Your Pattern: Crochet your design using your written pattern to ensure it is accurate and easy to follow.
9. Tips for Improving Your Crochet Skills
Like any skill, crochet takes practice and dedication to master. Here are some tips for improving your crochet skills:
- Practice Regularly: The more you crochet, the better you’ll become. Set aside time each day or week to practice your stitches and techniques.
- Take Classes: Consider taking a crochet class at your local yarn store or community center. A qualified instructor can provide personalized guidance and feedback.
- Watch Video Tutorials: There are countless video tutorials available online that demonstrate crochet stitches and techniques.
- Join a Crochet Group: Joining a crochet group can provide support, inspiration, and opportunities to learn from other crocheters.
- Experiment with Different Yarns and Hooks: Try using different yarn weights and hook sizes to see how they affect the look and feel of your projects.
- Don’t Be Afraid to Make Mistakes: Mistakes are a natural part of the learning process. Don’t get discouraged if you make a mistake; simply unravel your stitches and try again.
10. Advanced Crochet Techniques and Tips
Once you’ve mastered the basics of crochet, there are many advanced techniques and tips that can help you take your skills to the next level.
10.1. Tunisian Crochet
Tunisian crochet, also known as Afghan crochet, is a technique that combines elements of both knitting and crochet. It creates a dense, textured fabric that is ideal for blankets, scarves, and other warm items.
- Special Hook: Tunisian crochet requires a long hook with a stopper at the end to hold multiple loops.
- Forward and Return Pass: Each row of Tunisian crochet consists of a forward pass, where you pick up loops on the hook, and a return pass, where you work the loops off the hook.
- Variety of Stitches: There are many different Tunisian crochet stitches, each creating a unique texture and pattern.
10.2. Filet Crochet
Filet crochet is a technique that uses chains and double crochets to create openwork designs, often resembling lace or needlepoint.
- Grid-Based Designs: Filet crochet patterns are typically based on a grid, with each square representing a solid or open space.
- Charts and Symbols: Filet crochet patterns are often presented as charts, with different symbols representing different stitches.
- Intricate Patterns: Filet crochet can be used to create intricate patterns, such as floral motifs, geometric designs, and even portraits.
10.3. Broomstick Lace Crochet
Broomstick lace crochet is a technique that uses a large knitting needle or broomstick to create elongated loops, resulting in a lacy and open fabric.
- Elongated Loops: The size of the knitting needle or broomstick determines the length of the loops.
- Grouping and Securing Loops: The loops are grouped together and secured with single crochet stitches to create a variety of patterns.
- Unique Textures: Broomstick lace crochet creates unique textures that are perfect for scarves, shawls, and other accessories.
10.4. Amigurumi Crochet
Amigurumi is the Japanese art of crocheting small, stuffed toys and creatures.
- Working in the Round: Amigurumi is typically worked in the round, using a technique called the magic ring or adjustable ring.
- Increasing and Decreasing: Increasing and decreasing stitches is used to shape the amigurumi pieces.
- Stuffing and Assembling: The amigurumi pieces are stuffed with fiberfill and assembled to create the finished toy.
- Safety Eyes and Embellishments: Safety eyes, embroidery, and other embellishments are often used to add detail and personality to amigurumi creations.
10.5. Advanced Pattern Reading
As you gain experience with crochet, you’ll encounter more complex patterns that may include abbreviations, symbols, and charts. Understanding how to read these patterns is essential for successfully completing your projects.
- Abbreviations: Learn the common crochet abbreviations, such as sc (single crochet), dc (double crochet), ch (chain), and sl st (slip stitch).
- Symbols: Familiarize yourself with the crochet symbols used in charts, such as
