Learning to handstand is a rewarding journey that combines strength, balance, and dedication, and here at LEARNS.EDU.VN, we’re here to guide you every step of the way, offering tailored resources and expert insights to help you achieve your goals. Understanding the process, setting realistic expectations, and employing effective training strategies are vital for success. Master hand balancing, develop body awareness, and unlock new physical skills.
1. Setting Realistic Timelines for Handstand Mastery
Embarking on the journey to learn a handstand involves several factors that influence the timeline. There’s no one-size-fits-all answer to the question “How Long Does It Take To Learn To Handstand?” It depends on your starting point, dedication, and training approach. Let’s explore these factors to help you set realistic expectations.
1.1 Initial Fitness Level and Background
Your current fitness level significantly impacts how quickly you’ll progress. Individuals with a background in gymnastics, yoga, or other forms of bodyweight training often have an advantage due to pre-existing strength, flexibility, and body awareness.
Table 1: Impact of Background on Handstand Learning Time
| Background | Expected Learning Time | Notes |
|---|---|---|
| Gymnastics/Bodyweight Training | 3-6 months | Strong foundation in strength, flexibility, and body awareness. |
| Yoga | 6-12 months | Good flexibility and balance, but may need to build upper body strength. |
| General Fitness | 12-18 months | Requires building strength and flexibility from the ground up. |
| Sedentary Lifestyle | 18+ months | Needs significant time to develop basic fitness components. |
1.2 Consistency and Dedication to Training
Consistency is key to mastering any skill, and handstands are no exception. Regular practice reinforces the necessary muscle memory and improves balance. Aim for at least 3-4 training sessions per week, each lasting between 30-60 minutes.
Table 2: Impact of Training Frequency on Handstand Learning Time
| Training Frequency | Expected Progress Rate | Notes |
|---|---|---|
| 3-4 times per week | Faster | Consistent practice leads to quicker improvements in strength, balance, and technique. |
| 1-2 times per week | Slower | Progress may be slower and more sporadic due to less frequent reinforcement of skills. |
| Irregular Training | Very Slow | Inconsistent practice can lead to plateaus and setbacks, requiring more time to achieve the handstand. |
1.3 Effective Training Methods and Resources
Using structured training programs and resources can significantly accelerate your learning process. These programs break down the handstand into manageable steps, focusing on essential strength, flexibility, and balance exercises. Resources like LEARNS.EDU.VN provide detailed guides, video tutorials, and expert advice to support your journey.
Table 3: Impact of Training Resources on Handstand Learning Time
| Training Resources | Expected Progress Rate | Notes |
|---|---|---|
| Structured Training Program (e.g., LEARNS.EDU.VN) | Faster | Provides a clear roadmap, targeted exercises, and expert guidance, leading to more efficient progress. |
| Online Tutorials and Videos | Moderate | Offers visual guidance and tips, but may lack personalized feedback and structured progression. |
| Self-Taught | Slower | Requires significant research, trial and error, and may lead to inefficient training and increased risk of injury. |
2. Breaking Down the Handstand Learning Process
To effectively learn the handstand, it’s helpful to break down the process into distinct stages. Each stage focuses on specific skills and preparations that build upon the previous one.
2.1 Stage 1: Building Foundational Strength and Flexibility (Weeks 1-4)
This initial phase focuses on developing the necessary strength and flexibility in your wrists, shoulders, core, and legs. It’s crucial to prepare your body for the demands of the handstand to prevent injuries and ensure a solid foundation.
2.1.1 Wrist Strengthening Exercises
- Wrist Extensions and Flexions: Perform wrist extensions and flexions using light dumbbells or resistance bands. Aim for 3 sets of 15-20 repetitions.
- Wrist Circles: Rotate your wrists clockwise and counterclockwise for 1-2 minutes each direction.
- Finger Stretches: Extend your fingers and gently pull them back towards your forearm. Hold each stretch for 20-30 seconds.
2.1.2 Shoulder Mobility and Stability Exercises
- Shoulder Dislocates: Use a light stick or towel to perform shoulder dislocates, gradually increasing your range of motion.
- Scapular Retractions: Squeeze your shoulder blades together and hold for a few seconds. Perform 3 sets of 15-20 repetitions.
- Wall Slides: Stand with your back against a wall and slide your arms up and down, maintaining contact with the wall.
2.1.3 Core Strengthening Exercises
- Planks: Hold a plank for 30-60 seconds, focusing on maintaining a straight line from head to heels.
- Hollow Body Holds: Lie on your back and lift your arms and legs off the ground, maintaining a curved spine. Hold for 20-30 seconds.
- Dead Bugs: Lie on your back and alternate extending opposite arms and legs while maintaining core engagement.
2.1.4 Leg Strengthening Exercises
- Squats: Perform bodyweight squats, focusing on proper form and full range of motion.
- Lunges: Step forward into a lunge, ensuring your front knee stays behind your toes.
- Calf Raises: Stand on a slightly elevated surface and raise up onto your toes.
 Wrist Strengthening Exercises
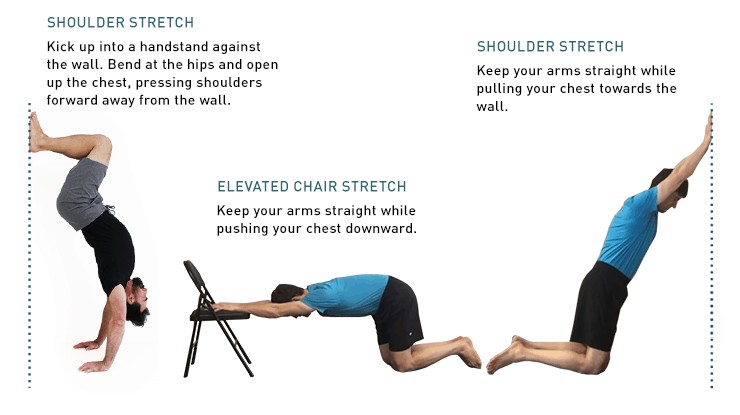
Shoulder warm-up stretches to improve shoulder mobility and stability.
2.2 Stage 2: Mastering Handstand Drills and Progressions (Weeks 5-12)
Once you’ve built a solid foundation, you can start working on specific handstand drills and progressions. These exercises gradually introduce you to the inverted position and help you develop the necessary balance and control.
2.2.1 Wall-Assisted Handstands
- Wall Walks: Place your hands on the ground facing a wall and walk your feet up the wall until you reach a vertical position. Focus on maintaining a straight line from head to heels.
- Belly-to-Wall Handstands: Kick up into a handstand with your belly facing the wall. Practice shifting your weight and finding your balance point.
- Wall Float: Kick up to the wall, then try to float for one or two seconds before tapping back down to the wall.
2.2.2 Handstand Kick-Up Drills
- Tuck Handstand Kick-Ups: Practice kicking up into a handstand with your knees tucked towards your chest. This helps you develop control and coordination.
- Straddle Handstand Kick-Ups: Kick up into a handstand with your legs straddled. This variation improves balance and stability.
- Split Leg Kick Ups: Use a split leg position to kick into a handstand, focusing on control and alignment.
2.2.3 Balancing Techniques
- Finger Control: Practice using your fingers to make small adjustments and maintain balance in the handstand.
- Shoulder Shrugs: Engage your shoulder muscles to make subtle corrections and prevent overbalancing.
- Core Engagement: Maintain a tight core to stabilize your body and prevent excessive arching or rounding of your back.
2.3 Stage 3: Refining Technique and Building Endurance (Weeks 13-24)
In this stage, you’ll focus on refining your handstand technique and gradually increasing your hold time. This involves practicing regularly, focusing on proper alignment, and incorporating conditioning exercises.
2.3.1 Freestanding Handstand Practice
- Short Holds: Practice holding a freestanding handstand for as long as possible, even if it’s just for a few seconds.
- Multiple Attempts: Perform multiple attempts with short rest periods in between to build endurance and improve consistency.
- Record and Review: Record your handstand attempts and review them to identify areas for improvement.
2.3.2 Conditioning Exercises
- Handstand Push-Ups: Perform handstand push-ups against a wall or with assistance to build upper body strength.
- Pike Push-Ups: Perform pike push-ups to target your shoulders and triceps.
- Core Stability Exercises: Continue to practice planks, hollow body holds, and other core exercises to maintain stability.
2.3.3 Mindful Practice
- Focus on Alignment: Pay attention to your body alignment, ensuring your wrists, shoulders, hips, and ankles are stacked in a straight line.
- Breath Control: Practice controlled breathing to stay calm and focused during the handstand.
- Visualization: Visualize yourself performing a perfect handstand to improve your mental focus and confidence.
2.4 Stage 4: Advanced Variations and Maintenance (Weeks 25+)
Once you’ve mastered the basic handstand, you can explore advanced variations and focus on maintaining your skills. This involves continuous practice, exploring new challenges, and staying committed to your training.
2.4.1 Advanced Handstand Variations
- One-Arm Handstand: Progress to the one-arm handstand. This requires significant strength, balance, and control.
- Press Handstand: Learn to press up into a handstand from a seated or standing position.
- Handstand Walks: Practice walking on your hands, which requires coordination and spatial awareness.
2.4.2 Active Recovery
- Stretching: Stretch your wrists, shoulders, and core to maintain flexibility and prevent injuries.
- Foam Rolling: Use a foam roller to release tension in your muscles and improve recovery.
- Yoga and Pilates: Incorporate yoga and Pilates into your routine to enhance flexibility, balance, and core strength.
2.4.3 Continuous Learning
- Workshops and Seminars: Attend handstand workshops and seminars to learn from experienced instructors and connect with other practitioners.
- Online Communities: Engage with online handstand communities to share your experiences, ask questions, and stay motivated.
- Set new goals: Set new handstand goals and continue to learn.
3. Common Challenges and How to Overcome Them
Learning to handstand can be challenging, and it’s important to be aware of common obstacles and how to overcome them. Here are some of the most frequent challenges and practical solutions.
3.1 Fear of Falling
Fear of falling is a common obstacle that can hinder your progress. Overcoming this fear involves building confidence and learning how to bail safely.
3.1.1 Practice Bailing Techniques
- Cartwheel Exit: Practice exiting the handstand by cartwheeling out to the side. This allows you to safely regain your footing and prevent injuries.
- Forward Roll: Learn to bail out of the handstand by performing a forward roll. This technique requires coordination and control.
- Controlled Fall: Practice falling onto a soft surface, such as a mat or cushion, to become comfortable with the sensation of being upside down.
3.1.2 Gradual Exposure
- Wall-Assisted Practice: Start by practicing handstands against a wall to build confidence and reduce the fear of falling.
- Spotter Assistance: Have a friend or instructor spot you as you practice freestanding handstands. This provides a sense of security and allows you to focus on your technique.
- Positive Self-Talk: Use positive affirmations to boost your confidence and overcome negative thoughts.
3.2 Wrist Pain
Wrist pain is a common issue for beginners, as the wrists are not accustomed to supporting the body’s weight. Preventing and managing wrist pain involves proper warm-up, strengthening exercises, and technique adjustments.
3.2.1 Proper Warm-Up
- Wrist Circles: Perform wrist circles in both directions to increase blood flow and flexibility.
- Wrist Extensions and Flexions: Gently stretch your wrists by extending and flexing them.
- Finger Stretches: Stretch your fingers to release tension and improve circulation.
3.2.2 Strengthening Exercises
- Wrist Curls: Perform wrist curls with light dumbbells to strengthen your forearm muscles.
- Reverse Wrist Curls: Perform reverse wrist curls to target the muscles on the back of your forearm.
- Grip Strengthening: Use a grip strengthener to improve your overall wrist and hand strength.
3.2.3 Technique Adjustments
- Proper Hand Placement: Ensure your hands are shoulder-width apart and your fingers are spread evenly to distribute the weight.
- Engage Your Fingers: Use your fingers to make small adjustments and maintain balance, rather than relying solely on your wrists.
- Avoid Locking Your Elbows: Keep a slight bend in your elbows to absorb impact and reduce stress on your wrists.
3.3 Balance Issues
Maintaining balance in the handstand requires coordination, body awareness, and practice. Improving your balance involves targeted drills, core engagement, and mental focus.
3.3.1 Targeted Drills
- Finger Tip Drills: Practice shifting your weight forward and backward, using your fingertips to maintain balance.
- Shoulder Shrug Drills: Engage your shoulder muscles to make subtle adjustments and prevent overbalancing.
- Core Engagement Drills: Focus on maintaining a tight core to stabilize your body and prevent excessive arching or rounding of your back.
3.3.2 Core Engagement
- Planks: Hold a plank for 30-60 seconds, focusing on maintaining a straight line from head to heels.
- Hollow Body Holds: Lie on your back and lift your arms and legs off the ground, maintaining a curved spine.
- Dead Bugs: Lie on your back and alternate extending opposite arms and legs while maintaining core engagement.
3.3.3 Mental Focus
- Visualization: Visualize yourself performing a perfect handstand to improve your mental focus and confidence.
- Breath Control: Practice controlled breathing to stay calm and focused during the handstand.
- Mindful Practice: Pay attention to your body alignment and make small adjustments as needed to maintain balance.
3.4 Lack of Progress
Plateaus are a normal part of the learning process, and it’s important to stay patient and persistent. Overcoming a lack of progress involves reassessing your training, seeking feedback, and trying new approaches.
3.4.1 Reassess Your Training
- Review Your Goals: Make sure your goals are realistic and achievable.
- Evaluate Your Program: Assess your training program to ensure it’s well-structured and addresses your specific needs.
- Track Your Progress: Monitor your progress regularly to identify areas for improvement.
3.4.2 Seek Feedback
- Professional Guidance: Consult with a qualified handstand coach or instructor for personalized feedback and guidance.
- Peer Review: Ask a friend or fellow practitioner to observe your handstand and provide constructive criticism.
- Online Communities: Share your videos and ask for feedback from online handstand communities.
3.4.3 Try New Approaches
- Vary Your Training: Introduce new exercises and drills to challenge your body and prevent boredom.
- Adjust Your Intensity: Experiment with different levels of intensity to find what works best for you.
- Focus on Weaknesses: Identify your weaknesses and dedicate extra time to improving them.
4. Sample Training Plans
To help you structure your handstand practice, here are two sample training plans tailored to different skill levels.
4.1 Beginner Training Plan (Weeks 1-12)
This plan focuses on building foundational strength and flexibility, mastering basic handstand drills, and developing proper alignment.
Table 4: Beginner Handstand Training Plan
| Day | Warm-Up (10 minutes) | Skill Work (20 minutes) | Cool-Down (10 minutes) |
|---|---|---|---|
| Monday | Wrist circles, shoulder dislocates, cat-cow stretches | Wall walks (3 sets of 5 reps), belly-to-wall handstands (3 sets of 30-second holds) | Wrist stretches, shoulder stretches |
| Tuesday | Rest | Rest | Rest |
| Wednesday | Wrist circles, shoulder dislocates, cat-cow stretches | Tuck handstand kick-ups (3 sets of 5 reps), straddle handstand kick-ups (3 sets of 5 reps) | Wrist stretches, shoulder stretches |
| Thursday | Rest | Rest | Rest |
| Friday | Wrist circles, shoulder dislocates, cat-cow stretches | Finger tip drills (3 sets of 1 minute), plank (3 sets of 30-second holds) | Wrist stretches, shoulder stretches, core work |
| Saturday | Rest | Rest | Rest |
| Sunday | Active recovery: light stretching, yoga, or foam rolling |
4.2 Intermediate Training Plan (Weeks 13-24)
This plan focuses on refining technique, building endurance, and working towards a freestanding handstand.
Table 5: Intermediate Handstand Training Plan
| Day | Warm-Up (10 minutes) | Skill Work (30 minutes) | Cool-Down (10 minutes) |
|---|---|---|---|
| Monday | Wrist circles, shoulder dislocates, cat-cow stretches | Freestanding handstand practice (5 attempts), handstand push-ups against the wall (3 sets of 5 reps) | Wrist stretches, shoulder stretches |
| Tuesday | Rest | Rest | Rest |
| Wednesday | Wrist circles, shoulder dislocates, cat-cow stretches | Freestanding handstand practice (5 attempts), pike push-ups (3 sets of 8-12 reps) | Wrist stretches, shoulder stretches |
| Thursday | Rest | Rest | Rest |
| Friday | Wrist circles, shoulder dislocates, cat-cow stretches | Finger tip drills (3 sets of 1 minute), hollow body holds (3 sets of 30-second holds), dead bugs (3 sets of 15 reps) | Wrist stretches, shoulder stretches, core work |
| Saturday | Rest | Rest | Rest |
| Sunday | Active recovery: light stretching, yoga, or foam rolling |
5. Expert Tips for Faster Progress
To accelerate your handstand learning journey, consider these expert tips.
5.1 Focus on Proper Alignment
Proper alignment is crucial for efficient and safe handstand practice. Focus on stacking your wrists, shoulders, hips, and ankles in a straight line to minimize strain and maximize balance.
5.2 Engage Your Entire Body
Engage your entire body, from your fingertips to your toes, to create stability and control in the handstand. Squeeze your legs together, tighten your core, and maintain tension throughout your body.
5.3 Practice Regularly
Consistency is key to mastering the handstand. Aim for at least 3-4 training sessions per week to reinforce muscle memory and improve balance.
5.4 Be Patient and Persistent
Learning to handstand takes time and dedication. Be patient with yourself, celebrate small victories, and stay persistent despite setbacks.
5.5 Seek Professional Guidance
Consider working with a qualified handstand coach or instructor for personalized feedback and guidance. A coach can help you identify areas for improvement, correct technique flaws, and accelerate your progress.
6. Utilizing Resources at LEARNS.EDU.VN
LEARNS.EDU.VN offers a wealth of resources to support your handstand learning journey.
6.1 Detailed Guides and Tutorials
Access detailed guides and tutorials that break down the handstand into manageable steps, covering everything from foundational exercises to advanced variations.
6.2 Video Demonstrations
Watch video demonstrations of proper technique and drills to improve your understanding and execution.
6.3 Expert Advice
Benefit from expert advice from experienced handstand practitioners and coaches.
6.4 Community Support
Connect with a community of fellow handstand enthusiasts to share your experiences, ask questions, and stay motivated.
7. Frequently Asked Questions (FAQs)
Here are some frequently asked questions about learning the handstand.
7.1 How much time should I dedicate to handstand practice each day?
Aim for 30-60 minutes of handstand practice per session, 3-4 times per week.
7.2 Is it necessary to have prior gymnastic experience to learn a handstand?
No, prior gymnastic experience is not necessary. Anyone can learn a handstand with proper training and dedication.
7.3 Can handstands cause injuries?
Handstands can cause injuries if performed incorrectly or without proper preparation. Prevent injuries by warming up thoroughly, strengthening your wrists and shoulders, and learning how to bail safely.
7.4 What should I do if I experience wrist pain while practicing handstands?
If you experience wrist pain, stop practicing immediately and rest your wrists. Apply ice to reduce inflammation and perform gentle wrist stretches. Consult with a healthcare professional if the pain persists.
7.5 How can I improve my balance in the handstand?
Improve your balance by practicing finger tip drills, engaging your core, and focusing on proper alignment.
7.6 What are some common mistakes to avoid when learning handstands?
Common mistakes to avoid include improper alignment, lack of core engagement, and rushing the process.
7.7 How do I stay motivated when learning handstands?
Stay motivated by setting realistic goals, tracking your progress, celebrating small victories, and connecting with a community of fellow practitioners.
7.8 Is it better to practice handstands against a wall or freestanding?
Both wall-assisted and freestanding practice are beneficial. Wall-assisted practice helps build confidence and refine technique, while freestanding practice develops balance and control.
7.9 What is the best time of day to practice handstands?
The best time of day to practice handstands is whenever you feel most alert and energized.
7.10 Can learning handstands improve my overall fitness?
Yes, learning handstands can improve your overall fitness by building strength, flexibility, balance, and coordination.
8. Ready to Start Your Handstand Journey?
Learning to handstand is a challenging but rewarding journey that offers numerous physical and mental benefits, and by understanding the process, setting realistic expectations, and employing effective training strategies, you can achieve your handstand goals. LEARNS.EDU.VN is here to support you every step of the way, with detailed guides, video tutorials, and expert advice. Take the first step towards mastering the handstand and unlock your full potential.
Ready to take the plunge? Visit LEARNS.EDU.VN today to discover comprehensive handstand courses and resources tailored to your skill level. Let our expert instructors guide you towards achieving your handstand dreams!
Contact us:
- Address: 123 Education Way, Learnville, CA 90210, United States
- WhatsApp: +1 555-555-1212
- Website: learns.edu.vn
Good luck, and happy handstanding!
Eduardo demonstrating a perfect handstand.