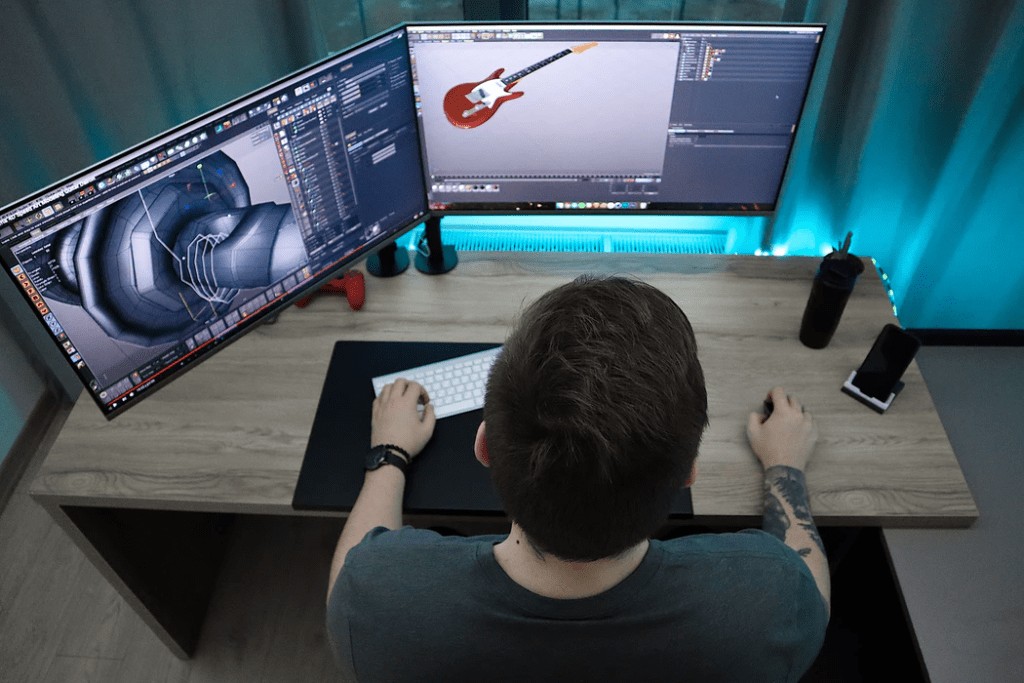
ZBrush, a powerful digital sculpting tool, opens doors to many creative industries. At LEARNS.EDU.VN, we understand that mastering ZBrush can seem daunting, but with the right approach, it’s an achievable goal. This guide explores how long it takes to learn ZBrush, offering step-by-step guidance, learning resources, and expert tips to help you succeed in digital sculpting, 3D modeling, and texture creation. Unlock your artistic potential and discover the exciting world of ZBrush! Discover courses on LEARNS.EDU.VN tailored to your learning pace and goals.
1. Understanding ZBrush and Its Applications
ZBrush is more than just a software; it’s a digital sculpting revolution. Before diving into the learning timeline, let’s explore what makes ZBrush a favorite among professionals and hobbyists alike.
1.1. What is ZBrush?
ZBrush is a digital sculpting and painting tool used across industries like film, gaming, and product design. It enables artists to create high-resolution 3D models with intricate details. According to Pixologic, the developers of ZBrush, its unique “pixol” technology allows for a sculpting experience that closely mimics traditional clay sculpting.
1.2. Key Applications of ZBrush
- Film Industry: ZBrush is used for character design, creature creation, and visual effects in movies like Lord of the Rings and Pirates of the Caribbean.
- Video Game Development: Game studios utilize ZBrush to create detailed characters and environments for games like God of War and Assassin’s Creed.
- Product Design: Designers use ZBrush to prototype and visualize products, from automotive designs to jewelry.
1.3. Features That Set ZBrush Apart
| Feature | Description | Benefit |
|---|---|---|
| 3D Brushes | Offers a wide array of brushes with customizable attributes like size, intensity, and firmness. | Allows for creating a variety of textures and patterns, enabling precise sculpting. |
| ZSpheres | Enables users to create a base mesh from simple spheres, which can then be sculpted into complex models. | Provides a flexible starting point for creating models with uniform topology. |
| Pixol Technology | Uses “pixols,” which contain information about color, lighting, material, depth, and position, unlike traditional pixels. | Enables the creation of highly detailed 2.5D objects with rich visual information. |
| Rendering | Includes Best Preview Render (BPR) for creating 360° maps and adjusting lighting in real-time. | Allows for high-quality rendering directly within ZBrush, streamlining the design process. |
| Shadowbox | Allows users to draw silhouettes of an object within a virtual box and see the model form in real-time. | Offers a unique and intuitive way to create complex shapes and designs. |
2. Estimating Your ZBrush Learning Timeline
The question “How Long To Learn Zbrush?” doesn’t have a one-size-fits-all answer. Several factors influence your learning curve, including your background, learning style, and dedication.
2.1. Factors Influencing Learning Time
- Prior Experience: If you have experience with 3D modeling or digital art, you’ll likely learn faster than someone new to the field.
- Learning Method: Structured courses, tutorials, or self-teaching can all affect how quickly you grasp the software.
- Time Commitment: Consistent practice is key. The more time you dedicate, the faster you’ll progress.
- Learning Goals: Are you aiming to become a professional 3D artist or simply want to create personal projects? Your goals will determine the depth of knowledge you need.
2.2. Realistic Timeframes
- Basic Proficiency (Understanding the Interface and Basic Tools): 1-2 months with consistent practice (5-10 hours per week).
- Intermediate Skills (Creating Complex Models and Textures): 6-12 months with regular practice and project work (10-20 hours per week).
- Advanced Mastery (Professional-Level Sculpting and Rendering): 2+ years of dedicated learning, practice, and professional experience.
2.3. The Journey to Mastery
The path to mastering ZBrush is a progressive journey. It involves:
- Familiarization: Understanding the interface, navigation, and basic tools.
- Skill Development: Learning sculpting techniques, texturing, and rendering.
- Application: Applying learned skills to personal or professional projects.
- Continuous Learning: Staying updated with new features, techniques, and industry trends.
3. Step-by-Step Guide to Learning ZBrush
Whether you’re a beginner or have some experience, a structured approach can help you learn ZBrush effectively. Here’s a step-by-step guide to get you started.
3.1. Setting Up Your ZBrush Environment
- Purchase and Install ZBrush: Visit the ZBrush website (Pixologic) to purchase a subscription or a perpetual license.
- Explore the Interface: Familiarize yourself with the ZBrush interface, including the menus, palettes, and viewport.
- Customize Your Workspace: Adjust the interface to suit your workflow by customizing hotkeys and arranging palettes.
3.2. Mastering the Basics
- Learn Navigation: Practice navigating the ZBrush viewport using mouse controls and hotkeys.
- Understand Brushes: Experiment with different 3D brushes and their attributes.
- Work with ZSpheres: Learn to create base meshes using ZSpheres.
- Sculpt Basic Shapes: Practice sculpting simple shapes like spheres, cubes, and cylinders.
3.3. Intermediate Techniques
- Dynamesh: Learn to use Dynamesh for creating and refining your models.
- ZRemesher: Understand how to use ZRemesher to optimize your topology.
- Subdivision Levels: Work with subdivision levels to add detail to your models.
- Texturing: Learn to apply textures to your models using Polypaint and UV mapping.
- Rendering: Experiment with different rendering settings to create high-quality images.
3.4. Advanced Skills and Workflow
- Advanced Sculpting Techniques: Explore techniques like creating realistic skin pores, wrinkles, and folds.
- Custom Brushes: Learn to create and customize your own brushes.
- Scripting: Use ZBrush’s scripting capabilities to automate tasks and create custom tools.
- Integration with Other Software: Learn to integrate ZBrush with other software like Maya, Photoshop, and Substance Painter.
- 3D Printing: Prepare your models for 3D printing by optimizing the mesh and adding necessary supports.
3.5. Practice and Project Work
- Start with Simple Projects: Begin with simple projects like sculpting a basic head or creating a simple prop.
- Progress to Complex Projects: Gradually move on to more complex projects like creating a full character or a detailed environment.
- Seek Feedback: Share your work with other artists and seek feedback to improve your skills.
- Participate in Challenges: Participate in online challenges and contests to test your skills and learn from others.
4. Top Resources for Learning ZBrush
To accelerate your ZBrush learning journey, utilize the best resources available.
4.1. Online Courses
- LEARNS.EDU.VN: Offers structured courses tailored to different skill levels, providing personalized learning paths and expert guidance. (Of course!)
- Pixologic ZClassroom: Offers a wide range of free video tutorials covering various aspects of ZBrush.
- Udemy: Provides numerous ZBrush courses with certifications, ranging from beginner to advanced levels.
- Lynda.com (LinkedIn Learning): Offers in-depth courses on ZBrush, covering tips, tricks, and advanced techniques.
4.2. Books
| Book Title | Description |
|---|---|
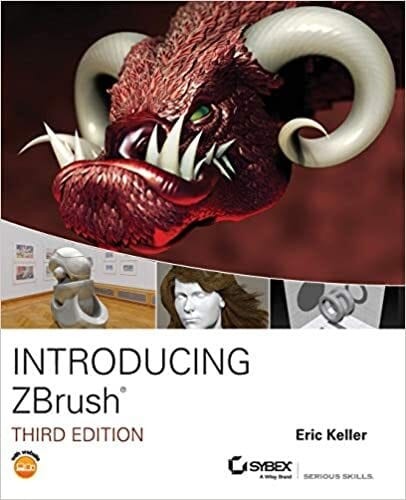
| Introducing ZBrush 3rd Edition by Eric Keller | A meticulous introduction to ZBrush, teaching you how sculpting works and how to create and export your digital art. It covers painting, textures, hard surface sculpting, rendering, lighting, and scripting 3D printing, and includes tutorials on how to create cartoons, humans, and organic objects. |
| Getting Started in ZBrush: An Introduction to Digital Sculpting and Illustration by Greg Johnson | A gentle introduction to ZBrush, starting with the basics of digital sculpting and guiding you through the user interface so that you can create professional 3D models. It also covers tasks like customizing brushes, scripts, and materials. |
| ZBrush Digital Sculpting Human Anatomy by Scott Spencer | Focuses on the fundamentals of human anatomy within ZBrush. It is essential for character artists and provides a solid foundation for creating realistic and stylized characters. |
| ZBrush Creature Design: From Concept to Completion by Alessandro Baldasseroni | This book is a step-by-step guide to designing creatures in ZBrush. Alessandro Baldasseroni, a renowned creature artist, shares his techniques for creating original and visually stunning creature designs, from initial concept to final render. |
| Mastering ZBrush by Paul Gaboury | An in-depth guide covering all aspects of ZBrush, from basic to advanced techniques. It includes detailed tutorials, tips, and tricks for optimizing your workflow and creating high-quality 3D models. This book is a valuable resource for both beginners and experienced ZBrush users looking to enhance their skills. |
4.3. Online Communities and Forums
- ZBrushCentral: The official ZBrush forum, where you can find tutorials, share your work, and get feedback from other artists.
- Polycount: A popular forum for game artists, with a dedicated ZBrush section.
- ArtStation: A platform for artists to showcase their work and connect with other professionals.
4.4. YouTube Channels
- Pixologic: The official ZBrush YouTube channel, featuring tutorials, demos, and interviews with industry professionals.
- Michael Pavlovich: Offers comprehensive ZBrush tutorials for beginners and advanced users.
- FlippedNormals: Provides high-quality tutorials on various 3D art topics, including ZBrush.
5. Optimizing Your Learning Experience
To make the most of your ZBrush learning journey, consider these tips.
5.1. Set Realistic Goals
Start with small, achievable goals and gradually increase the complexity of your projects. This will help you stay motivated and track your progress.
5.2. Focus on Fundamentals
Master the basics before moving on to advanced techniques. A strong foundation will make it easier to learn more complex skills.
5.3. Practice Regularly
Consistent practice is essential for improving your skills. Set aside time each day or week to work on ZBrush projects.
5.4. Seek Feedback
Share your work with other artists and ask for constructive criticism. This will help you identify areas for improvement and learn new techniques.
5.5. Stay Updated
ZBrush is constantly evolving, with new features and updates released regularly. Stay updated with the latest developments by following industry news and participating in online communities.
5.6. Customize Your Learning Approach
Adapt your learning approach to suit your learning style. Experiment with different resources and techniques to find what works best for you.
5.7. Focus on Problem-Solving
Learning ZBrush involves problem-solving. When you encounter a challenge, research solutions, experiment with different approaches, and don’t be afraid to ask for help.
6. Monetizing Your ZBrush Skills
Once you’ve developed your ZBrush skills, you can explore various ways to monetize your expertise.
6.1. Freelance Work
Offer your services as a freelance 3D artist on platforms like Upwork, Fiverr, and ArtStation. You can work on projects such as character design, environment modeling, and product visualization.
6.2. Create and Sell 3D Assets
Create and sell 3D models, textures, and brushes on marketplaces like TurboSquid, CGTrader, and Gumroad. This can be a passive income stream that generates revenue over time.
6.3. Offer ZBrush Training
Share your knowledge and expertise by offering ZBrush training to others. You can create online courses, conduct workshops, or provide one-on-one tutoring.
6.4. Work in the Gaming Industry
Apply your ZBrush skills in the gaming industry as a character artist, environment artist, or prop modeler. Many game studios are constantly looking for talented 3D artists.
6.5. Work in the Film Industry
Use your ZBrush skills to create characters, creatures, and visual effects for movies and TV shows. This can be a challenging but rewarding career path.
7. Real-World Examples and Case Studies
Let’s look at a few examples of how ZBrush is used in real-world scenarios and case studies of artists who have successfully integrated ZBrush into their workflows.
7.1. Case Study: Character Design for Video Games
Artist: Maria Petrova, Lead Character Artist at a major game studio
Project: Creating main characters for a AAA fantasy RPG
Approach: Maria uses ZBrush to sculpt high-resolution character models, focusing on intricate details such as facial expressions, armor textures, and clothing folds. She starts with a base mesh and progressively adds detail using various brushes and techniques.
Challenges: Maintaining consistent style across multiple characters, optimizing models for real-time rendering.
Solutions: Developed a set of custom brushes and materials to ensure consistency. Used ZRemesher to optimize topology for performance.
Results: Successfully created compelling and visually stunning characters that enhanced the game’s narrative and visual appeal.
7.2. Case Study: Visual Effects for Film
Company: Digital Illusions, a VFX studio
Project: Creating realistic creatures for a sci-fi movie
Approach: The team at Digital Illusions used ZBrush to sculpt detailed creature models with realistic skin textures, scales, and anatomical features. They collaborated closely with the film’s art director to ensure the creatures fit the movie’s aesthetic.
Challenges: Achieving a high level of realism, integrating digital models with live-action footage.
Solutions: Employed advanced sculpting techniques to create realistic details. Used ZBrush’s rendering capabilities to generate high-quality renders that seamlessly blended with live footage.
Results: Created memorable and believable creatures that enhanced the movie’s visual impact and storytelling.
7.3. Case Study: Product Design for Automotive Industry
Designer: Kenji Tanaka, Automotive Designer
Project: Prototyping a new car model
Approach: Kenji used ZBrush to quickly create and iterate on different design concepts. He sculpted various parts of the car, focusing on aerodynamic features and aesthetic appeal.
Challenges: Translating design concepts into manufacturable prototypes, optimizing designs for production.
Solutions: Used ZBrush’s sculpting tools to create detailed models. Collaborated with engineers to ensure designs were feasible for manufacturing.
Results: Rapidly developed and refined design concepts, leading to a successful and innovative car model.
8. The Impact of ZBrush on the Creative Industries
ZBrush has revolutionized the creative industries by providing artists with a powerful tool for creating high-quality 3D models. Its impact is seen across various sectors:
8.1. Enhancing Visual Quality
ZBrush allows artists to create models with a level of detail that was previously unattainable. This enhances the visual quality of movies, games, and other media.
8.2. Streamlining Workflows
ZBrush streamlines the 3D modeling process, allowing artists to create models more quickly and efficiently. This reduces production time and costs.
8.3. Fostering Innovation
ZBrush fosters innovation by enabling artists to experiment with new ideas and techniques. Its flexibility and versatility encourage creativity and push the boundaries of what is possible.
8.4. Empowering Independent Artists
ZBrush empowers independent artists by providing them with the tools they need to create professional-quality 3D models. This allows them to compete with larger studios and pursue their creative visions.
9. Staying Current with ZBrush
The world of digital art and 3D modeling is constantly evolving. To stay current with ZBrush and the industry, consider the following:
9.1. Follow Industry Blogs and Websites
Stay informed about the latest news, trends, and techniques by following industry blogs and websites. Some popular resources include ZBrushCentral, ArtStation, and CGTrader.
9.2. Attend Conferences and Workshops
Attend industry conferences and workshops to network with other artists, learn from experts, and stay up-to-date on the latest technologies.
9.3. Participate in Online Communities
Engage with other artists in online communities and forums. Share your work, ask questions, and learn from others’ experiences.
9.4. Experiment with New Features
ZBrush releases new features and updates regularly. Experiment with these new features to expand your skillset and stay ahead of the curve.
9.5. Continuously Learn and Practice
The key to staying current with ZBrush is to continuously learn and practice. Set aside time each week to work on new projects and explore new techniques.
10. Frequently Asked Questions (FAQ) about Learning ZBrush
Q1: Is ZBrush difficult to learn?
A: ZBrush has a unique interface and many features, which can seem daunting at first. However, with consistent practice and the right resources, anyone can learn it.
Q2: Can I learn ZBrush for free?
A: Yes, Pixologic offers ZBrushCoreMini, a free version of ZBrush with limited features. You can also find many free tutorials and resources online.
Q3: What are the system requirements for running ZBrush?
A: ZBrush requires a computer with a 64-bit operating system, a multi-core processor, and at least 8 GB of RAM. Check the ZBrush website for detailed system requirements.
Q4: Do I need to know how to draw to learn ZBrush?
A: While drawing skills can be helpful, they are not essential for learning ZBrush. The software is designed to mimic traditional sculpting techniques, so a good understanding of form and anatomy is more important.
Q5: What is the difference between ZBrush and other 3D modeling software like Blender or Maya?
A: ZBrush is primarily a sculpting tool, while Blender and Maya are more general-purpose 3D modeling software. ZBrush excels at creating high-resolution models with intricate details, while Blender and Maya are better suited for animation, rigging, and other tasks.
Q6: How important is anatomy knowledge for ZBrush artists?
A: Anatomy knowledge is crucial for creating realistic and believable characters. Studying anatomy will help you understand the underlying structure of the human body and how to sculpt it accurately.
Q7: What are the best resources for learning human anatomy for ZBrush?
A: Some great resources for learning human anatomy include books like “Anatomy for Sculptors” and online courses on platforms like Anatomy 360.
Q8: Can I use ZBrush for 3D printing?
A: Yes, ZBrush is widely used for creating models for 3D printing. You can use ZBrush’s tools to optimize your models for printing and add necessary supports.
Q9: How can I optimize my ZBrush models for real-time rendering?
A: To optimize your ZBrush models for real-time rendering, you can use techniques like ZRemesher to reduce the polygon count and bake high-resolution details into textures.
Q10: Where can I find ZBrush communities and forums to connect with other artists?
A: You can find ZBrush communities and forums on platforms like ZBrushCentral, Polycount, and ArtStation. These communities are great for sharing your work, asking questions, and getting feedback from other artists.
Learning ZBrush can be a rewarding journey, opening doors to various creative opportunities. By understanding the software, setting realistic goals, and utilizing the available resources, you can master ZBrush and create stunning 3D art. Remember, consistent practice and a passion for learning are key to success.
Ready to start your ZBrush journey? Visit learns.edu.vn today to explore our comprehensive ZBrush courses and unlock your creative potential. Our expert instructors and personalized learning paths will guide you every step of the way. Don’t wait; your dream of becoming a 3D artist is just a click away! Contact us at 123 Education Way, Learnville, CA 90210, United States or Whatsapp: +1 555-555-1212.