Learning how to do a back walkover can be an exciting and rewarding journey, enhancing your flexibility, strength, and coordination, especially with the expert guidance available at LEARNS.EDU.VN. Mastering this gymnastic skill requires a structured approach, building a strong foundation through progressive training and technique refinement. Discover essential tips, expert advice, and resources for mastering the back walkover, enabling you to achieve this impressive feat with confidence and flair, improving your overall physical abilities.
1. Understanding the Back Walkover
The back walkover is a fundamental skill in gymnastics, dance, and cheerleading that showcases flexibility, strength, and body control. Performing a back walkover involves a fluid motion, starting from a standing position, arching backward to place your hands on the ground, and then kicking your legs over your head to return to a standing position. Mastering this move is not only an impressive feat but also a stepping stone to more advanced skills.
1.1. What is a Back Walkover?
A back walkover is a gymnastic movement where you transition from standing to a backbend, touch your hands to the floor, kick your legs over, and stand back up. This skill showcases flexibility and strength. It is often a prerequisite for more advanced gymnastic moves.
1.2. Why Learn a Back Walkover?
Learning a back walkover has numerous benefits:
- Flexibility: Enhances spinal and shoulder flexibility.
- Strength: Builds core and upper body strength.
- Coordination: Improves body awareness and coordination.
- Foundation: Serves as a building block for more advanced gymnastic skills.
1.3. Who Can Learn a Back Walkover?
While a basic level of flexibility and strength is helpful, the back walkover is attainable for people of various ages and fitness levels with consistent practice and proper guidance. Those with pre-existing back or joint issues should consult a healthcare professional before attempting this skill.
2. Prerequisites and Essential Skills
Before attempting a back walkover, it’s crucial to master some foundational skills that will make the learning process smoother and safer. These prerequisites build the necessary strength, flexibility, and coordination.
2.1. Handstand Mastery
The handstand is a fundamental skill for gymnastics. It develops the necessary upper body strength and balance required for a back walkover.
- Why It’s Important: A strong handstand builds confidence and stability.
- How to Practice: Start with wall-assisted handstands, gradually increasing the duration you can hold the position.
2.2. Bridge Pose
The bridge pose enhances spinal flexibility and strengthens the core muscles, essential for arching backward.
- Why It’s Important: The bridge pose prepares your spine for the backbend.
- How to Practice: Lie on your back, bend your knees, and lift your hips off the ground, pushing through your feet and shoulders.
2.3. Backbend Kickover
The backbend kickover involves transitioning from a bridge position to standing. It builds confidence and teaches the mechanics of kicking over.
- Why It’s Important: It mimics the leg movement in a back walkover.
- How to Practice: Start in a bridge position and kick one leg over your head until you stand up.
2.4. Flexibility Training
Regular stretching improves range of motion and reduces the risk of injury. Focus on stretching the back, shoulders, and hamstrings.
- Why It’s Important: Flexibility is crucial for a smooth and safe back walkover.
- Recommended Stretches: Include cat-cow pose, shoulder stretches, and hamstring stretches in your routine.
3. Step-by-Step Guide to Learning a Back Walkover
Once you’ve mastered the prerequisites, you can start learning the back walkover step by step. Each phase focuses on a specific component of the movement.
3.1. Starting Position
- Stance: Stand tall with one leg slightly in front of the other.
- Arm Placement: Extend your arms straight up by your ears.
- Focus: Maintain a straight line from your hands to your front foot.
3.2. The Backbend
- Initiation: Slowly lean backward, keeping your core engaged.
- Arm Movement: Keep your arms by your ears as you reach back.
- Head Position: Keep your eyes focused on your hands for guidance.
3.3. Hand Placement
- Reaching Back: Continue arching until your hands reach the floor.
- Finger Direction: Point your fingers toward your feet.
- Weight Distribution: Distribute your weight evenly between your hands.
3.4. Kicking Over
- Leg Drive: Kick your dominant leg over your head.
- Core Engagement: Use your core to lift your legs.
- Straight Legs: Keep both legs straight as you kick over.
3.5. Landing
- Controlled Landing: Plant your feet one at a time, landing in a lunge position.
- Arm Position: Keep your arms by your ears as you stand up.
- Balance: Maintain balance as you return to a standing position.
4. Essential Drills and Exercises
Drills and exercises help to reinforce the necessary skills and build muscle memory. Incorporate these drills into your training routine to accelerate your progress.
4.1. Wall Walks
- Description: Stand facing a wall, reach back, and walk your hands down the wall into a bridge position.
- Benefits: Improves back flexibility and builds confidence in the backbend.
- How to Perform: Start close to the wall and gradually increase the distance as you become more comfortable.
4.2. Bridge Push-Ups
- Description: Perform push-ups while in a bridge position.
- Benefits: Strengthens the arms and shoulders while maintaining spinal flexibility.
- How to Perform: Start in a bridge position and lower your chest towards the ground, then push back up.
4.3. Leg Lifts
- Description: Lie on your back and lift your legs straight up.
- Benefits: Strengthens core muscles needed for lifting the legs during the kickover.
- How to Perform: Keep your legs straight and lift them towards the ceiling, engaging your core.
4.4. Spotting Drills
- Description: Have a spotter assist you with the back walkover motion.
- Benefits: Provides support and guidance, building confidence in the full movement.
- How to Perform: A spotter stands beside you, supporting your back as you lean back and kick over.
5. Strengthening Exercises for Back Walkovers
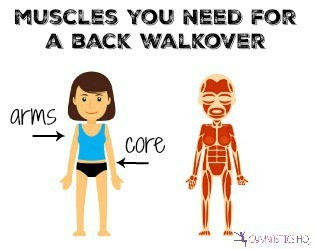
Strength training is crucial for performing a back walkover safely and effectively. Focus on exercises that target the core, back, shoulders, and legs.
5.1. Core Strengthening
A strong core is essential for controlling your body during the back walkover.
- Planks: Hold a plank position for 30-60 seconds to engage your core muscles.
- Crunches: Perform crunches to strengthen your abdominal muscles.
- Leg Raises: Lift your legs while lying on your back to engage your lower abs.
- Russian Twists: Twist your torso from side to side while holding a weight or medicine ball.
5.2. Back Strengthening
A strong back supports the spine and helps maintain balance during the backbend.
- Supermans: Lie on your stomach and lift your arms and legs simultaneously.
- Back Extensions: Use a back extension machine to strengthen your lower back muscles.
- Rows: Perform rows with dumbbells or a barbell to strengthen your upper back.
5.3. Shoulder Strengthening
Strong shoulders are necessary for supporting your weight during the handstand phase.
- Push-Ups: Perform push-ups to strengthen your chest, shoulders, and triceps.
- Dumbbell Raises: Lift dumbbells to the front, side, and overhead to strengthen your shoulder muscles.
- Overhead Press: Use a barbell or dumbbells to press weight overhead.
5.4. Leg Strengthening
Strong legs provide the power needed for the kickover and landing.
- Squats: Perform squats to strengthen your quadriceps, hamstrings, and glutes.
- Lunges: Step forward into a lunge position to work your leg muscles.
- Calf Raises: Stand on your toes to strengthen your calf muscles.
6. Common Mistakes and How to Avoid Them
Awareness of common mistakes can help you avoid them and improve your technique more efficiently.
6.1. Not Engaging the Core
- Mistake: Neglecting to engage the core muscles during the backbend and kickover.
- Solution: Focus on squeezing your abdominal muscles throughout the entire movement to maintain control and stability.
6.2. Bending Arms During Hand Placement
- Mistake: Bending the arms when placing your hands on the floor.
- Solution: Keep your arms straight to support your weight effectively and prevent injury.
6.3. Rushing the Movement
- Mistake: Trying to perform the back walkover too quickly.
- Solution: Focus on controlled, deliberate movements to maintain balance and proper form.
6.4. Not Kicking Over Enough
- Mistake: Hesitating or not kicking over with enough force.
- Solution: Practice kicking over with confidence and ensuring your legs are straight to generate enough momentum.
6.5. Neglecting Flexibility Training
- Mistake: Skipping stretching and flexibility exercises.
- Solution: Incorporate regular stretching into your routine to improve range of motion and reduce the risk of injury.
7. Safety Precautions
Safety is paramount when learning a back walkover. Follow these precautions to prevent injuries.
7.1. Use a Spotter
- Importance: A spotter provides support and guidance, especially when you’re first learning the skill.
- How to Use: Have the spotter stand beside you, supporting your back and hips as you lean back and kick over.
7.2. Practice on Soft Surfaces
- Importance: Soft surfaces like mats or grass can cushion your fall and reduce the risk of injury.
- Recommended Surfaces: Gymnastics mats, padded floors, or soft grass.
7.3. Warm-Up Properly
- Importance: Warming up prepares your muscles for activity and reduces the risk of strains and sprains.
- Warm-Up Exercises: Include light cardio, dynamic stretching, and joint mobility exercises.
7.4. Listen to Your Body
- Importance: Pay attention to any pain or discomfort and avoid pushing yourself too hard.
- What to Do: Rest and recover if you experience pain, and consult a healthcare professional if necessary.
7.5. Gradual Progression
- Importance: Progress gradually, mastering each step before moving on to the next.
- How to Progress: Start with basic skills and gradually increase the difficulty as you gain strength and confidence.
8. Overcoming Fear and Mental Blocks
Learning a back walkover can be mentally challenging. Overcoming fear and mental blocks is essential for progress.
8.1. Visualization
- Description: Mentally rehearse the back walkover to build confidence.
- How to Practice: Close your eyes and visualize yourself performing the skill successfully, focusing on each step.
8.2. Positive Self-Talk
- Description: Use positive affirmations to boost your confidence.
- Examples: Tell yourself, “I am strong,” “I am flexible,” and “I can do this.”
8.3. Breaking Down the Skill
- Description: Divide the back walkover into smaller, manageable parts.
- How to Practice: Focus on mastering each component before putting them together.
8.4. Celebrate Small Victories
- Description: Acknowledge and celebrate your progress, no matter how small.
- Why It’s Important: Positive reinforcement boosts motivation and builds confidence.
8.5. Seek Support
- Description: Talk to a coach, mentor, or friend about your fears and challenges.
- Benefits: Sharing your concerns can help you gain perspective and find solutions.
9. Training Schedule for Learning a Back Walkover
A structured training schedule helps you stay consistent and track your progress. Here’s a sample schedule:
| Day | Activity | Duration |
|---|---|---|
| Monday | Warm-up, Flexibility Training, Core Work | 60 mins |
| Tuesday | Skill Drills, Spotting Drills | 60 mins |
| Wednesday | Rest or Light Cardio | 30 mins |
| Thursday | Warm-up, Strength Training, Leg Work | 60 mins |
| Friday | Skill Drills, Wall Walks | 60 mins |
| Saturday | Rest or Active Recovery | 30 mins |
| Sunday | Full Body Stretch, Relaxation | 45 mins |
Important Considerations:
- Customize: Adjust the schedule to fit your fitness level and goals.
- Listen to Your Body: Take rest days when needed to prevent overtraining.
- Consistency: Aim for consistency to see continuous improvement.
10. Advanced Tips and Techniques
Once you’ve mastered the basic back walkover, you can refine your technique with these advanced tips.
10.1. Improving Flexibility
- Advanced Stretches: Incorporate deeper backbends, shoulder stretches, and hamstring stretches.
- Hold Stretches Longer: Increase the duration of your stretches to improve flexibility.
- Yoga and Pilates: Practice yoga and Pilates to enhance flexibility and core strength.
10.2. Refining Technique
- Smooth Transitions: Focus on creating a seamless transition between each phase of the back walkover.
- Controlled Movements: Maintain control throughout the entire movement, avoiding jerky motions.
- Proper Alignment: Ensure your body is properly aligned, with your head, shoulders, and hips in a straight line.
10.3. Increasing Speed and Power
- Explosive Kicking: Generate more power in your kickover for a faster rotation.
- Core Engagement: Engage your core muscles to control your body during the rotation.
- Practice Speed Drills: Perform drills that focus on increasing the speed of your back walkover.
10.4. Variation and Creativity
- Back Walkover Variations: Try different variations, such as a one-handed back walkover or a back walkover with a split.
- Incorporate into Routines: Add the back walkover to dance routines, gymnastics routines, or cheerleading routines.
11. Staying Motivated and Tracking Progress
Staying motivated is crucial for long-term success. Track your progress and celebrate your achievements to stay inspired.
11.1. Set Realistic Goals
- Description: Set achievable goals that are specific, measurable, attainable, relevant, and time-bound (SMART).
- Examples: Aim to improve your back flexibility by a certain percentage each week or master a specific component of the back walkover within a month.
11.2. Keep a Training Journal
- Description: Record your workouts, progress, and challenges in a training journal.
- Benefits: Helps you track your progress, identify patterns, and stay accountable.
11.3. Reward Yourself
- Description: Treat yourself when you achieve a goal or milestone.
- Examples: Enjoy a relaxing massage, buy new workout gear, or indulge in a healthy treat.
11.4. Join a Community
- Description: Connect with other people who are learning or have mastered the back walkover.
- Benefits: Provides support, motivation, and inspiration.
11.5. Visualize Success
- Description: Regularly visualize yourself achieving your goals and performing the back walkover flawlessly.
- Benefits: Builds confidence and reinforces positive outcomes.
12. Resources and Tools for Learning
Utilize these resources and tools to enhance your learning experience.
12.1. Online Tutorials
- Description: Access online tutorials and videos that demonstrate proper technique.
- Recommended Channels: YouTube channels dedicated to gymnastics and fitness.
12.2. Gymnastics Coaches
- Description: Seek guidance from qualified gymnastics coaches who can provide personalized instruction.
- Benefits: Expert feedback, spotting assistance, and tailored training plans.
12.3. Gymnastics Equipment
- Description: Use gymnastics equipment such as mats, balance beams, and spotting blocks to enhance your training.
- Where to Find: Gymnastics supply stores or online retailers.
12.4. Fitness Apps
- Description: Utilize fitness apps to track your progress, set goals, and stay motivated.
- Recommended Apps: Apps that track flexibility, strength, and workout routines.
12.5. Books and Guides
- Description: Read books and guides that provide detailed information on gymnastics and flexibility training.
- Benefits: In-depth knowledge, illustrations, and step-by-step instructions.
13. Nutrition and Recovery
Proper nutrition and recovery are vital for optimizing your training and preventing injuries.
13.1. Balanced Diet
- Description: Consume a balanced diet that includes protein, carbohydrates, healthy fats, vitamins, and minerals.
- Why It’s Important: Provides the energy and nutrients needed for training and recovery.
13.2. Hydration
- Description: Drink plenty of water throughout the day to stay hydrated.
- Why It’s Important: Supports muscle function, prevents dehydration, and aids recovery.
13.3. Sleep
- Description: Get adequate sleep each night to allow your body to recover and repair.
- Recommended Amount: Aim for 7-9 hours of sleep per night.
13.4. Active Recovery
- Description: Engage in light activities such as walking, swimming, or yoga to promote recovery.
- Why It’s Important: Improves circulation, reduces muscle soreness, and prevents stiffness.
13.5. Massage Therapy
- Description: Receive regular massage therapy to release muscle tension and promote relaxation.
- Benefits: Reduces muscle soreness, improves flexibility, and aids recovery.
14. Long-Term Maintenance and Improvement
Once you’ve mastered the back walkover, it’s important to maintain your skills and continue to improve.
14.1. Consistent Practice
- Description: Continue to practice the back walkover regularly to maintain your skills.
- Recommended Frequency: Aim for at least a few times a week.
14.2. Regular Flexibility Training
- Description: Continue to incorporate flexibility training into your routine to maintain your range of motion.
- Stretching Routine: Perform stretches that target your back, shoulders, and hamstrings.
14.3. Strength Training
- Description: Continue to engage in strength training to maintain your muscle strength.
- Recommended Exercises: Focus on exercises that target your core, back, shoulders, and legs.
14.4. Set New Challenges
- Description: Set new challenges to continue improving your skills.
- Examples: Try learning advanced variations of the back walkover or incorporating it into more complex routines.
14.5. Seek Expert Advice
- Description: Continue to seek advice from qualified coaches and trainers to refine your technique and prevent injuries.
- Benefits: Expert feedback, personalized training plans, and ongoing support.
15. The Role of LEARNS.EDU.VN in Your Learning Journey
LEARNS.EDU.VN offers a wide array of resources tailored to support your journey in mastering the back walkover. Whether you’re looking for detailed tutorials, expert guidance, or structured training programs, our platform provides the tools and knowledge you need to succeed. Discover the support and expertise you need to achieve your gymnastic goals with confidence and skill at LEARNS.EDU.VN.
15.1. Expert Tutorials and Guides
LEARNS.EDU.VN provides detailed tutorials and guides that break down the back walkover into easy-to-follow steps. These resources include video demonstrations, written instructions, and helpful tips.
15.2. Personalized Training Programs
Our platform offers personalized training programs designed to fit your individual needs and goals. These programs are tailored to your fitness level, experience, and objectives.
15.3. Community Support
Connect with a community of fellow learners and experts who can provide support, motivation, and encouragement. Share your progress, ask questions, and learn from others’ experiences.
15.4. Access to Expert Coaches
LEARNS.EDU.VN connects you with certified gymnastics coaches who can provide personalized guidance and feedback. These coaches offer one-on-one sessions, group classes, and online consultations.
15.5. Progress Tracking Tools
Utilize our progress tracking tools to monitor your achievements, set goals, and stay motivated. Visualize your progress and celebrate your successes along the way.
FAQ: Your Questions Answered
Q1: What is the most challenging part of learning a back walkover?
The most challenging part is often overcoming the fear of going backward and trusting your body to perform the skill.
Q2: How long does it typically take to learn a back walkover?
It varies depending on your fitness level, flexibility, and dedication, but most people can learn it within a few months with consistent practice.
Q3: Can I learn a back walkover at home without a coach?
While it’s possible, it’s highly recommended to work with a coach, especially when starting. A coach can provide guidance and ensure your safety.
Q4: What are the best stretches for improving back flexibility?
Cat-cow pose, bridge pose, and back extensions are excellent for improving back flexibility.
Q5: What should I do if I feel pain while practicing?
Stop immediately and rest. Consult a healthcare professional if the pain persists.
Q6: Is it necessary to have a gymnastics background to learn a back walkover?
No, it’s not necessary. With consistent practice and proper training, anyone can learn it.
Q7: How can I improve my balance during the landing?
Focus on engaging your core and maintaining a stable base by keeping your feet grounded.
Q8: What equipment do I need to practice a back walkover?
A gymnastics mat and comfortable workout clothes are essential. Spotting blocks and a balance beam can be helpful as you progress.
Q9: How often should I train to see results?
Aim for at least 3-4 training sessions per week for consistent progress.
Q10: What are some common variations of the back walkover?
Variations include the one-handed back walkover, back walkover with a split, and back walkover on a beam.
Ready to embark on your journey to master the back walkover? LEARNS.EDU.VN is here to guide you every step of the way. Visit our website today and discover the resources, tools, and support you need to achieve your gymnastic goals. Start learning now at LEARNS.EDU.VN and unlock your full potential!
Contact Information:
- Address: 123 Education Way, Learnville, CA 90210, United States
- WhatsApp: +1 555-555-1212
- Website: learns.edu.vn