Screen printing, also known as silk screen printing, offers a vibrant and versatile way to transfer designs onto fabric, paper, and other materials. This comprehensive guide provides a step-by-step approach for beginners eager to learn this popular printing technique. From gathering essential supplies to mastering basic techniques, we’ll equip you with the knowledge to create your own stunning prints.
Understanding the Basics of Screen Printing
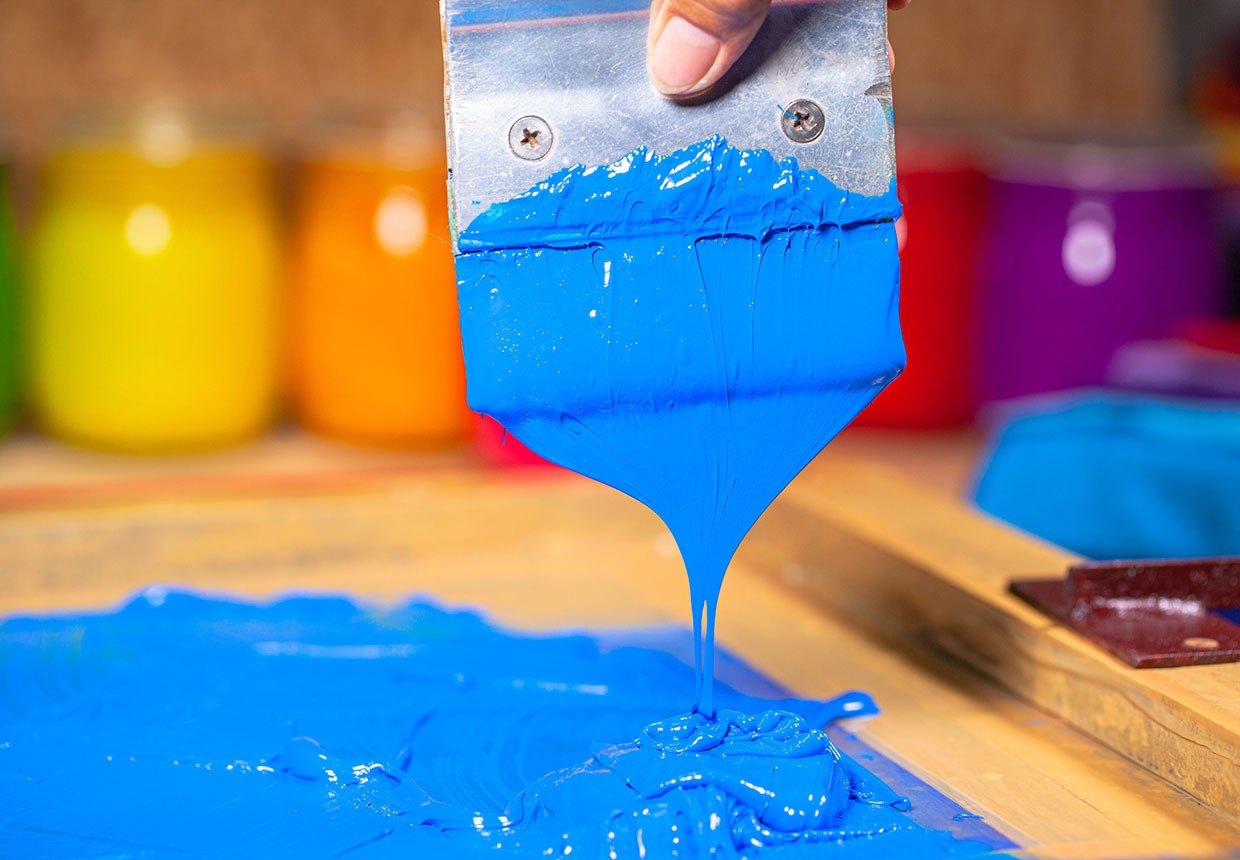
Screen printing involves pushing ink through a fine mesh screen stretched tautly over a frame. A stencil is used to block out areas of the screen, allowing ink to pass through only where desired, creating the imprinted design.
The process relies on a few key elements:
- Screen Printing Frame: A sturdy frame, typically wooden or aluminum, holding the stretched mesh. Common sizes include A4 and A3.
- Mesh Screen: Traditionally made from silk (hence “silk screen printing”), modern screens often use synthetic fabrics like nylon for durability.
- Stencil: A design cut from paper, cardstock, or acetate, used to block ink flow on the screen. Specialized screen blocking paint can also be used.
- Squeegee: A rubber or plastic blade used to evenly distribute ink across the screen and push it through the mesh onto the printing surface.
- Ink: Acrylic-based inks are commonly used for screen printing, often mixed with a printing medium to adjust opacity and consistency.
Gathering Your Screen Printing Supplies
Before you begin, gather the following essential materials:
- Screen printing frame
- Acrylic ink in your desired colors
- Acrylic printing medium
- Stencil material (paper, cardstock, or acetate)
- Craft knife and cutting mat
- Paper or fabric for printing
- Squeegee
- Masking tape (optional, for securing stencils)
Step-by-Step Guide to Screen Printing
1. Designing and Cutting Your Stencil
Start with a simple, bold design. Draw it onto your stencil material and carefully cut it out using a craft knife and cutting mat. Precision is key for clean print results. Pre-made stencils are also available in many craft stores.
2. Preparing Your Screen and Ink
Secure your stencil to the underside of your screen using masking tape. Mix your acrylic ink with the printing medium, typically in a 50:50 ratio for opaque coverage. Adjust the ratio for desired transparency.
3. Applying the Ink and Printing
Place your screen on top of your printing surface. Pour a line of ink along the top edge of the screen. Holding the squeegee at a 45-degree angle, make a firm, even pass across the screen, pushing the ink through the mesh onto the material below.
4. Drying and Heat Setting (for Fabric)
Allow the ink to dry completely. If printing on fabric, heat set the design with an iron to ensure permanence. Clean your screen thoroughly with cold water after each use.
Conclusion
Learning silk screen printing opens up a world of creative possibilities. With practice and experimentation, you can master this technique and create unique, personalized designs on a variety of surfaces. Explore different inks, stencils, and color combinations to develop your own style and bring your artistic vision to life.