If you find the “Learn more about this picture” icon from Windows Spotlight on your Windows 11 desktop distracting, you can easily remove it. This guide will show you how to hide this icon while still enjoying Spotlight’s beautiful wallpapers.
Advertisement
Windows Spotlight is a popular feature among Windows users, first introduced in Windows 10 as a Lock Screen background option. It automatically updates your lock screen with stunning images downloaded from the internet.
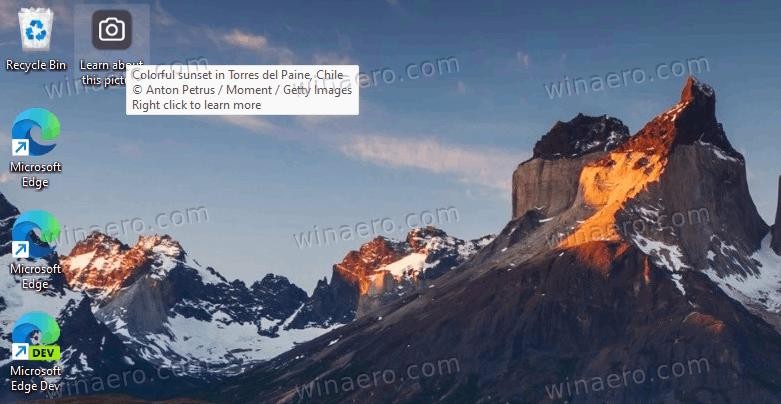
Windows 11 Spotlight Desktop Icon displaying image details in the tooltip
Windows 11 expanded Spotlight’s functionality to the desktop, allowing you to set it as your desktop background. This means you can enjoy a constantly refreshing display of nature scenes, landscapes, and beautiful scenery directly on your desktop wallpaper, without needing to lock your computer.
When you enable Spotlight as your desktop background, Windows 11 adds a “Learn more about this picture” icon to your desktop. This icon provides extra information about the current wallpaper image. Interestingly, it even works with standard, pre-installed wallpapers. Furthermore, right-clicking the icon provides a context menu that allows you to switch to the next background image or vote (upvote/downvote) on the current one.
Currently, Windows 11 settings do not include a direct option to hide this desktop icon. Once Spotlight is set to manage your wallpapers, the icon remains visible. To remove the “Learn more about this picture” desktop icon, you’ll need to use a Registry tweak.
If you wish to remove the Spotlight icon from your Windows 11 desktop, follow the steps below.
Contents hide
Remove “Learn more about this picture” Icon from Desktop
Ready-to-use Registry Files
Using Winaero Tweaker
Remove the Spotlight Icon from Desktop in Windows 11
Remove “Learn more about this picture” Icon from Desktop
This method involves editing the Windows Registry to hide the “Learn more about this picture” icon. Please follow these steps carefully:
-
Press Win + R keys to open the Run dialog box. Type
regeditand press Enter to open the Registry Editor. -
In the Registry Editor, navigate to the following key using the left-hand pane:
HKEY_CURRENT_USERSoftwareMicrosoftWindowsCurrentVersionExplorerHideDesktopIconsNewStartPanel -
Right-click on the NewStartPanel key in the left pane, select New > DWORD (32-bit) Value from the context menu.
Creating a new DWORD value in Registry Editor to remove the Spotlight desktop icon
-
Name the new value as
{2cc5ca98-6485-489a-920e-b3e88a6ccce3}and double-click it to modify its data. -
In the Edit DWORD (32-bit) Value dialog, change the Value data from
0to1. Click OK.
Setting the DWORD value to 1 to remove the Windows Spotlight desktop icon
- Right-click anywhere on your desktop and select Refresh from the context menu. The “Learn more about this picture” icon should now disappear from your desktop.
Refreshing the Windows 11 desktop after applying the Registry tweak to remove the Spotlight icon
As shown in the screenshot below, the “Learn more about this picture” icon is no longer visible on the desktop.
Windows 11 desktop after successfully removing the “Learn more about this picture” icon
You have successfully removed the icon. To restore the icon at any time, simply delete the {2cc5ca98-6485-489a-920e-b3e88a6ccce3} value you created in the Registry.
Deleting the DWORD value to restore the Windows Spotlight desktop icon
Ready-to-use Registry Files
For a quicker and easier method, you can use pre-made Registry files. This eliminates manual Registry editing.
Download this ZIP archive and extract its contents to a folder of your choice.
Extracted Registry files for removing and restoring the Windows Spotlight desktop icon
Locate and open the remove windows spotlight icon from desktop.reg file. Windows User Account Control (UAC) may prompt you for permission; click Yes to proceed.
After running the file, refresh your desktop. This will remove the Windows Spotlight icon from the desktop in Windows 11.
Refreshing the desktop after applying the Registry file to remove the “Learn more about this picture” icon
The archive also includes an add windows spotlight icon to desktop.reg file. Run this file to undo the tweak and restore the icon if desired.
Besides Registry modifications, alternative methods are available to achieve the same result.
Using Winaero Tweaker
Winaero Tweaker offers a user-friendly interface to remove the Spotlight desktop icon. Version 1.40 and later include a dedicated option for this.
Download Winaero Tweaker from here, install, and launch the application. Navigate to Windows 11 > Windows Spotlight Desktop Icon in the left navigation pane.
Winaero Tweaker interface with the option to disable the Windows Spotlight desktop icon
On the right side, check the box next to “Disable Windows Spotlight Desktop Icon”. You may need to manually refresh your desktop or sign out and back into your user account for the change to take effect.
To restore the icon, simply uncheck the “Disable Windows Spotlight Desktop Icon” option within Winaero Tweaker.
Winaero Tweaker provides numerous other customization options for Windows 11, such as enabling full extended context menus and customizing taskbar icon display. It offers a wide range of features to enhance your Windows 11 experience.
Winaero Tweaker also supports exporting and importing settings, allowing you to easily apply your preferred configurations across multiple devices or after a clean installation.
Remove the Spotlight Icon from Desktop in Windows 11 using ExplorerPatcher
Another method involves using the free and open-source application ExplorerPatcher. This tool allows for extensive customization of Windows 11, including hiding the Spotlight desktop icon, without manual tweaking.
Here’s how to use ExplorerPatcher to hide the Spotlight desktop icon in Windows 11:
-
Download the latest version of ExplorerPatcher from the author’s GitHub page.
-
Run the downloaded installer file and follow the on-screen instructions.
-
After installation, your taskbar may resemble the Windows 10 style. Right-click on the taskbar and select Properties from the menu.
Accessing ExplorerPatcher Properties by right-clicking on the taskbar
- In the ExplorerPatcher Properties window, navigate to the Spotlight section in the left-hand menu. Then, select the option “Hide the “Learn about this picture” icon”.
ExplorerPatcher Spotlight settings with the option to hide the “Learn about this picture” icon highlighted
- If you prefer the modern Windows 11 taskbar, you can revert to it by navigating to the Taskbar section in ExplorerPatcher Properties and selecting your preferred taskbar style.
ExplorerPatcher Taskbar settings allowing users to switch between Windows 10 and Windows 11 taskbar styles
That’s it! Regardless of the method you choose, the Windows Spotlight icon will no longer appear on your desktop.
To uninstall ExplorerPatcher, open Settings (Win + I), go to Apps > Installed apps. Locate ExplorerPatcher in the list, click the three dots button next to it, and select Uninstall. Follow the prompts to remove the application.
You have successfully removed the “Learn more about this picture” icon from your Windows 11 desktop.
RECOMMENDED: Click here to fix Windows issues and optimize system performance
Support Us
Winaero relies on community support. You can help us continue providing valuable content and software by supporting us through the following options:
If you found this article helpful, please share it using the social media buttons below. Your support helps us grow and continue providing helpful content. Thank you!