Embroidery learning is now more accessible than ever, especially with resources like LEARNS.EDU.VN offering structured guidance. Whether you’re picking up a needle for the first time or aiming to refine your skills, this comprehensive guide will walk you through everything you need to know about embroidery, from basic stitches to advanced techniques, ensuring a fulfilling and creative journey in needlework and thread painting.
1. Understanding the Fundamentals of Learn Embroidery
Learn Embroidery is an art form that involves decorating fabric with needle and thread or other similar materials. It’s a craft that dates back centuries, evolving from simple functional repairs to intricate decorative designs. Understanding the basics is crucial before diving into more complex projects.
1.1. What is Embroidery?
Embroidery is more than just stitching; it’s a way to express creativity and personalize items. From clothing and home decor to accessories and art pieces, embroidery adds a unique touch. It can be done by hand or machine, each offering distinct advantages. Hand embroidery allows for greater control and intricate detailing, while machine embroidery is faster and suitable for mass production.
1.2. Why Learn Embroidery?
Embroidery offers a multitude of benefits, making it a worthwhile skill to acquire. It’s not only a creative outlet but also a therapeutic activity that can reduce stress and improve focus. Furthermore, learning embroidery can open doors to various opportunities, such as creating personalized gifts, embellishing clothing, or even starting a small business selling handmade items.
1.3. Essential Embroidery Supplies
Before you begin your embroidery journey, you’ll need to gather some essential supplies. These include:
- Embroidery Floss: Available in a variety of colors and materials, such as cotton, silk, and metallic threads.
- Embroidery Needles: These needles have a larger eye to accommodate embroidery floss.
- Fabric: Linen, cotton, and muslin are popular choices for beginners due to their ease of use.
- Embroidery Hoop: Used to keep the fabric taut while stitching, making it easier to create neat and even designs.
- Scissors: Small, sharp scissors are essential for trimming threads.
- Tracing Supplies: Used to transfer patterns onto fabric, including tracing paper, pencils, and water-soluble pens.
These basic supplies will provide a solid foundation for your embroidery projects. As you progress, you may want to explore additional tools and materials, but these are the essentials to get you started.
2. Essential Stitches for Learn Embroidery Beginners
Mastering a few basic stitches is crucial for any beginner in embroidery. These stitches form the foundation for more complex designs and techniques. LEARNS.EDU.VN provides detailed tutorials on each of these stitches, making it easy for you to learn and practice.
2.1. Running Stitch
The running stitch is one of the simplest and most versatile stitches in embroidery. It’s created by passing the needle in and out of the fabric in a straight line. This stitch is perfect for outlining shapes, creating dashed lines, or adding simple details to your designs.
2.2. Back Stitch
The back stitch creates a solid line and is often used for outlining and adding definition to designs. To create this stitch, bring the needle up through the fabric, then insert it back down a short distance away. Bring the needle up again, slightly ahead of the first stitch, and then insert it back down into the end of the previous stitch.
2.3. Satin Stitch
The satin stitch is used to fill in shapes with smooth, solid areas of color. It involves making a series of parallel stitches that are close together. This stitch is ideal for creating bold, eye-catching elements in your embroidery.
2.4. French Knot
The French knot is a decorative stitch that creates a small, raised dot on the fabric. To make a French knot, bring the needle up through the fabric, wrap the floss around the needle once or twice, and then insert the needle back down close to the point where it emerged. This stitch is perfect for adding texture and dimension to your embroidery.
2.5. Stem Stitch
The stem stitch is used to create smooth, flowing lines, making it ideal for outlining stems, vines, and curved shapes. Bring the needle up through the fabric, then insert it back down a short distance away. Bring the needle up again, halfway between the first stitch, keeping the floss to one side of the needle.
2.6. Split Stitch
The split stitch creates a textured line that resembles a chain. Bring the needle up through the fabric, then insert it back down a short distance away. Bring the needle up again, splitting the previous stitch in the middle. This stitch is great for adding depth and interest to your embroidery.
3. Choosing the Right Materials for Learn Embroidery
Selecting the right materials is crucial for achieving the best results in your embroidery projects. The type of fabric, floss, and needles you choose can significantly impact the look and feel of your finished piece.
3.1. Selecting the Best Embroidery Fabric
When choosing fabric for embroidery, consider the weight, texture, and fiber content. Linen and cotton are popular choices for beginners due to their ease of use and availability. Other options include muslin, felt, and even denim. The best fabric for your project will depend on the type of design you’re creating and the desired effect.
| Fabric Type | Pros | Cons | Best For |
|---|---|---|---|
| Linen | Durable, natural fiber, beautiful texture | Can be expensive, wrinkles easily | Heirloom projects, detailed designs, vintage-inspired pieces |
| Cotton | Affordable, easy to find, versatile | Can shrink, may not be as durable as linen | Samplers, beginner projects, everyday items |
| Muslin | Lightweight, inexpensive, good for practice | Not very durable, can be sheer | Practice projects, backing for embroidery |
| Felt | No fraying, easy to cut, available in many colors | Can be difficult to stitch through, not suitable for detailed work | Appliqués, small projects, decorative items |
| Denim | Durable, sturdy, adds a unique texture | Can be difficult to stitch through, requires strong needles | Embellishing clothing, creating unique home decor items |
| Silk | Luxurious, smooth, adds a beautiful sheen | Expensive, requires special care, can be slippery to work with | High-end projects, detailed designs, heirloom pieces |
| Aida Cloth | Even weave, easy to count stitches, ideal for cross-stitch | Not suitable for all embroidery techniques | Cross-stitch, counted thread embroidery |

3.2. Understanding Embroidery Floss Types
Embroidery floss comes in a variety of materials, each with its own unique characteristics. Cotton floss is the most common choice due to its affordability and versatility. Silk floss offers a luxurious sheen and is ideal for delicate designs. Metallic threads add sparkle and texture to your embroidery. Experimenting with different floss types can add depth and interest to your projects.
3.3. Choosing the Right Embroidery Needle
The right needle can make a significant difference in your embroidery experience. Embroidery needles, also known as crewel needles, have a larger eye to accommodate embroidery floss. The size of the needle should correspond to the weight of the fabric and floss you’re using. A sharp needle is essential for piercing the fabric cleanly and creating neat stitches.
4. Transferring Embroidery Patterns
Transferring your chosen design onto the fabric is a crucial step in the embroidery process. There are several methods you can use, each with its own advantages and disadvantages. LEARNS.EDU.VN offers detailed tutorials on various pattern transfer techniques, ensuring you find the method that works best for you.
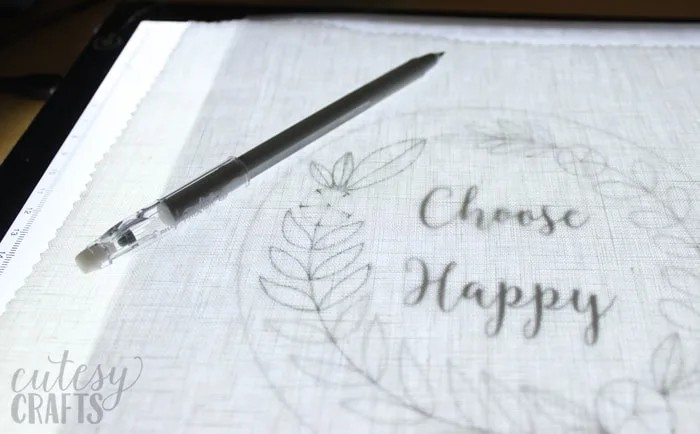
4.1. Tracing Method
The tracing method involves placing tracing paper over the pattern and then tracing the design onto the fabric using a pencil or water-soluble pen. This method is best suited for light-colored fabrics and simple designs.
4.2. Iron-On Transfer Pens
Iron-on transfer pens allow you to draw the pattern onto paper and then transfer it to the fabric using a hot iron. This method is quick and easy but may not be suitable for delicate fabrics.
4.3. Water-Soluble Stabilizer
Water-soluble stabilizer is a thin, transparent sheet that you can print or trace your design onto. You then adhere the stabilizer to the fabric and stitch through both layers. Once you’re finished, simply rinse the stabilizer away with water. This method is ideal for dark-colored fabrics and intricate designs.
4.4. Pouncing Method
The pouncing method involves pricking holes along the lines of the pattern and then using a pounce pad filled with chalk or pigment to transfer the design to the fabric. This method is best suited for delicate fabrics and intricate designs.
4.5. Software for Pattern Transfer
Utilize software such as Adobe Illustrator or Inkscape to create and manipulate embroidery patterns digitally. These programs allow for precise adjustments and scaling, ensuring accurate transfer to your fabric.
5. Learn Embroidery Techniques: A Step-by-Step Guide
Embroidery involves a variety of techniques that can add depth, texture, and visual interest to your projects. Mastering these techniques will allow you to create stunning and unique designs.
5.1. Outlining Techniques
Outlining is a fundamental technique in embroidery, used to define shapes and add definition to your designs. Common outlining stitches include the back stitch, stem stitch, and split stitch. Choose the stitch that best suits the desired effect.
5.2. Filling Techniques
Filling techniques are used to cover large areas of fabric with color and texture. The satin stitch is a popular choice for filling shapes with smooth, solid areas of color. Other filling techniques include the long and short stitch, which creates a more textured effect.
5.3. Adding Texture
Adding texture to your embroidery can create visual interest and depth. Techniques such as French knots, seed stitch, and bullion knots add dimension to your designs. Experiment with different textures to create unique and eye-catching effects.
5.4. Shading Techniques
Shading techniques are used to create the illusion of depth and dimension in your embroidery. This can be achieved by varying the color and density of your stitches. Techniques such as thread painting and needle painting allow you to blend colors and create realistic shading effects.
5.5. Appliqué Techniques
Appliqué involves attaching pieces of fabric to a background fabric using embroidery stitches. This technique is perfect for creating bold, graphic designs and adding dimension to your projects.
5.6. Ribbon Embroidery Techniques
Ribbon embroidery uses silk or satin ribbons to create raised, dimensional designs. This technique is perfect for creating flowers, leaves, and other natural elements.
6. Advanced Learn Embroidery Stitches and Techniques
Once you’ve mastered the basic stitches and techniques, you can move on to more advanced techniques that will elevate your embroidery skills. LEARNS.EDU.VN offers advanced tutorials for those looking to take their embroidery to the next level.
6.1. Thread Painting
Thread painting, also known as needle painting, is a technique that uses a variety of stitches and colors to create realistic shading and dimension. This technique is perfect for creating portraits, landscapes, and other detailed designs.
6.2. Goldwork Embroidery
Goldwork embroidery uses metallic threads and wires to create luxurious and intricate designs. This technique has been used for centuries to embellish clothing, religious textiles, and other high-end items.
6.3. Stumpwork Embroidery
Stumpwork embroidery, also known as raised embroidery, involves creating three-dimensional elements that stand out from the fabric. This technique is perfect for adding texture and dimension to your embroidery.
6.4. Blackwork Embroidery
Blackwork embroidery uses black thread on white fabric to create intricate, geometric designs. This technique has been popular since the Tudor period and is often used to embellish clothing and home decor items.
6.5. Whitework Embroidery
Whitework embroidery uses white thread on white fabric to create delicate, textured designs. This technique is perfect for creating elegant and understated pieces.
6.6. Crewel Embroidery
Crewel embroidery uses wool thread on a tightly woven fabric to create durable and textured designs. This technique has been used for centuries to embellish upholstery, curtains, and other home decor items.
7. Learn Embroidery Project Ideas for All Skill Levels
Embroidery can be applied to a wide range of projects, from simple samplers to intricate works of art. Here are some project ideas to inspire your creativity.
7.1. Beginner Projects
- Embroidered Sampler: Create a sampler with basic stitches to practice and refine your skills.
- Personalized Tote Bag: Embellish a plain tote bag with a simple embroidered design.
- Embroidered Patches: Create custom patches to add to clothing or accessories.
- Embroidered Bookmarks: Design unique bookmarks with your favorite motifs.
7.2. Intermediate Projects
- Embroidered Pillow: Create a decorative pillow with an intricate embroidered design.
- Embroidered Wall Art: Design a piece of wall art with a combination of stitches and techniques.
- Embroidered Clothing: Embellish clothing items such as jeans, jackets, and shirts with embroidered details.
- Embroidered Quilt: Create a quilt with embroidered blocks featuring different designs.
7.3. Advanced Projects
- Thread-Painted Portrait: Create a realistic portrait using thread painting techniques.
- Goldwork Embellished Garment: Embellish a garment with intricate goldwork embroidery.
- Stumpwork Sculpture: Create a three-dimensional stumpwork sculpture.
- Blackwork Sampler: Design a complex blackwork sampler with geometric patterns.
- Embroidered Home Decor: Create unique home decor items, such as curtains, tablecloths, and wall hangings, with advanced embroidery techniques.
8. Tips for Learn Embroidery Success
To achieve success in embroidery, consider these helpful tips and tricks.
8.1. Practice Regularly
Like any skill, practice is essential for improving your embroidery techniques. Set aside time each day or week to work on your projects and experiment with new stitches and techniques.
8.2. Start Simple
Begin with simple projects and gradually work your way up to more complex designs. This will help you build your skills and confidence.
8.3. Use Quality Materials
Investing in quality materials will make a significant difference in the look and feel of your finished pieces. Choose high-quality fabrics, floss, and needles for the best results.
8.4. Take Your Time
Embroidery is a slow and deliberate craft. Don’t rush through your projects. Take your time and enjoy the process.
8.5. Learn from Others
Take advantage of online resources, workshops, and classes to learn from experienced embroiderers. Sharing tips and techniques with others can help you improve your skills and stay motivated.
8.6. Don’t Be Afraid to Experiment
Embroidery is a creative art form. Don’t be afraid to experiment with different stitches, techniques, and materials to create unique and personalized designs.
8.7. Seek Inspiration
Find inspiration from a variety of sources, such as nature, art, and design. Use this inspiration to create original and innovative embroidery projects.
9. Learn Embroidery Online Resources and Communities
Numerous online resources and communities can support your embroidery journey. These resources offer tutorials, patterns, and a supportive community of fellow embroiderers.
9.1. Online Tutorials
Websites like LEARNS.EDU.VN, YouTube, and Skillshare offer a wealth of embroidery tutorials for all skill levels. These tutorials cover a wide range of topics, from basic stitches to advanced techniques.
9.2. Online Patterns
Websites like Etsy, Creative Market, and DMC offer a vast selection of embroidery patterns to choose from. These patterns can be downloaded and printed, making it easy to start your next project.
9.3. Online Communities
Online communities such as Reddit’s r/Embroidery and Facebook groups dedicated to embroidery provide a supportive environment for sharing tips, asking questions, and showcasing your work.
9.4. Social Media
Social media platforms like Instagram and Pinterest are great sources of inspiration for embroidery projects. Follow your favorite embroiderers and designers to stay up-to-date on the latest trends and techniques.
9.5. Embroidery Software Resources
Websites such as Wilcom and Embrilliance offer software and resources for machine embroidery design, catering to advanced users looking to digitize and customize their projects.
10. Learn Embroidery: Maintaining and Caring for Your Embroidery
Proper care and maintenance will ensure that your embroidery projects last for years to come. Here are some tips for caring for your embroidered pieces.
10.1. Washing Embroidery
Hand washing is the best way to clean delicate embroidery projects. Use cold water and a mild detergent. Gently agitate the water and then rinse thoroughly. Avoid wringing or twisting the fabric.
10.2. Drying Embroidery
Line drying is the preferred method for drying embroidery projects. Lay the fabric flat on a clean towel or hang it on a clothesline away from direct sunlight. Avoid using a dryer, as the heat can damage the embroidery.
10.3. Ironing Embroidery
Ironing can help to remove wrinkles and creases from your embroidery projects. Place the fabric face down on a padded surface and use a low-heat setting. Avoid ironing directly over the embroidered areas, as this can flatten the stitches.
10.4. Storing Embroidery
Store your embroidery projects in a clean, dry place away from direct sunlight. Consider using acid-free tissue paper to protect delicate items.
10.5. Repairing Embroidery
If your embroidery becomes damaged, it’s important to repair it as soon as possible. Use a needle and thread that matches the original floss to re-stitch any loose or broken stitches.
FAQ About Learn Embroidery
Here are some frequently asked questions about embroidery.
Q1: What is the best fabric for embroidery?
The best fabric for embroidery depends on the type of project you’re working on. Linen and cotton are popular choices for beginners due to their ease of use.
Q2: What are the essential embroidery stitches?
The essential embroidery stitches include the running stitch, back stitch, satin stitch, French knot, stem stitch, and split stitch.
Q3: How do I transfer a pattern onto fabric?
There are several methods for transferring a pattern onto fabric, including tracing, iron-on transfer pens, and water-soluble stabilizer.
Q4: How do I add texture to my embroidery?
You can add texture to your embroidery by using techniques such as French knots, seed stitch, and bullion knots.
Q5: How do I shade my embroidery?
You can shade your embroidery by varying the color and density of your stitches. Techniques such as thread painting and needle painting allow you to blend colors and create realistic shading effects.
Q6: What are some beginner embroidery projects?
Some beginner embroidery projects include embroidered samplers, personalized tote bags, embroidered patches, and embroidered bookmarks.
Q7: How do I care for my embroidery projects?
Hand washing is the best way to clean delicate embroidery projects. Line dry and iron on a low-heat setting.
Q8: Where can I find embroidery patterns online?
You can find embroidery patterns online on websites like Etsy, Creative Market, and DMC.
Q9: How can I join an embroidery community?
You can join an embroidery community online through Reddit’s r/Embroidery and Facebook groups dedicated to embroidery.
Q10: How do I learn machine embroidery?
Machine embroidery can be learned through online tutorials, courses, and specialized software, allowing for more complex and efficient designs.
Learning embroidery is a rewarding and creative endeavor that can be enjoyed by people of all ages and skill levels. With the right supplies, techniques, and resources, you can create beautiful and unique embroidered pieces that you’ll be proud to display and share. Whether you’re a beginner just starting out or an experienced embroiderer looking to expand your skills, there’s always something new to learn and explore in the world of embroidery. So grab your needle and thread and start stitching your way to success.
Ready to dive deeper into the art of embroidery? Explore LEARNS.EDU.VN for comprehensive guides, expert tips, and a wide range of courses tailored to every skill level. Unleash your creativity and master the art of embroidery with us today. Contact us at 123 Education Way, Learnville, CA 90210, United States or WhatsApp at +1 555-555-1212. Visit our website learns.edu.vn for more information.