Welcome to the wonderful world of crochet! If you’re looking to Learn How To Crochet For Beginners, you’ve come to the right place. Crochet is a fantastic craft that’s both relaxing and rewarding. Once you master the basics, you’ll be amazed at the beautiful items you can create, from cozy blankets to stylish accessories. The best part is, getting started is easier than you might think! With just a few simple steps, you’ll be on your way to crocheting your very first project.
Many beginners feel intimidated, thinking crochet is complicated. I remember when I first started learning to crochet, I spent hours watching YouTube tutorials, wanting to make sure I got every step just right. Like many, I was a bit of a perfectionist and wanted my crochet to look exactly like the examples. But the truth is, the key to success in crochet, like any skill, is practice. Don’t be afraid to experiment and create practice swatches. These little squares are invaluable for getting comfortable with holding your hook and yarn and understanding your tension. And guess what? Even those practice squares can be turned into something amazing later on – sew them together to make a blanket!
In this beginner-friendly guide, I will walk you through the essential first steps of crochet. You’ll learn how to properly hold your crochet hook and yarn, how to make a slip knot to start your project, how to crochet a chain, and finally, how to create the foundational single crochet stitch. We’ll also cover how to finish off your work and weave in those loose ends for a neat and professional finish.
Gathering Your Supplies: What You Need to Start Crocheting
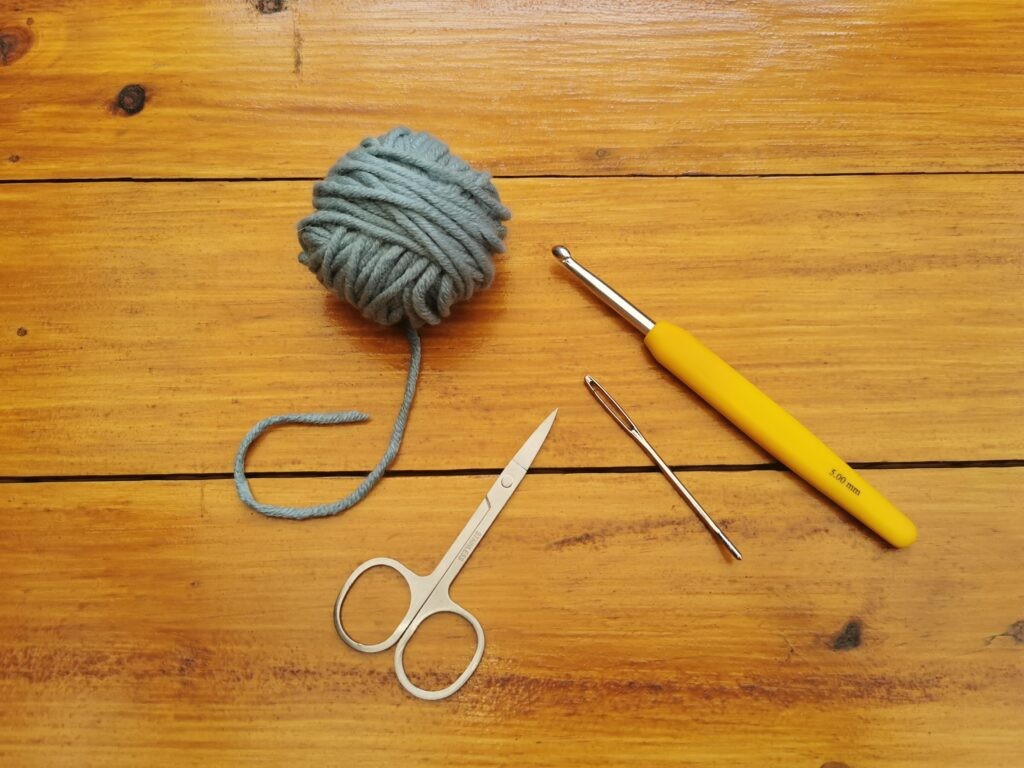
The most important things you’ll need to begin are yarn, a crochet hook in the recommended size for your yarn, scissors, and a yarn needle (also known as a tapestry needle or darning needle).
When you are just starting out learning to crochet for beginners, I highly recommend using a thicker yarn. Thicker yarn is easier to handle and allows you to see your stitches more clearly, which is a big help when you’re still learning. Always check the yarn label for the recommended crochet hook size.
But how do you decipher those yarn labels when you’re shopping for supplies? The yarn label contains crucial information, including the yarn weight, indicated by a number. This number tells you the thickness of the yarn.
This image shows a typical yarn label highlighting the yarn weight number. Beginners should look for yarn labeled size 4 or larger for easier handling.
For beginners, look for yarn weight size 4 (Medium/Worsted) and up. The yarn label will also suggest the appropriate hook size. For a size 4 yarn, a 5.5mm (US I-9) crochet hook is usually recommended. Don’t worry too much about getting the absolute perfect hook right away; these are just guidelines to get you started.
Mastering the Hold: How to Hold Your Crochet Hook
There’s no single “right” way to hold a crochet hook. Comfort is key! Experiment to find what feels most natural in your hand.
However, there are two popular ways to hold a crochet hook: the knife hold and the pencil hold.
Knife Hold
Pencil Hold
Personally, I prefer the knife hold as it feels more comfortable and gives me good control. Try both the knife hold and the pencil hold to see which grip works best for you. The most important thing is to hold the hook in a way that feels comfortable and allows you to maintain even tension as you crochet.
Getting Started: How to Make a Slip Knot
Before we learn how to hold the yarn, we need to create a slip knot and place it on your hook. The slip knot is the foundation of almost every crochet project.
The slip knot is the standard way to begin most crochet projects. While some patterns might use a “magic circle” (especially for amigurumi or toys), the slip knot is the most common starting point. Most patterns assume you know how to make a slip knot and won’t explicitly instruct you to create one.
Here’s a simple, step-by-step guide on how to make a slip knot:
- First, measure out about 3 inches of yarn from the end. Hold the yarn in your non-dominant hand, using three fingers, and point your index finger outwards, like you’re making a finger gun!
- Next, wrap the yarn around your index finger once, bringing the short end to the front of your finger.
- Wrap the yarn around your finger a second time, so you now have two loops around your index finger.
- Now, using your thumb and middle finger, grab both yarn tails – the short tail and the long tail that’s attached to your yarn ball (this long tail is also called the working yarn).
- Take the back loop (the loop further away from your fingertip) and pull it over the front loop, but don’t pull it completely off your finger yet.
- Now, take that same back loop and pull it completely off your finger. Tighten the knot by gently pulling both yarn tails. Make sure you don’t tighten it too much; you want the slip knot to be able to slide easily on your hook.
Ta-da! You’ve made your first slip knot!
Now, insert your crochet hook into the slip knot loop. Gently pull on the working yarn to tighten the knot around the hook. Ensure the short tail end of the yarn is facing towards the hook.
Yarn Control: How to Hold Your Yarn for Crocheting
Now that you know how to hold your hook and make a slip knot, let’s move on to yarn management – holding your yarn! This is a crucial step in learning how to crochet for beginners.
Getting comfortable holding your yarn is essential because it directly affects your tension, which is how tight or loose your stitches are. Whether you are right-handed or left-handed, the goal is to hold the yarn in your non-dominant hand in a relaxed way. You want enough tension to create even stitches, but not so tight that it’s difficult to pull the yarn through.
Again, there’s no single “right” way to hold your yarn – it’s about finding what works best for you. However, here’s how I hold mine, which is a common and effective method:
- With your slip knot already on your hook (and the hook in your dominant hand), take the working yarn and place it between your middle finger and index finger of your non-dominant hand.
- Then, wrap the yarn down and around your pinky finger, bringing it back up to the front of your index finger. Finally, wrap it around the back of your index finger.
Experiment with different ways of wrapping the yarn around your fingers to find a method that allows the yarn to flow smoothly and consistently as you crochet. The key is to maintain a relaxed grip and consistent tension.
The Foundation: How to Make a Crochet Chain
You’ve come so far already! Learning to crochet a chain can feel a little awkward at first, but with a bit of practice, you’ll get the hang of it quickly. Mastering the chain is a fundamental step when learning how to crochet for beginners.
With your slip knot on the hook and your yarn held comfortably, you now need to hold the slip knot in place. Use your thumb and middle finger of your non-dominant hand to gently hold the slip knot close to the hook.
- To make a chain stitch, bring the yarn over your hook from back to front (this is called “yarn over” or YO). Catch the yarn with your hook.
- Pull the hooked yarn through the slip knot loop that’s already on your hook.
And that’s it – you’ve made your first chain stitch! Yay! Repeat this “yarn over, pull through” step to create a chain of your desired length. For practice, continue making chains until you have about 21 chains. Remember, the loop currently on your hook does not count as a chain stitch. Your chain should look something like this:
When creating a chain, remember that practice is key to achieving even tension. Your chain stitches should be loose enough that you can clearly see each stitch. If your chains are too tight, you’ll find it difficult to work into them in the next rows. If you’re struggling with tight chains, try switching to a slightly larger hook size, which will naturally create looser stitches.
Examining Your Chain Stitches
Let’s take a closer look at your chain. Understanding the anatomy of a chain stitch is helpful for the next step, where you’ll work into these stitches.
Still feeling a bit lost?
Don’t worry! I’ve created a helpful video tutorial on YouTube that visually demonstrates everything we’ve covered so far. This quick 8-minute video will walk you through these steps in real-time! Click here to watch the video tutorial!
While you’re there, remember to subscribe to my YouTube channel and hit the notification bell so you’ll be alerted whenever I upload new crochet tutorials!
Your First Stitch: The Single Crochet
Okay, now for the exciting part – let’s learn how to crochet the single crochet stitch! This is one of the most basic and versatile crochet stitches, and a must-know when learning how to crochet for beginners.
For another visual guide, I also have a YouTube tutorial specifically for the single crochet stitch! Click here to watch the single crochet video tutorial!
As you work your single crochet stitches, pay attention to how you hold your chain with your middle finger and thumb. As you progress down the chain, gently move your fingers to support your work.
- To begin the single crochet row, skip the very first chain stitch from your hook (this skipped chain doesn’t count as a stitch). Insert your hook into the center of the next chain stitch (which is the second chain from your hook).
- Yarn over (bring the yarn over your hook from back to front) and pull the yarn through the chain stitch and up onto your hook. You should now have two loops on your hook.
- Yarn over again, and this time, pull the yarn through both loops that are on your hook. One loop will remain on your hook. You’ve just completed your first single crochet stitch!
- Continue making single crochet stitches in each chain stitch across the foundation chain. If you started with 21 chains, you should make 20 single crochet stitches (remember, you skipped the first chain). Your row of single crochet stitches should look something like this, and you should have 20 single crochet stitches in total:
Starting the Next Row:
- To begin the next row of single crochet stitches, you need to create a “turning chain.” Chain 1 (yarn over, pull through the loop on your hook). This chain 1 acts as a turning chain and helps to keep the edges of your work straight.
- Now, turn your work. It doesn’t matter whether you turn clockwise or counter-clockwise, just make sure you turn your work the same way at the end of each row to keep your crochet fabric consistent.
- To continue crocheting down the row, insert your hook into the very first single crochet stitch you made in the previous row. This will be the stitch right next to your chain 1 turning chain.
-
Notice how the stitch looks from the top – it forms a “V” shape. For single crochet, you typically insert your hook under both loops of this “V.”
-
Yarn over and pull through the stitch. You’ll have two loops on your hook.
- Yarn over once more, and pull through both loops on your hook. This completes your single crochet stitch in the second row!
And that’s it! You can now crochet! If you’re using this square as a practice piece, you can continue practicing rows of single crochet to improve your stitch consistency. You can also learn how to weave in the ends now! Below, I’ll show you how to finish off your work and weave in the yarn ends for a clean look.
Finishing and Neatening: How to Finish Off and Weave in Ends
Cutting the yarn at the end of a crochet project can be surprisingly satisfying – second only to seeing your finished creation!
Crochet patterns often use the abbreviation “FO” or “Finish Off,” which simply means to cut your yarn and secure the last loop. Here’s a step-by-step guide with photos for both finishing off and weaving in your yarn ends. (It’s really easier than it looks!)
At the end of your last row, yarn over as if you were making a chain 1.
Pull the loop on your hook out to be about an inch long.
Keeping the loop on your hook, lay your crochet work down and measure about 2 inches of yarn from the loop. Cut the yarn at the 2-inch mark.
Now, use your hook to pull the yarn tail completely through the loop and tighten to secure.
Weaving in the Ends
To weave in the ends, thread the yarn tail through the eye of your yarn needle.
Pull enough yarn through the needle eye so you have a good length to work with.
I usually insert the needle from the back of the first stitch to reach the bottom row of stitches.
Insert the needle under the top of a stitch, going downwards, being careful not to poke through to the other side of your work.
Pull the needle through gently, not too tightly, as you don’t want to distort your crochet fabric.
Weave the needle back into the bottom row, near where your yarn tail emerged.
Pull the needle through again, keeping the tension even.
Remove the needle from the yarn and cut the yarn tail close to your crochet work. If a tiny piece of yarn end peeks out, gently stretch the row to help it disappear.
And that’s it! You’ve successfully finished off and woven in your ends!
Now you can continue practicing the single crochet stitch by making more squares – perhaps enough to sew together into a blanket or throw!
In conclusion, I hope you’ve enjoyed this beginner crochet tutorial! If you have any questions, please feel free to leave a comment below. And don’t forget to follow me on my social media platforms for more crochet inspiration and patterns! Subscribe to my newsletter to get the latest tutorials and, best of all, free crochet patterns delivered straight to your inbox!
I look forward to seeing you in the next tutorial!
Please share this post with your friends who want to learn how to crochet!
[