So, you’re eager to Learn Ukulele? Fantastic! Stepping into the world of ukulele is like joining a vibrant, welcoming community of music lovers. One of the first things you’ll notice is the sheer enthusiasm and support from fellow ukulele players. This isn’t just an instrument; it’s a social connector, a little musical engine that brings people together in joyful harmony. The ukulele spirit is truly infectious. As you start to grasp your first chords, strums, and songs, you’ll likely find yourself wanting to share the fun and music with everyone around you.
Understanding Hands & Handedness for Ukulele Players
Playing the ukulele is a team effort for both of your hands! One hand is your “chording hand,” responsible for pressing down on the strings to create different notes and chords. The other is your “strumming” or “speaking” hand, which generates the rhythm and sound. While most people, including some left-handed individuals, naturally strum with their right hand and chord with their left, some lefties may find it challenging to express rhythm with their non-dominant hand.
For left-handed players, there are a couple of options. The first is to adapt to the standard right-handed approach. The second option is to reverse the string order, essentially playing “upside-down-backwards” and figuring out mirrored chord shapes. Another solution, and often the most liberating for lefties, is to restring the ukulele to be left-handed. Restringing is a straightforward process that can eliminate frustration and make learning much smoother.
Throughout this guide, we’ll generally refer to the strumming hand as the right hand and the chording hand as the left, keeping with standard ukulele instruction. Also, remember that chord diagrams are always presented in the standard right-handed orientation. If you’re a lefty who has restrung their ukulele, simply flip the diagrams and instructions to suit your left-handed setup.
A tip for all players, regardless of handedness: keep the nails on your chording hand very short. This allows your fingertips to press the strings down cleanly. On the strumming hand, you can keep slightly longer nails, as they can actually be used as natural picks, or plectrums as they’re called in some countries.
Heidi Swedberg: From ‘Seinfeld’ to Uke Clinician
How to Hold Your Ukulele Correctly
Starting your ukulele journey with good posture and holding technique is essential. Think of it like learning to hold a violin in the Suzuki method – proper positioning from the beginning sets you up for success. While the ukulele is more forgiving than a violin, developing good habits early on prevents bad habits later and helps avoid strain.
Whether you’re standing or sitting, hold the ukulele close to your body. Many players use a strap to maintain the ukulele in the ideal playing position, while others prefer playing without one. If you opt to go strapless, your right forearm will gently secure the instrument against your chest. For now, let your left hand lightly support the neck near the headstock.
If you’re sitting, choose a chair without armrests. Avoid slouching; sitting upright at the edge of your seat promotes better posture, especially when you’re starting out. Try crossing your right leg over your left and resting the ukulele gently against your thigh for added stability. Keep your shoulders relaxed and remember to breathe! Tension is the enemy of smooth playing.
Mastering the Thumb Strum & Your First Ukulele Chord: C6
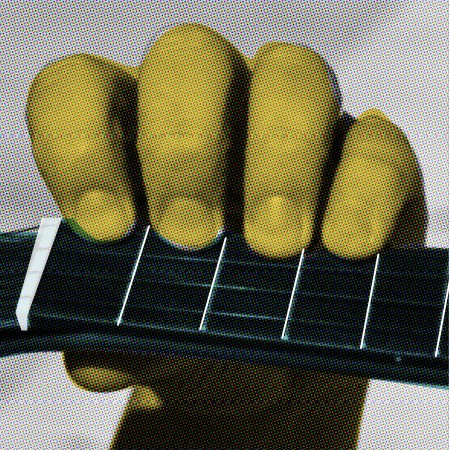
Position your fingers between the metal frets, ensuring a gentle curve in each finger. Your thumb should rest on the back of the ukulele neck, directly behind your index finger for support.
The ukulele strings are numbered 4-3-2-1, from the top string (closest to your face when holding the ukulele in playing position) to the bottom string (closest to your feet). Using the pad of your thumb, gently strum each string individually, moving from string 4 to string 1. Find a comfortable strumming spot, often around where the neck meets the body. As you strum each string, say its string number (4-3-2-1) and its note name (G-C-E-A). Now, repeat this while singing the melody of “My Dog Has Fleas!” – a classic tune often used to remember ukulele tuning.
This thumb strum creates a soft, mellow sound. Now, strum all four strings together in a steady rhythm, counting 1-2-3-4, 1-2-3-4… Try singing “Row, Row, Row Your Boat” along with your strumming. (If you’re struggling to find the starting note, it’s C. Pluck the third string to find it. Remember, strings are counted from the bottom up!). As you progress, your strumming will evolve to include different fingers and patterns, but this steady, rhythmic down strum with your thumb is a fundamental starting point.
When you strum all the open strings together (without pressing any frets with your left hand), you’re playing a chord called C6. The C6 chord is made up of the notes G-C-E-A – the same notes we tune our ukuleles to! This tuning is known as “C tuning” and is the most common ukulele tuning. (Historically, some methods used a lower “Bb tuning,” and in parts of Canada, a higher “D tuning” is sometimes found, but modern ukulele resources overwhelmingly use C tuning.) The C6 chord is an “open” chord, meaning no fingers are fretting any strings – it’s simply the sound of all open strings played together.
Introducing the Chording Hand & The C7 Ukulele Chord
Imagine your hand is a sock puppet ready to talk. Mimic making a sock puppet talk. Your wrist is likely straight, and your fingers are aligned, tapping downwards. Now, make your sock puppet look towards you. This hand position is a great starting point for how your left hand should be positioned on the ukulele neck.
Bring your hand around the ukulele headstock and gently place the neck into your “puppet’s mouth.” Locate the first string (the A string, closest to the floor). Position your fingertips just behind the frets (closer to the soundhole, not directly on top of or in front of the metal fret), placing your index finger behind the 1st fret, middle finger behind the 2nd, ring finger behind the 3rd, and pinky behind the 4th. Keep a gentle curve in your fingers. Your thumb should be positioned on the back of the neck, roughly opposite your index finger, and your wrist should remain relatively straight, not bent sharply.
Now, lift all fingers except your index finger. Your index finger should remain on the first string, behind the first fret. If you were to remove the ukulele, your hand would resemble an “OK” sign, with your fingers gently curved, thumb touching your index finger, and wrist straight. Strum the strings. Congratulations! You’re now playing a C7 chord. With this single chord, you can accompany yourself on simple one-chord songs like “Old Joe Clark.” (You can find tutorials and hear this classic song in online video resources.)
Chord shapes become automatic with practice, but chord diagrams are invaluable visual aids for learning finger placements. The thick horizontal line at the top of a chord diagram represents the ukulele’s nut. The four vertical lines represent the strings, from left to right: 4-3-2-1. The thin horizontal lines are the frets. If you held your ukulele vertically next to a chord diagram, they would correspond directly. The dots on the diagram show where to place your fingers on the strings and frets. Sometimes, numbers inside the dots indicate which finger to use (1=index, 2=middle, 3=ring, 4=pinky). Look at the C7 diagram above and practice forming the chord.
Decoding Ukulele Chord Diagrams
Many popular songs are presented in a “campfire style,” with chord names or diagrams above the lyrics, indicating chord changes. The chords should appear directly above the syllable where the chord change occurs. “Happy Birthday to You” is a universally known song and an excellent choice for practicing your first two chords. Bring your ukulele to the next birthday celebration and give it a try. You might be surprised at how easily everyone joins in when you play along!
The song begins on a C note. Find this note on your third string and sing the start of the song to yourself before you begin playing. The rhythm of “Happy Birthday” is in waltz time: 1-2-3, 1-2-3. Strum this rhythm while holding a C7 chord to get a feel for it, then start singing “Hap…” on the third beat. When you reach “Birth…” switch to the F chord, and so on. Chord changes might feel a bit clumsy at first, but the goal is to maintain a steady rhythm while strumming, singing, and smoothly transitioning between chords. Play and sing along with the song and refer to online video tutorials for guidance.
Advertisement
Mastering the F Ukulele Chord
In ukulele finger numbering, the index finger is 1, middle finger is 2, ring finger is 3, and pinky is 4. However, for clarity, we’ll refer to them by name. When you play a C7 chord, your index finger is on the first string, first fret. To transition to an F chord, shift that index fingertip up one string, so it’s now on the second string, first fret. Next, place your middle fingertip on the fourth (top) string, behind the second fret. That’s the F chord! Give it a strum. Ensure you’re pressing with your fingertips; if your fingers accidentally touch adjacent strings, the chord will sound muted. While practicing, keep checking your wrist and thumb position, maintaining relaxation and proper form. Developing good habits now is key.
Practice switching between F and C7 chords. Notice that your middle finger lifts off the ukulele for the C7, and your index finger can easily shift down to the first string for C7. Create a mental “map” of the finger movements between these chords, aiming for efficient transitions. Once you feel comfortable, strum four slow, even beats on each chord, anticipating the chord change. When this feels smooth, gradually increase the tempo or reduce the number of beats per chord.
Learning the G7 Ukulele Chord
Start by positioning your fingers for the F chord (and double-check your thumb!). To move from F to G7, your index finger remains anchored on the 2nd string, first fret. Your middle finger stays on the second fret but moves down to the 3rd string. Now, add your ring finger to the first string, behind the second fret. Maintaining fingertip positioning and proper thumb placement is crucial for this slightly more crowded chord shape. You’ll notice the G7 chord visually forms a triangle pointing towards the ukulele’s nut. Strum the G7 and adjust your finger positions until the chord rings clearly. Building finger strength and dexterity takes time and practice. Be patient with yourself and remember that muscle memory develops gradually. The G7 is often considered the trickiest of these beginner chords, so give yourself a pat on the back for tackling it! Practice transitioning between F and G7, using the same techniques you used for F to C7, and then practice moving between G7 and C7.
Want to start playing your favorite songs right away? Download a FREE ukulele chord chart for essential chords!
Practice Ukulele with a Song
Practicing is much more enjoyable when you’re playing a song! Let’s use F, G7, and C7 chords in that sequence to play and sing “99 Bottles of Beer on the Wall.” By the time you reach the last bottle (or sooner!), you’ll be much smoother at changing between these chords (and maybe a little thirsty!). Another fun song using the same chord progression is the traditional Hawaiian song “Popoki Make a Cat,” which offers a bonus: a mini-Hawaiian language lesson! If you don’t read music notation yet, you can learn “Popoki Make a Cat” by ear using online video tutorials.
Home Base: The C Major Ukulele Chord
You’ve already learned C6 and C7 chords; now let’s add the C major chord to your repertoire. Return to your “sock puppet” hand position and place it on the ukulele neck again, thumb on the back, all four fingers hovering over the first string. Now, release all fingers except your ring finger, which should be placed on the third string, behind the third fret. Strum! This is the C major chord – a chord you’ll encounter very frequently. Because ukuleles are tuned in C tuning, the C major chord feels like “home base” in many songs.
You’ll notice that C major has a different sound compared to C7 and C6. Without getting too deep into music theory, here’s a simple explanation: The “C” in the chord name indicates that all these chords are based on the note C. The word or number after “C” specifies the chord’s “flavor” or quality, like a musical adjective. Major chords are so common and have a neutral, fundamental flavor, that they are often written simply as “C,” without explicitly saying “major.”
Rhythm is the Heart of Music
Bob Marley. Photo courtesy of Magnolia Pictures
Bob Marley’s “Three Little Birds” is a timeless favorite, perfect for ukulele beginners. It uses chords from your starter set and is easy to play and sing, especially because you likely already know the melody and its catchy, repetitive lyrics. This song is driven by a strong backbeat, offering a great opportunity to explore simple strumming variations.
Think of the basic rhythmic count: 1 and 2 and 3 and 4 and 1 and 2 and 3 and 4 and… This rhythm is the backbone of countless songs. The numbered beats (1, 2, 3, 4) are typically where you strum down on the strings (downstrokes). These beats are grouped in fours, which we call “common time” – the most prevalent rhythm in Western music. The “and”s represent the upstrokes. Strumming upwards with just your thumb can be tricky, so this is where you begin to incorporate your right-hand fingers.
Relax your strumming hand and imagine you’re shaking water off your hand over a sink without making a mess. There’s a subtle movement from your elbow, a slight wrist twist, and a flick of your fingers. That’s the essence of a good ukulele strum. You can use just your index finger or a combination of fingers – find what feels most comfortable. Everyone develops their own strumming style; the key is to maintain a steady and relaxed rhythm.
To add variety to your playing, you can omit certain beats or emphasize (accent) others. For a simple backbeat strum, play only on beats 2 and 4. Another backbeat variation involves strumming only the upstrokes (the “and”s), leaving out all the downbeats.
A slightly more complex strum is the “doo wack-a doo” strum. On beats 1 and 3, do a light, partial down strum, just brushing the 4th string. Then, on beats 2 and 4, give a solid, accented down strum, followed by an upstroke on the “and” of each beat. Count it out as: one two and three four and one two and three four and. Or think of it as: down down up down down up, or doo wack-a doo wack-a doo…
Due to copyright restrictions, we are unable to post notation or tablature for this musical work. If you have a digital or physical copy of the Fall 2019 issue, you will find the music on page 18.
Advertisement
Start Making Music Now
With just these starter chords (C6, C7, F, G7, C major), you can play literally thousands of songs! Really! Ask other ukulele players in your growing ukulele community for song suggestions, or search online for “easy ukulele songs.” You’re now officially hooked on the ukulele! Share the joy – pass this lesson on to a friend and learn ukulele together. Play along with online video tutorials – making music is always more fun with friends!
Getting Started on Ukulele: Learn Your First 4 Basic Chords
How to Practice Ukulele—4 Tips to Get Better Faster
The Ukulele Owner’s Manual is an essential resource for every ukulele player. Created by the experts at Ukulele Magazine, it covers everything from basic instrument care to troubleshooting issues and even a visual history of the ukulele. Book owners also get access to step-by-step how-to videos on common ukulele maintenance and setup topics.
Ukulele Basics – Learning and Practicing is perfect for beginners and those wanting to solidify their foundational ukulele skills. Get your copy today at store.ukulelemag.com.
Ukulele Basics – Learning and Practicing features lessons from leading ukulele educators like Jim Beloff, Heidi Swedberg, Sarah Maisel, Craig Chee, Jim D’Ville, and Cathy Fink. These experienced teachers share valuable tips on effective practice techniques, ear training for tuning, and music reading.
Want to learn to read ukulele music? Download our FREE guide to ukulele notation, covering all essential notation for any type of ukulele.