The Shark Ion Robot learns your house through a combination of smart sensors, mapping technology, and adaptive cleaning algorithms, ensuring efficient and thorough floor cleaning. At LEARNS.EDU.VN, we offer resources to help you understand and optimize your home cleaning technology. Discover how to improve your robot vacuum’s navigation with our guides on smart home integration and robotic cleaning tips.
1. Understanding the Shark Ion Robot’s Learning Process
The Shark Ion Robot vacuum is designed to autonomously navigate and clean your home. Its ability to “learn” your house relies on a combination of sensors, software, and cleaning patterns that adapt over time. Unlike some high-end robot vacuums that create detailed maps, the Shark Ion Robot utilizes a more simplified approach, focusing on efficient coverage rather than precise mapping. This system allows it to effectively clean different floor types and navigate around obstacles.
1.1 Initial Setup and Exploration
When you first start your Shark Ion Robot, it begins an exploratory cleaning cycle. During this phase, the robot uses its sensors to detect walls, furniture, and other obstacles. It doesn’t create a permanent map in the way some advanced models do, but it does learn the general layout of your rooms through repeated interactions. According to SharkNinja, the initial cleaning cycles are crucial for the robot to adapt to its environment (SharkNinja Official Website).
1.2 Sensor Technology
The Shark Ion Robot is equipped with several types of sensors that contribute to its ability to navigate and clean your home effectively:
-
Cliff Sensors: These prevent the robot from falling down stairs or ledges. They work by detecting a drop-off and signaling the robot to change direction.
-
Obstacle Detection Sensors: These sensors help the robot detect and avoid obstacles like furniture, walls, and pet bowls. The robot slows down as it approaches an obstacle, gently bumping it before changing direction.
-
Wheel Encoders: These track the distance the robot has traveled, helping it to clean in a systematic pattern.
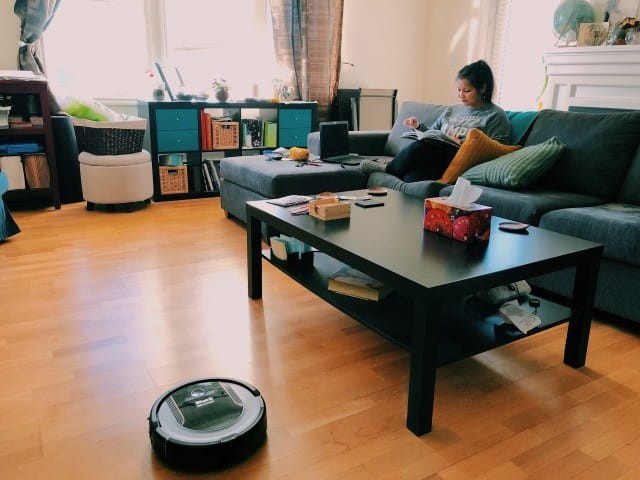 Shark Ion Robot vacuum cleaning living room
1.3 Adaptive Cleaning Patterns
The Shark Ion Robot uses a variety of cleaning patterns to ensure thorough coverage of your floors. These patterns include:
-
Spiral Cleaning: When the robot encounters a particularly dirty area, it may enter a spiral cleaning mode, where it moves in a tight spiral to concentrate on that spot.
-
Edge Cleaning: The robot is designed to follow along walls and edges of furniture to ensure that these areas are thoroughly cleaned.
-
Random Cleaning: For open areas, the robot uses a more random pattern to cover as much ground as possible.
The robot’s ability to switch between these patterns allows it to adapt to different types of messes and floor layouts, improving its overall cleaning effectiveness.
2. Optimizing the Learning Process
While the Shark Ion Robot is designed to learn your house on its own, there are several steps you can take to optimize its learning process and improve its cleaning performance. These steps include preparing your home, using boundary strips, and regularly maintaining the robot.
2.1 Preparing Your Home
Before running your Shark Ion Robot for the first time, it’s important to prepare your home to ensure that the robot can navigate and clean effectively. This involves removing obstacles, securing cords, and clearing clutter.
| Preparation Step | Description |
|---|---|
| Remove Small Obstacles | Pick up small objects like toys, shoes, and loose papers from the floor. These items can get in the robot’s way and prevent it from cleaning effectively. |
| Secure Cords | Secure loose cords and cables to prevent the robot from getting tangled. Use cord organizers or tape to keep cords out of the robot’s path. |
| Clear Clutter | Clear clutter from the floor, such as stacks of books or magazines. The more open space the robot has, the more effectively it can clean. |
| Lift Curtains/Drapes | Make sure curtains and drapes are lifted off the floor. The robot can get stuck on long curtains, preventing it from cleaning the entire room. |
| Furniture Arrangement | Consider rearranging furniture to create wider pathways for the robot. This can help it navigate more efficiently and cover more ground. |
| Pre-Cleaning | Before the robot’s initial run, consider doing a quick manual clean. This removes larger debris and allows the robot to focus on finer dust and dirt during its learning phase. |
| Pet Care | Keep pet food and water bowls in a designated area and consider using boundary strips to prevent the robot from accessing them. |
| Fragile Items | Protect fragile items by placing them on higher surfaces or using boundary strips to keep the robot away. |
| Rugs and Carpets | Ensure rugs and carpets are securely anchored to the floor to prevent the robot from pushing or bunching them up. Using rug pads or tape can help keep them in place. |
| Lighting | Ensure the cleaning area is adequately lit. While many robots can navigate in low light, sufficient lighting can improve their sensor performance and overall cleaning efficiency. |
By taking these steps, you can create a more robot-friendly environment and help your Shark Ion Robot learn your house more quickly and effectively.
2.2 Using Boundary Strips
The Shark Ion Robot comes with boundary strips that you can use to create virtual barriers. These strips prevent the robot from entering areas you don’t want it to clean, such as pet food areas, delicate rugs, or rooms with lots of cords.
To use boundary strips effectively, place them on the floor around the perimeter of the area you want to exclude. Make sure the strips are flat and securely attached to the floor. The robot will detect the strips and turn around, avoiding the restricted area.
2.3 Regular Maintenance
Regular maintenance is essential for keeping your Shark Ion Robot running smoothly and effectively. This includes emptying the dustbin, cleaning the brushes, and replacing the filters.
| Maintenance Task | Frequency |
|---|---|
| Empty the Dustbin | After each cleaning cycle or as needed, depending on the amount of dirt and debris in your home. |
| Clean the Brushes | Once a week or as needed, remove any hair, string, or debris that has become wrapped around the brushes. |
| Replace the Filter | Every two to three months, or as needed, depending on the air quality in your home. A clean filter helps maintain the robot’s suction power. |
| Clean the Sensors | Once a month, gently wipe the sensors with a soft, dry cloth to remove any dust or debris. This ensures that the sensors can function properly. |
| Check the Wheels | Once a month, check the wheels for any obstructions or debris that may be preventing them from turning freely. |
| Battery Maintenance | Follow manufacturer guidelines for battery care to maximize battery life. Avoid letting the battery completely drain for extended periods. |
| Software Updates | If applicable, ensure the robot’s software is up to date. Updates often include performance improvements and new features. |
By performing these maintenance tasks regularly, you can keep your Shark Ion Robot in good working condition and ensure that it continues to clean your home effectively.
3. Addressing Common Issues
Even with proper preparation and maintenance, you may encounter some common issues with your Shark Ion Robot. These issues can include getting stuck, not cleaning certain areas, and experiencing error messages.
3.1 Robot Getting Stuck
One of the most common issues with robot vacuums is getting stuck on obstacles or in tight spaces. Here are some tips for preventing your Shark Ion Robot from getting stuck:
-
Clear Obstacles: Make sure to remove any small objects or clutter from the floor that could get in the robot’s way.
-
Secure Cords: Loose cords and cables are a common cause of robot vacuums getting stuck. Use cord organizers or tape to keep cords out of the robot’s path.
-
Use Boundary Strips: If there are certain areas where the robot consistently gets stuck, use boundary strips to prevent it from entering those areas.
-
Monitor the Robot: During the first few cleaning cycles, monitor the robot to see if it’s getting stuck in any particular areas. This will help you identify potential problem spots and take steps to address them.
3.2 Not Cleaning Certain Areas
If you notice that your Shark Ion Robot is not cleaning certain areas of your home, there are several possible explanations:
-
Obstacles: The robot may be unable to reach certain areas due to obstacles like furniture or clutter. Try rearranging furniture or removing obstacles to create more open space.
-
Boundary Strips: Make sure that boundary strips are not inadvertently blocking access to areas you want the robot to clean.
-
Sensor Issues: If the robot’s sensors are dirty or malfunctioning, it may not be able to detect certain areas of your home. Clean the sensors regularly and contact customer support if you suspect a sensor issue.
-
Battery Life: If the robot’s battery is low, it may not have enough power to complete a full cleaning cycle. Make sure the robot is fully charged before each use.
3.3 Error Messages
The Shark Ion Robot is designed to display error messages when it encounters a problem. These messages can provide valuable information about what’s wrong and how to fix it. Here are some common error messages and their solutions:
| Error Message | Possible Cause | Solution |
|---|---|---|
| “Brush Error” | The brushroll is tangled with hair or debris. | Turn off the robot and remove the brushroll. Clean any hair or debris from the brushroll and reinstall it. |
| “Wheel Error” | The wheels are obstructed or unable to turn freely. | Turn off the robot and check the wheels for any obstructions. Remove any debris and make sure the wheels can turn freely. |
| “Cliff Sensor Error” | The cliff sensors are dirty or obstructed. | Gently wipe the cliff sensors with a soft, dry cloth. Make sure the sensors are clean and free from any obstructions. |
| “Low Battery” | The robot’s battery is low and needs to be charged. | Place the robot on its docking station to charge. Allow the battery to fully charge before using the robot again. |
| “Stuck” | The robot is stuck on an obstacle or in a tight space. | Manually move the robot to a clear area. Remove any obstacles that may be causing the robot to get stuck. |
| “Full Dustbin” | The dustbin is full and needs to be emptied. | Empty the dustbin and reinstall it. |
| “Filter Error” | The filter is dirty or needs to be replaced. | Clean or replace the filter as needed. A clean filter helps maintain the robot’s suction power. |
| “Charging Error” | The robot is not charging properly. | Ensure the docking station is properly connected to a power outlet. Check the charging contacts on the robot and docking station for any debris. Clean the contacts if necessary. |
| “Software Error” | There is an issue with the robot’s software. | Check for software updates in the SharkClean app. If an update is available, install it. If the problem persists, contact Shark customer support. |
| “Communication Error” | The robot is unable to connect to the Wi-Fi network. | Ensure the Wi-Fi network is working properly. Check the robot’s connection to the Wi-Fi network in the SharkClean app. If necessary, reconnect the robot to the Wi-Fi network. |
By understanding these common issues and their solutions, you can troubleshoot problems with your Shark Ion Robot and keep it running smoothly.
4. Advanced Features and Settings
The Shark Ion Robot comes with several advanced features and settings that can help you customize its cleaning performance. These features include scheduling, spot cleaning, and different power modes.
4.1 Scheduling
One of the most convenient features of the Shark Ion Robot is its ability to be scheduled. You can use the SharkClean app to set up a cleaning schedule that works for you. For example, you can schedule the robot to clean every day at 10:00 AM while you’re at work.
To set up a cleaning schedule, open the SharkClean app and navigate to the scheduling section. From there, you can select the days and times you want the robot to clean. You can also choose different power modes for scheduled cleanings.
4.2 Spot Cleaning
The Shark Ion Robot also has a spot cleaning mode that you can use to clean a specific area. This is useful for cleaning up spills or messes in a targeted area.
To use spot cleaning mode, place the robot in the center of the area you want to clean and activate spot cleaning mode in the SharkClean app. The robot will then clean in a spiral pattern, focusing on the immediate area.
4.3 Power Modes
The Shark Ion Robot has different power modes that you can use to adjust its cleaning performance. These modes include:
-
Eco Mode: This mode uses less power and is quieter, making it ideal for cleaning lightly soiled areas or for use when you don’t want to be disturbed.
-
Normal Mode: This is the default mode and provides a balance between cleaning power and battery life.
-
Max Mode: This mode provides the highest level of suction and is ideal for cleaning heavily soiled areas or for use on carpets.
You can select the desired power mode in the SharkClean app or on the robot itself.
5. Integrating with Smart Home Systems
The Shark Ion Robot can be integrated with smart home systems like Amazon Alexa and Google Assistant. This allows you to control the robot with voice commands.
5.1 Amazon Alexa
To integrate your Shark Ion Robot with Amazon Alexa, you’ll need to enable the SharkClean skill in the Alexa app. Once the skill is enabled, you can use voice commands like “Alexa, start my Shark” or “Alexa, stop my Shark” to control the robot.
5.2 Google Assistant
To integrate your Shark Ion Robot with Google Assistant, you’ll need to link your SharkClean account in the Google Home app. Once the account is linked, you can use voice commands like “Hey Google, start my Shark” or “Hey Google, stop my Shark” to control the robot.
6. Comparing Shark Ion Robot to Other Robot Vacuums
The Shark Ion Robot is a popular choice for robot vacuums, but there are many other options available on the market. Here’s a comparison of the Shark Ion Robot to some of its competitors:
| Feature | Shark Ion Robot | Roomba i7+ | Eufy RoboVac 11S |
|---|---|---|---|
| Mapping Technology | Simplified navigation; doesn’t create detailed maps. | Imprint Smart Mapping; creates detailed maps of your home. | Random navigation; no mapping capabilities. |
| Self-Emptying | No. | Yes, empties its own bin into a disposable bag. | No. |
| Battery Life | Up to 90 minutes. | Up to 75 minutes. | Up to 100 minutes. |
| Smart Home Integration | Amazon Alexa and Google Assistant. | Amazon Alexa and Google Assistant. | None. |
| Price | Mid-range. | High-end. | Budget-friendly. |
| Key Features | Boundary strips, scheduling, different power modes. | Smart mapping, self-emptying, targeted cleaning. | Slim design, quiet operation, simple to use. |
| Best For | Homes with simple layouts and minimal obstacles. | Homes with complex layouts and those who want hands-free operation. | Small apartments or homes with minimal cleaning needs. |
| Pros | Affordable, easy to use, good cleaning performance. | Advanced features, excellent mapping capabilities, self-emptying. | Budget-friendly, quiet operation, good battery life. |
| Cons | Lacks advanced mapping, doesn’t self-empty. | Expensive, requires replacement bags for self-emptying. | No smart features, random navigation. |
| Cleaning Performance | Effectively cleans hard floors and low-pile carpets, good at picking up pet hair. | Excellent on all floor types, powerful suction. | Good for light cleaning on hard floors and thin carpets. |
| Maintenance | Easy to maintain, brushes and filters are easily replaceable. | Requires regular maintenance, including cleaning sensors and replacing filters. | Simple maintenance, easy to clean. |
| Obstacle Avoidance | Detects and avoids most obstacles, but may struggle with small or low-lying objects. | Advanced sensors and mapping help it avoid obstacles effectively. | Bumps into obstacles and changes direction. |
| Noise Level | Moderate. | Moderate. | Quiet. |
| App Features | Scheduling, power modes, cleaning history. | Detailed mapping, targeted cleaning, keep-out zones, cleaning reports. | Basic start/stop control. |
| Design | Round design with side brushes. | Round design with advanced sensors. | Slim, low-profile design to fit under furniture. |
| Dustbin Capacity | Varies by model. | Varies by model. | Varies by model. |
| Filter Type | HEPA filter. | HEPA filter. | Standard filter. |
| Additional Features | Handheld vacuum included in some models. | Automatic dirt disposal system. | High suction power. |
| Remote Control | App-based or remote control (depending on the model). | App-based. | Remote control. |
When choosing a robot vacuum, it’s important to consider your specific needs and budget. The Shark Ion Robot is a good choice for those who want a reliable and affordable robot vacuum with smart features. The Roomba i7+ is a high-end option with advanced mapping and self-emptying capabilities. The Eufy RoboVac 11S is a budget-friendly option that’s easy to use and has a long battery life.
7. Troubleshooting Connectivity Issues
Connectivity issues with your Shark Ion Robot can be frustrating, especially if you rely on the app for scheduling and control. Here’s a guide to troubleshooting common connectivity problems:
7.1 Initial Setup Problems
-
Ensure Compatibility: Confirm that your smartphone or tablet meets the minimum system requirements for the SharkClean app. Check compatibility details on the app store or Shark’s official website.
-
Wi-Fi Network Requirements: Verify that your Wi-Fi network meets the necessary specifications. Most robot vacuums require a 2.4 GHz Wi-Fi network. Ensure your router supports this frequency, as 5 GHz networks are often incompatible.
-
Router Placement: Place the robot vacuum and your smartphone or tablet close to the router during the initial setup process. This minimizes potential interference and ensures a strong Wi-Fi signal.
-
Correct Password: Double-check that you’re entering the correct Wi-Fi password. Passwords are case-sensitive, so ensure you’re typing it exactly as it appears on your router settings.
-
App Permissions: Grant the SharkClean app all necessary permissions, including location services. These permissions are often required for the app to discover and connect to your robot vacuum.
-
Restart Devices: Restart both your smartphone/tablet and the robot vacuum. Power cycling can resolve temporary glitches that may be preventing the devices from connecting.
-
Factory Reset: If the initial setup continues to fail, perform a factory reset on the robot vacuum. Refer to the user manual for instructions on how to reset your specific model.
7.2 Intermittent Connection Loss
-
Check Wi-Fi Signal Strength: Use a Wi-Fi analyzer app on your smartphone to check the signal strength in areas where the robot vacuum operates. Weak signals can cause intermittent connection loss. Consider repositioning your router or adding a Wi-Fi range extender to improve coverage.
-
Minimize Interference: Identify potential sources of interference that may be disrupting the Wi-Fi signal. Common culprits include microwave ovens, Bluetooth devices, and other electronic appliances. Keep these devices away from the robot vacuum and router.
-
Router Firmware: Ensure your router’s firmware is up to date. Manufacturers regularly release firmware updates to improve performance and address security vulnerabilities. Check your router’s administration panel for available updates.
-
DHCP Lease Time: Adjust the DHCP lease time on your router to prevent IP address conflicts. A shorter lease time ensures that devices are regularly assigned new IP addresses, reducing the risk of conflicts.
-
Static IP Address: Assign a static IP address to the robot vacuum. This ensures that the robot always has the same IP address, which can prevent connection issues caused by dynamic IP address assignment.
-
Firewall Settings: Review your router’s firewall settings to ensure that the SharkClean app and robot vacuum are not being blocked. Create exceptions for the app and robot vacuum if necessary.
-
Check for App Updates: Ensure you’re using the latest version of the SharkClean app. Developers often release updates to address bugs and improve connectivity.
7.3 Advanced Troubleshooting Steps
-
Test with Another Device: Try connecting the robot vacuum to a different smartphone or tablet. This helps determine whether the issue is specific to your primary device or a more general connectivity problem.
-
Guest Network: Create a guest network on your router and connect the robot vacuum to it. This can help isolate issues related to your primary network configuration.
-
Contact Shark Support: If you’ve exhausted all other troubleshooting steps and are still experiencing connectivity issues, contact Shark customer support for assistance. They may be able to provide specific guidance or arrange for a repair or replacement.
8. Maximizing Battery Life
Maximizing the battery life of your Shark Ion Robot is crucial for ensuring it can clean your home effectively and efficiently. Here are several strategies to help you extend the battery life of your robot vacuum:
8.1 Optimizing Cleaning Habits
-
Regular Cleaning Schedule: Establish a consistent cleaning schedule. Regular, shorter cleaning sessions are less taxing on the battery than infrequent, long sessions.
-
Pre-Cleaning: Before running the robot, do a quick manual sweep to remove larger debris. This reduces the workload on the robot vacuum, allowing it to conserve battery power.
-
Eco Mode: Utilize the Eco mode whenever possible. This mode reduces suction power, conserving battery life for routine cleaning tasks.
-
Targeted Cleaning: Use the spot cleaning mode for specific areas rather than cleaning the entire house unnecessarily. This focuses the robot’s energy on where it’s needed most.
-
Avoid Obstacles: Minimize clutter and obstacles in the cleaning area. The robot expends more energy navigating around obstacles, so clearing the path can help extend battery life.
8.2 Maintenance and Care
-
Clean Brushes and Filters: Regularly clean the brushes and filters. Clogged brushes and filters force the motor to work harder, reducing battery efficiency.
-
Check Wheels: Ensure the wheels are free of debris and can rotate smoothly. Obstructions can cause the robot to use more power to move.
-
Battery Storage: If storing the robot for an extended period, charge the battery to about 50% and store it in a cool, dry place. Avoid storing it with a fully charged or completely discharged battery.
-
Software Updates: Keep the robot’s software updated. Manufacturers often release updates that include battery optimization improvements.
8.3 Advanced Battery Management
-
Battery Calibration: Periodically calibrate the battery. Refer to the user manual for instructions on how to calibrate your specific model. Calibration helps ensure accurate battery level readings.
-
Battery Replacement: After several years of use, the battery’s capacity will naturally decline. Consider replacing the battery to restore optimal performance. Use only manufacturer-approved replacement batteries.
-
Charging Habits: Avoid leaving the robot on the charging dock continuously after it’s fully charged. Overcharging can reduce battery lifespan.
-
Room Size Considerations: For larger homes, consider dividing the cleaning area into zones and cleaning one zone at a time. This prevents the robot from running continuously and depleting the battery.
9. Understanding Robot Vacuum Sensors
Robot vacuum sensors are the key components that allow these devices to navigate, avoid obstacles, and clean efficiently. Understanding how these sensors work can help you optimize their performance and troubleshoot issues.
9.1 Types of Sensors
-
Cliff Sensors: These sensors are located on the bottom of the robot and detect drop-offs, such as stairs or ledges. They work by emitting infrared light and measuring the reflection. If the sensor detects a significant drop, it signals the robot to stop and change direction, preventing it from falling.
-
Obstacle Detection Sensors: These sensors help the robot detect and avoid obstacles, such as furniture, walls, and pet bowls. There are several types of obstacle detection sensors:
- Infrared Sensors: These sensors emit infrared light and measure the reflection to detect obstacles. They are effective for detecting solid objects but may struggle with transparent or dark-colored objects.
- Ultrasonic Sensors: These sensors emit ultrasonic sound waves and measure the time it takes for the waves to return. They are more effective than infrared sensors at detecting transparent and dark-colored objects.
- Bump Sensors: These sensors are physical sensors that detect when the robot bumps into an obstacle. They are a simple and reliable way to detect obstacles but may not be as effective at preventing the robot from bumping into things.
-
Wall Following Sensors: These sensors help the robot follow along walls and edges of furniture to ensure that these areas are thoroughly cleaned. They typically use infrared light to detect the wall and maintain a consistent distance from it.
-
Wheel Encoders: These sensors track the distance the robot has traveled and the direction it’s moving. They work by counting the number of rotations of the wheels and using this information to calculate the robot’s position.
-
Dirt Detection Sensors: Some robot vacuums have dirt detection sensors that can detect areas with high concentrations of dirt and debris. These sensors typically use optical or acoustic methods to measure the amount of dirt being picked up by the vacuum.
9.2 How Sensors Work
-
Infrared Sensors: These sensors emit infrared light and measure the reflection to detect objects. The intensity of the reflected light is used to determine the distance to the object.
-
Ultrasonic Sensors: These sensors emit ultrasonic sound waves and measure the time it takes for the waves to return. The time it takes for the waves to return is used to determine the distance to the object.
-
Bump Sensors: These sensors are physical sensors that detect when the robot bumps into an obstacle. When the robot bumps into something, the sensor is triggered, and the robot changes direction.
-
Wall Following Sensors: These sensors use infrared light to detect the wall and maintain a consistent distance from it. The robot adjusts its speed and direction to stay close to the wall.
-
Wheel Encoders: These sensors track the distance the robot has traveled and the direction it’s moving. The robot uses this information to create a map of the area it has cleaned and to plan its cleaning path.
-
Dirt Detection Sensors: These sensors measure the amount of dirt being picked up by the vacuum. The robot uses this information to adjust its cleaning power and focus on areas with high concentrations of dirt.
9.3 Optimizing Sensor Performance
-
Keep Sensors Clean: Regularly clean the sensors with a soft, dry cloth to remove any dust or debris. Dirty sensors can cause the robot to malfunction or become less effective at detecting obstacles.
-
Ensure Proper Lighting: Ensure that the cleaning area is adequately lit. Some sensors, such as infrared sensors, may not work well in dark environments.
-
Avoid Reflective Surfaces: Avoid placing reflective surfaces, such as mirrors or polished metal, in the robot’s path. Reflective surfaces can interfere with the sensors and cause the robot to become disoriented.
-
Use Boundary Strips: Use boundary strips to prevent the robot from entering areas with obstacles that are difficult to detect, such as cords or small objects.
-
Check for Obstructions: Regularly check for obstructions that may be blocking the sensors, such as pet hair or debris.
10. Future of Robot Vacuum Learning
The future of robot vacuum learning is likely to involve more advanced mapping technologies, improved artificial intelligence, and better integration with smart home systems. These advancements will enable robot vacuums to clean more efficiently and effectively, with less human intervention.
10.1 Advanced Mapping Technologies
-
LiDAR (Light Detection and Ranging): LiDAR technology uses lasers to create detailed 3D maps of your home. This allows robot vacuums to navigate more precisely and avoid obstacles more effectively.
-
SLAM (Simultaneous Localization and Mapping): SLAM technology allows robot vacuums to create maps of their environment while simultaneously localizing themselves within those maps. This enables them to navigate complex environments without getting lost.
-
Visual SLAM: Visual SLAM uses cameras to create maps of the environment. This technology is less expensive than LiDAR but can be less accurate in low-light conditions.
10.2 Improved Artificial Intelligence
-
Object Recognition: Object recognition technology allows robot vacuums to identify and avoid specific objects, such as pet bowls, cords, and shoes. This can prevent the robot from getting stuck or damaging objects.
-
Cleaning Pattern Optimization: AI can be used to optimize cleaning patterns based on the layout of your home and the types of messes you typically encounter. This can improve cleaning efficiency and reduce battery usage.
-
Voice Control and Integration: Integration with voice assistants like Amazon Alexa and Google Assistant will become even more seamless, allowing you to control your robot vacuum with simple voice commands.
10.3 Better Integration with Smart Home Systems
-
Smart Home Ecosystems: Robot vacuums will be able to communicate with other smart home devices, such as smart lights and smart thermostats, to coordinate cleaning schedules and optimize energy usage.
-
Remote Monitoring and Control: You will be able to monitor and control your robot vacuum from anywhere in the world using your smartphone or tablet. This will allow you to start a cleaning cycle remotely or check on the robot’s progress.
-
Predictive Maintenance: Robot vacuums will be able to predict when they need maintenance, such as brush cleaning or filter replacement, and alert you accordingly. This will help you keep your robot vacuum in good working condition and extend its lifespan.
By staying informed about these future trends, you can make informed decisions about which robot vacuum is right for you and how to optimize its performance.
At LEARNS.EDU.VN, we understand the importance of staying ahead in the world of technology and home automation. That’s why we offer a comprehensive range of courses and articles designed to help you master the latest innovations, including robotic vacuum cleaners. Whether you’re looking to understand the intricacies of smart home integration or simply want to optimize the performance of your devices, we have the resources you need to succeed. Join us today and unlock the full potential of your smart home! Visit learns.edu.vn, contact us at 123 Education Way, Learnville, CA 90210, United States, or reach out via Whatsapp at +1 555-555-1212.
FAQ About Shark Ion Robot Learning
Q1: How long does it take for the Shark Ion Robot to learn my house?
The Shark Ion Robot starts learning from its first run, but it takes a few cleaning cycles for it to adapt fully to your home’s layout.
Q2: Does the Shark Ion Robot create a map of my house?
No, unlike some high-end models, the Shark Ion Robot does not create a permanent, detailed map. It uses sensors to navigate and learn the general layout through repeated cleaning cycles.
Q3: Can I help the Shark Ion Robot learn my house faster?
Yes, preparing your home by removing obstacles, securing cords, and using boundary strips will help the robot navigate more efficiently and learn your home more quickly.
Q4: What happens if I move furniture around? Will the Shark Ion Robot get confused?
The Shark Ion Robot will adapt to the new layout over time. It may take a few cleaning cycles for it to adjust to the changes.
Q5: Can the Shark Ion Robot learn multiple floors in my house?
The Shark Ion Robot can only remember one floor at a time, since it doesn’t save a persistent map. You’ll need to move the robot manually to each floor you want it to clean.
Q6: How do boundary strips help the Shark Ion Robot learn?
Boundary strips create virtual barriers that prevent the robot from entering areas you don’t want it to clean. This helps the robot focus on the areas you want it to clean and avoids getting stuck in unwanted areas.
Q7: What if the Shark Ion Robot keeps getting stuck in the same spot?
Identify the cause of the problem, such as a cord or small object. Remove the obstacle or use a boundary strip to prevent the robot from entering that area.
Q8: Does the SharkClean app help the robot learn my house?
The SharkClean app allows you to schedule cleaning cycles, adjust power modes, and monitor the robot’s progress. While it doesn’t directly help the robot learn, it allows you to optimize its cleaning performance.
Q9: Can I use voice commands to help the Shark Ion Robot learn my house?
You can use voice commands to start and stop the robot, but you cannot directly control its learning process with voice commands.
Q10: How does regular maintenance affect the Shark Ion Robot’s ability to learn?
Regular maintenance, such as cleaning the brushes and sensors, ensures that the robot can navigate and clean effectively. This helps it learn your house more accurately and efficiently.