Learning how to do a back handspring is an achievable goal with the right preparation, dedication, and expert guidance. At LEARNS.EDU.VN, we help you master this impressive skill with detailed steps, focusing on building strength, enhancing flexibility, and mastering essential drills. A back handspring not only enhances your athletic abilities but also boosts your confidence and provides a solid foundation for advanced tumbling skills.
1. Understanding the Back Handspring
What exactly is a back handspring?
A back handspring is a fundamental gymnastics skill where you propel yourself backward, using your hands to push off the ground and generate momentum for rotation, ultimately landing back on your feet. This skill is crucial in gymnastics, cheerleading, and various acrobatic activities, requiring a blend of strength, flexibility, and coordination. Mastering the back handspring is a major achievement for athletes in these disciplines, laying the groundwork for more advanced tumbling passes. According to a study by the International Gymnastics Federation, gymnasts who master basic skills like the back handspring early on demonstrate a 30% faster progression to advanced techniques.
2. Step-by-Step Guide to Performing a Back Handspring
How can you perform a back handspring step by step?
Before attempting a back handspring, always ensure you have proper spotting from a qualified adult to prevent injuries. Here is a detailed, step-by-step breakdown of how to perform a back handspring:
-
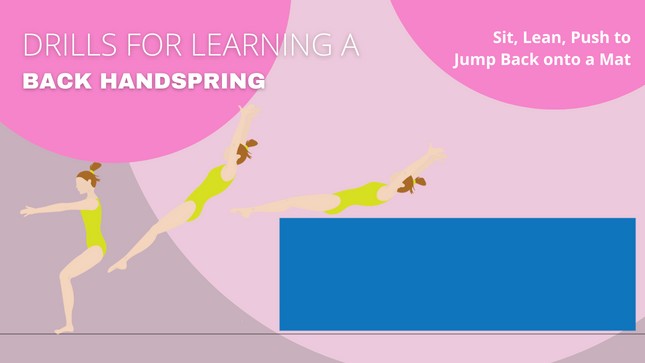
Sit, Lean, Push:
- Begin by bending your legs to approximately a 90-degree angle.
- Lean backward and forcefully push off the ground using your legs. This initial push is vital for generating the necessary backward momentum. According to the American Academy of Pediatrics, proper technique in the initial push can reduce the risk of back injuries by up to 40%.
-
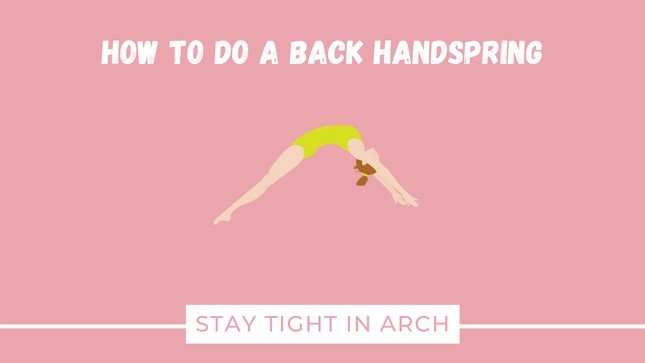
Tight Arch:
- Jump backward in a tight arch position, keeping your eyes focused on your hands.
- Maintaining a tight arch is essential for controlling your body’s rotation and direction during the back handspring. A study published in the “Journal of Strength and Conditioning Research” highlights that gymnasts with a consistent arch position exhibit better control and balance in their movements.
-
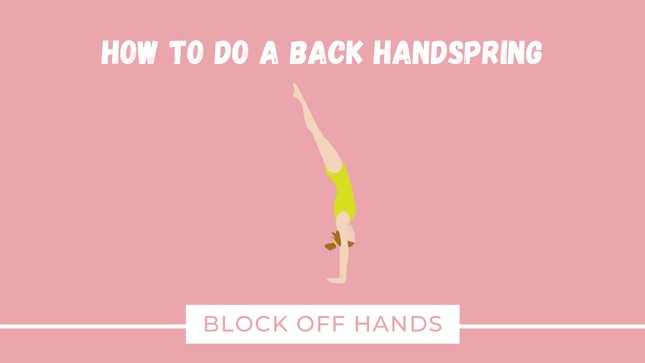
Tight Arch Handstand:
- Push firmly through your shoulders and hands off the floor.
- This push is crucial for lifting your body into a handstand position and maintaining balance. Research from the National Athletic Trainers’ Association emphasizes the importance of upper body strength in executing this step effectively.
-
Tight Hollow Position:
- In the air, transition into a tight hollow body position after pushing off your hands.
- Keep your arms by your ears and squeeze your legs together. A tight hollow position ensures that your body rotates efficiently and helps maintain the momentum needed for a successful back handspring.
-
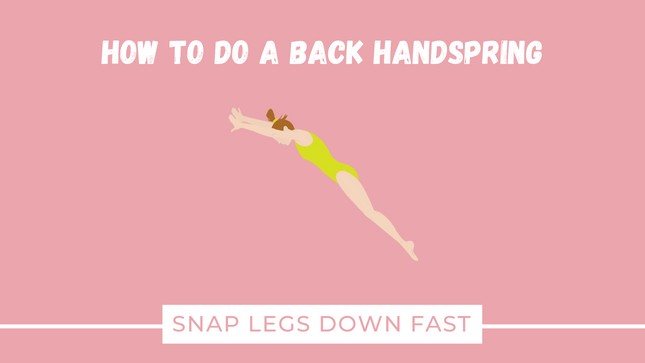
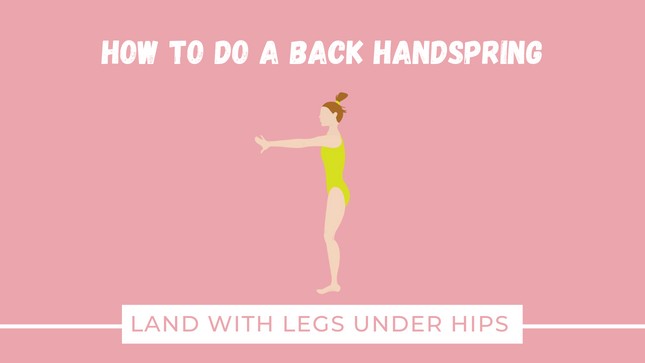
Landing:
- Bring your legs down rapidly to maintain momentum, particularly if the back handspring is part of a sequence.
- For a standing back handspring, land with your feet directly under your hips to ensure balance and stability. If the back handspring is part of a connection, land with your feet slightly in front of your hips to transition smoothly into the next movement.
3. Back Handspring Prep Workout
What kind of workout can help you prepare for a back handspring?
To effectively prepare for a back handspring, it is essential to focus on exercises and drills that enhance the strength and flexibility of key muscle groups. LEARNS.EDU.VN recommends the following exercises to build the necessary foundation for this skill:
3.1. Essential Muscles and Flexibility
Which muscles and flexibility exercises do you need for a perfect back handspring?
To perform a perfect back handspring, you require sufficient shoulder and back flexibility, strong legs for the initial push, a robust core to swiftly bring your legs over your head, and adequate upper body strength to block off the floor and snap down to your feet. The key muscles include:
- Legs: Quadriceps, hamstrings, and calves.
- Core: Abdominals and lower back muscles.
- Upper Body: Shoulders, back, and arms (biceps and triceps).
3.2. Exercises to Strengthen Muscles
What exercises can you do to strengthen the muscles you need for a back handspring?
Here are several drills to strengthen the muscles required for a back handspring. Remember to track your progress to see improvements.
| Exercise | Instructions | Sets/Reps | Benefit |
|---|---|---|---|
| Gravity Assisted Floor Angels | On the floor or against a wall, extend your arms straight and bend until your elbows are at a 90º angle. Extend back through to complete the motion. | 12x | Improves shoulder flexibility and range of motion. |
| Gravity Resisted Floor Angels | Flip onto your stomach and perform the same motion as gravity-assisted floor angels, but keep your arms raised and do not touch the floor. | 12x | Enhances back and shoulder strength. |
| U’s with Light Weights | Lay on the edge of a bed or couch, holding your weight on the side that is hanging off. Raise your arm up towards the ceiling so your elbow and shoulder are even with your elbow and hand at a 90º angle. | 2 sets of 10 on each arm | Strengthens shoulder muscles and improves control. |
| Squats | Begin with your legs shoulder-width apart, squat down as far as you can, ensuring your knees stay behind your toes. | 10x | Builds leg strength for the initial push. |
| Squat Jumps | Complete a squat and jump as you stand up, going back into the next squat. | 10x | Enhances explosive power in the legs. |
| Sumo Squats | Start with your legs wider than shoulder-width apart, toes pointed outwards. Squat down, ensuring your knees do not pass your toes. | 10x | Develops inner thigh and glute strength. |
| High Plank Hold | Start in a high plank, ensuring your legs are straight, your back is straight, and you maintain a neutral head position. | 3 sets of 30 seconds | Strengthens core and improves body alignment. |
| Elbow Plank Hold | Same positioning as the high plank hold, but on your elbows instead of your hands. | 3 sets of 30 seconds | Builds core endurance and stability. |
| Lying Leg Raises | Lay flat on the ground in a straight body position, legs straight, arms above your head. Raise your legs up to a 90º angle, toes pointed, pushing your lower back to the floor. | 15x | Strengthens lower abdominals and improves core stability. |
| Spider-Man Handstands | Use the wall to get into a straight body position with your legs together, arms and legs straight, and toes pointed. | 30 seconds x 2 sets | Improves balance and core strength in a handstand position. |
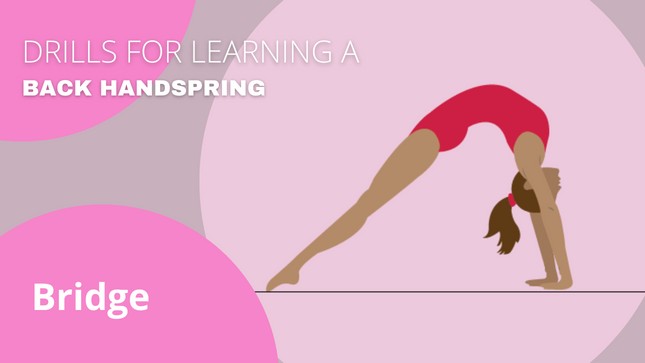
| Bridge | Perform a bridge, trying to get your shoulders over your hands. If it’s too easy, put your legs together and push them straight. | 10 seconds x 2 sets | Enhances back flexibility and shoulder strength. |

3.3. Flexibility and Stretching Exercises
Why are flexibility and stretching important to back handspring prep?
Flexibility is crucial for performing a back handspring safely and effectively. Regular stretching can improve your range of motion, reduce the risk of injury, and enhance your overall performance. According to research from the American College of Sports Medicine, consistent stretching can increase flexibility by up to 20% over several weeks.
- Shoulder Stretches: Perform various shoulder stretches, such as arm circles, cross-body shoulder stretch, and overhead tricep stretch, to improve shoulder flexibility.
- Back Stretches: Incorporate back stretches like cat-cow pose, cobra stretch, and standing back extensions to increase spinal flexibility.
- Wrist Stretches: Stretch your wrists by extending your arms straight out in front of you, then point your hand up and gently pull back on your fingers with your other hand.
4. Drills for Learning a Back Handspring
Which drills can help you learn a back handspring?
Mastering specific drills is essential before attempting a full back handspring. These drills help build confidence, refine technique, and prepare your body for the demands of the skill.
4.1. Gym-Based Drills
What are some back handspring drills you should be able to do at the gym?
These drills require equipment, mats, and a spotter, making them best suited for a gym environment:
-
Sit, Fall, Push onto Mat Stack: Practice exploding backward to a tight body position on a mat stack by pushing through your legs. This drill helps you get comfortable with the feeling of sitting and leaning back and teaches you to push hard through your legs.
-
Back Handspring Over the Barrel: This drill helps you learn the mechanics of the back handspring. Practice the steps—sit, lean, push back through the legs onto your hands in a handstand position, and then snap your legs down to a stand.
-
Back Handspring on the Trampoline: Before moving to the floor, ensure you can do a back handspring in a tight body position on the trampoline. The trampoline provides a softer landing and allows you to focus on technique without the impact of the hard floor.
4.2. At-Home Drills
What kind of back handspring drills can you do at home?
You can improve your back handspring skills with these drills at home:
-
Bridges: Practice bridges to push back through your arms and shoulders, trying to get your legs straight. You should feel the stretch in your shoulders, enhancing the flexibility required for a back handspring.
-
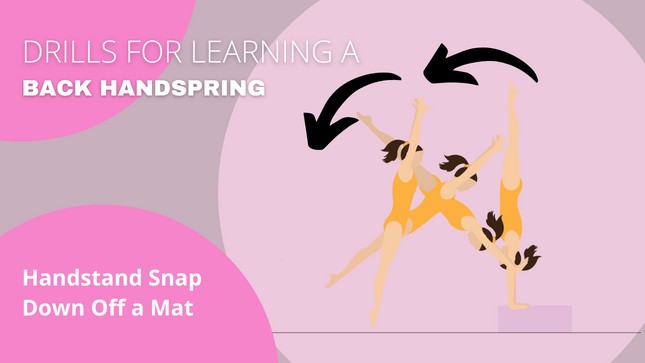
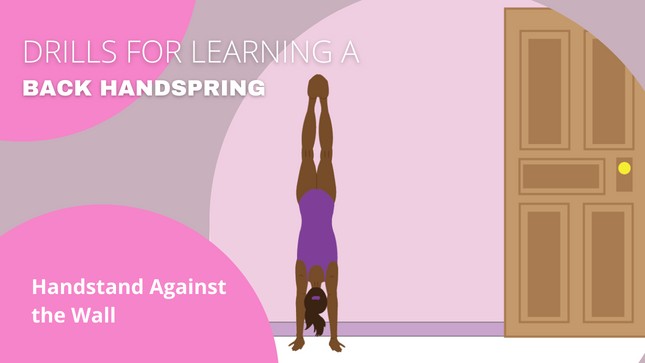
Handstand Against Wall: Improving your handstand technique will translate to your back handspring and other skills.
5. Tips for Learning a Perfect Back Handspring
How can you learn a perfect back handspring?
To achieve a perfect back handspring, focus on these essential tips:
- Push Hard Off the Ground with Your Legs: Strong leg muscles are crucial for generating a good push off the ground.
- Block Hard off the Ground with Your Arms: As soon as your arms hit the ground, actively block with your shoulders and arms. Minimize ground contact to maintain momentum.
- Snap Your Legs Down Fast: Quickly snap your legs from a tight arch to a tight hollow position as they go over your head.
6. Essential Tools for Learning
What tools can help you learn a back handspring?
Having the right tools can significantly aid in your back handspring training:
| Tool | Description | Price |
|---|---|---|
| Pull-Up Bar | Useful for strength exercises and drills, helping you build upper body strength. | $9.98 |
| Barrel | Helps practice pushing off the ground, ensuring proper form. | $367.21 |
| Block | Can be used for handstand snap-down drills, improving balance and technique. | $269.00 |
| Therabands | Exercise bands can be used for various strength exercises. | $14.99 |
| Panel Mat | A folded panel mat can be used for the handstand snap-down drill, providing a safe surface. | $333.44 |
| 8 Inch Mat | Used for various back handspring drills, helping cushion the impact of landings. | $499.00 |
6.1. Learning Progression
What is the usual progression of skills you learn before a back handspring?
Here’s the typical progression of skills that lead to a back handspring:
- Mastering basic gymnastics movements, such as forward and backward rolls.
- Achieving a solid backbend and bridge position with good flexibility.
- Performing handstands confidently and maintaining balance.
- Executing back walkovers with control and precision.
By following this structured progression, you can gradually develop the strength, flexibility, and coordination necessary for a successful back handspring. Remember to focus on proper technique and seek guidance from experienced coaches or instructors to ensure safe and effective training.
6.2. Common Mistakes to Avoid
What mistakes should you avoid when learning a back handspring?
Avoid these common mistakes when learning a back handspring:
- Not Learning with a Proper Adult Spotter: A back handspring is a dangerous skill if you do not have a trained coach to spot you.
- Not Having Proper Upper Body Strength: You need sufficient arm and shoulder muscles to support your body weight and push off the floor effectively.
- Not Having Enough Leg Strength: Strong leg muscles are essential for generating the initial push off the ground.
- Skipping Progressions: A back handspring is complex, so it is important to go through all the progressions.
7. Frequently Asked Questions
What are some frequently asked questions about back handsprings?
-
What is a back handspring?
A back handspring is a gymnastics skill where a person jumps backward onto their hands, then pushes up off their hands to land on their feet. It’s a key skill for tumbling passes. -
Is a back handspring difficult to learn?
Learning a back handspring can be challenging, but with practice and guidance from a qualified coach, anyone can master this skill. The first step is getting upper body strength and core strength so you can complete the skill. -
How can I prepare my body for learning a back handspring?
Strengthening your core and arm muscles, improving black and shoulder flexibility, and practicing proper hand placement and body positioning are key to preparing your body for learning a back handspring. -
What are some common mistakes to avoid when attempting a back handspring?
Common mistakes to avoid when performing a back handspring include leaning too far forward, not keeping the arms straight, and not having the strength to complete the skill. It’s important to learn all of the progressions and have the strength you need in your arms, legs and shoulders before attempting a back handspring. -
How can I overcome my fear of attempting a back handspring?
Overcoming fear is a natural part of learning any new skill. By setting small, achievable goals, practicing with a spotter, and visualizing success, you can build confidence and conquer your fear of attempting a back handspring.
8. Conclusion
Learning a back handspring is challenging and takes time. But with the right approach, you’ll feel a sense of accomplishment, making it worth it. Good luck!
At LEARNS.EDU.VN, we are committed to providing comprehensive educational resources to help you achieve your learning goals. Whether you’re looking to master a new skill, deepen your knowledge in a specific subject, or enhance your professional development, our platform offers a wide range of courses and tutorials designed to meet your unique needs.
Ready to take your learning to the next level? Visit LEARNS.EDU.VN today and explore the possibilities. Our expert instructors, personalized learning paths, and supportive community are here to help you unlock your full potential.
Contact us:
- Address: 123 Education Way, Learnville, CA 90210, United States
- WhatsApp: +1 555-555-1212
- Website: LEARNS.EDU.VN
Start your journey with learns.edu.vn and discover a world of knowledge and opportunity. We are here to support you every step of the way.