Learning how to knit might seem daunting at first, but with the right guidance, it can be an incredibly rewarding and relaxing hobby. At LEARNS.EDU.VN, we break down the essentials of knitting into easy-to-follow steps, ensuring you grasp the fundamentals quickly. Whether you’re looking to create cozy scarves, intricate sweaters, or unique home décor, understanding the basics of knitting sets you on the path to endless creative possibilities. Explore detailed tutorials, expert tips, and helpful resources at LEARNS.EDU.VN, designed to transform you from a novice to a confident knitter and unlock a world of yarn crafts, stitch patterns, and fiber arts.
1. Understanding the Basics of Knitting
Knitting, at its core, involves creating fabric by interlocking loops of yarn. These loops are formed using two needles, and the process can be as simple or complex as you like. The beauty of knitting lies in its versatility; with just a few basic techniques, you can produce a wide range of textures and patterns. It’s a craft that combines artistry with practical skill, offering both a creative outlet and the satisfaction of making something tangible. Learning to knit is not just about acquiring a new skill; it’s about joining a community of crafters who share tips, patterns, and a passion for creating with yarn.
1.1. Essential Materials for Beginners
Before you begin, gathering the right materials is crucial. Starting with quality tools can make the learning process smoother and more enjoyable. Here’s what you’ll need:
- Yarn: Choose a smooth, light-colored yarn in a medium weight (worsted weight is ideal). This makes it easier to see your stitches.
- Knitting Needles: Opt for a pair of size US 8 (5 mm) needles. Straight needles are best for beginners.
- Scissors: For cutting the yarn.
- Tapestry Needle: For weaving in the ends of your yarn.
- Measuring Tape: To measure your gauge and project size.
- Stitch Markers: To mark specific points in your pattern (optional but helpful).
Selecting the right yarn is critical. According to a study by the Craft Yarn Council, beginners often find natural fibers like wool or cotton easier to work with due to their forgiving nature. These fibers provide good stitch definition and are less likely to slip off the needles.
1.2. Understanding Different Types of Yarn
The type of yarn you choose significantly impacts the look and feel of your finished project. Here’s a brief overview of common yarn types:
| Yarn Type | Characteristics | Best For |
|---|---|---|
| Wool | Warm, durable, and elastic. Great for textured stitches. | Sweaters, scarves, hats |
| Cotton | Breathable, absorbent, and easy to wash. Good for warmer weather items. | Dishcloths, baby clothes, summer tops |
| Acrylic | Affordable, easy to care for, and comes in a wide range of colors. | Blankets, toys, beginner projects |
| Alpaca | Soft, luxurious, and warm. Has a beautiful drape. | Shawls, scarves, lightweight sweaters |
| Silk | Shiny, smooth, and strong. Adds a touch of elegance to projects. | Delicate scarves, lace work, and blended with other fibers for softness |
1.3. Choosing the Right Knitting Needles
Knitting needles come in various materials and sizes. Here’s a quick guide to help you choose:
| Needle Type | Material | Advantages | Disadvantages | Best For |
|---|---|---|---|---|
| Straight | Metal, Bamboo, Plastic | Easy to handle, good for beginners, inexpensive. | Can be cumbersome for large projects. | Small projects, scarves, dishcloths |
| Circular | Metal, Bamboo, Plastic | Versatile, can handle large projects, good for knitting in the round. | Takes some getting used to for flat knitting. | Sweaters, blankets, hats, socks |
| Double-Pointed | Metal, Bamboo, Plastic | Ideal for small circumference knitting, such as socks and gloves. | Can be fiddly to manage at first. | Socks, gloves, small hats |
1.4. Essential Knitting Terminology
Understanding common knitting terms is crucial for following patterns and tutorials. Here are a few to get you started:
- Cast On (CO): The method of creating the first row of stitches on your needle.
- Knit (K): The basic stitch in knitting.
- Purl (P): Another basic stitch, the reverse of a knit stitch.
- Cast Off (BO): The method of removing the stitches from your needle to finish your project.
- Gauge: The number of stitches and rows per inch or centimeter, used to ensure your project matches the pattern.
- Stitch (st): A single loop of yarn on the needle.
- Row: A line of stitches.
2. Mastering the Basic Knitting Techniques
Once you have your materials and understand the terminology, it’s time to learn the fundamental techniques. These building blocks will enable you to tackle a wide range of projects.
2.1. The Slip Knot: The First Step
The slip knot is the foundation of your knitting project. It creates the first loop on your needle.
- Hold the yarn, leaving a tail of about 6 inches.
- Form a loop with the yarn, crossing the working yarn (the yarn coming from the ball) over the tail.
- Insert your fingers through the loop and grab the working yarn.
- Pull the working yarn through the loop.
- Place the loop onto your needle and tighten gently by pulling the tail.
2.2. Casting On: Creating Your First Stitches
Casting on creates the initial row of stitches on your needle. There are several methods, but the long-tail cast on is a popular choice for beginners due to its elasticity and neat appearance.
- Hold the yarn with the tail end over your thumb and the working yarn over your index finger.
- Insert the needle into the loop on your thumb from below.
- Grab the yarn from your index finger with the needle.
- Pull the yarn through the loop on your thumb.
- Slip the loop off your thumb and tighten the stitch on the needle.
- Repeat steps 2-5 until you have the desired number of stitches.
2.3. The Knit Stitch: The Foundation of Knitting
The knit stitch is the most basic and essential stitch in knitting.
- Hold the needle with the cast-on stitches in your left hand and the empty needle in your right hand.
- Insert the right needle into the first stitch on the left needle from left to right.
- Wrap the yarn around the right needle in a clockwise direction.
- Pull the yarn through the stitch with the right needle.
- Slip the old stitch off the left needle, leaving the new stitch on the right needle.
- Repeat steps 2-5 for each stitch on the left needle.
- Transfer the needle with the new stitches back to your left hand, and repeat the process.
Practicing the knit stitch helps build muscle memory and improves your knitting speed. According to a study from the University of California, repetitive hand movements like knitting can reduce stress and improve fine motor skills.
2.4. The Purl Stitch: The Reverse of Knit
The purl stitch is the counterpart to the knit stitch and is essential for creating various stitch patterns.
- Hold the needle with the stitches in your left hand and the empty needle in your right hand.
- Bring the yarn to the front of your work.
- Insert the right needle into the first stitch on the left needle from right to left.
- Wrap the yarn around the right needle counter-clockwise.
- Pull the yarn through the stitch with the right needle.
- Slip the old stitch off the left needle, leaving the new stitch on the right needle.
- Repeat steps 3-6 for each stitch on the left needle.
- Transfer the needle with the new stitches back to your left hand, and repeat the process.
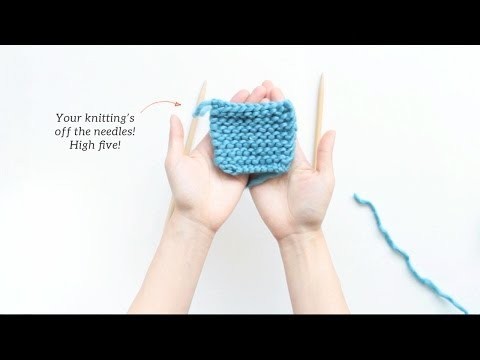
2.5. Casting Off: Finishing Your Project
Casting off, also known as binding off, secures the stitches and prevents your work from unraveling.
- Knit two stitches.
- Insert the left needle into the first stitch on the right needle.
- Lift the first stitch over the second stitch and off the needle.
- Knit one stitch so there are two stitches on the right needle.
- Repeat steps 2-4 until only one stitch remains.
- Cut the yarn, leaving a tail of about 6 inches.
- Pull the yarn through the last stitch and tighten to secure.
3. Common Knitting Mistakes and How to Avoid Them
As a beginner, you’re bound to encounter some common mistakes. Recognizing and addressing these issues early on can save you time and frustration.
3.1. Dropped Stitches
- Problem: A stitch falls off the needle, causing a hole in your work.
- Solution: Pick up the dropped stitch as soon as possible. Use a crochet hook or your knitting needle to pull the loop back up through the rows. LEARNS.EDU.VN offers detailed tutorials on how to fix dropped stitches.
3.2. Uneven Tension
- Problem: Your stitches are too tight or too loose, resulting in an uneven fabric.
- Solution: Practice maintaining consistent tension. Try to relax your hands and avoid pulling the yarn too tightly. Blocking can also help even out your stitches.
3.3. Adding or Losing Stitches
- Problem: You accidentally increase or decrease the number of stitches in a row.
- Solution: Count your stitches at the end of each row to ensure you have the correct number. Use stitch markers to help keep track of increases or decreases.
3.4. Twisted Stitches
- Problem: Stitches are twisted on the needle, resulting in a tight, dense fabric.
- Solution: Make sure to insert your needle into the stitch correctly. For knit stitches, insert the needle from left to right through the front loop.
3.5. Incorrectly Identifying Stitches
- Problem: Difficulty distinguishing between knit and purl stitches, leading to errors in patterns.
- Solution: Practice recognizing the “V” shape of knit stitches and the “bump” of purl stitches. Use good lighting and take your time when examining your work.
4. Practicing Simple Knitting Projects
Now that you know the basics, it’s time to put your skills to practice with some easy projects. These projects will help you build confidence and refine your technique.
4.1. Garter Stitch Scarf
The garter stitch scarf is an excellent beginner project because it only uses the knit stitch.
- Cast on 20-30 stitches, depending on the desired width of your scarf.
- Knit every row until the scarf reaches your desired length.
- Cast off and weave in the ends.
4.2. Simple Dishcloth
A dishcloth is a small, quick project that’s perfect for practicing basic stitches.
- Cast on 30-40 stitches.
- Knit every row for a garter stitch dishcloth, or alternate knit and purl rows for a stockinette stitch dishcloth.
- Knit until the dishcloth is square.
- Cast off and weave in the ends.
4.3. Ribbed Headband
A ribbed headband introduces you to the concept of ribbing, which creates a stretchy fabric.
- Cast on 20-30 stitches.
- Knit 1, purl 1 (K1, P1) for each row.
- Repeat row 2 until the headband reaches your desired length.
- Cast off and sew the ends together.
5. Exploring Different Knitting Stitches and Patterns
Once you’re comfortable with the basic stitches, you can start exploring more complex patterns and techniques.
5.1. Stockinette Stitch
The stockinette stitch creates a smooth, flat fabric. It’s made by knitting every row on the right side and purling every row on the wrong side.
- Row 1 (Right Side): Knit all stitches.
- Row 2 (Wrong Side): Purl all stitches.
- Repeat rows 1 and 2.
5.2. Rib Stitch
Ribbing creates a stretchy, textured fabric that’s often used for cuffs, hems, and necklines.
- 1×1 Rib: Alternate knit and purl stitches in each row (K1, P1).
- 2×2 Rib: Knit two, purl two stitches in each row (K2, P2).
5.3. Seed Stitch
The seed stitch creates a textured, bumpy fabric that lies flat and doesn’t curl.
- Row 1: Alternate knit and purl stitches (K1, P1).
- Row 2: Knit the purl stitches and purl the knit stitches.
- Repeat rows 1 and 2.
5.4. Cable Stitch
Cables create raised, rope-like designs on your fabric. They involve rearranging the order of stitches using a cable needle.
- Slip a specified number of stitches onto a cable needle and hold it in front or back of your work.
- Knit the next stitches from the left needle.
- Knit the stitches from the cable needle.
LEARNS.EDU.VN offers a variety of patterns that incorporate these stitches, providing step-by-step guidance for creating beautiful and intricate designs.
6. Knitting in the Round: Hats, Socks, and More
Knitting in the round involves creating a seamless tube of fabric. This technique is perfect for projects like hats, socks, and cowls.
6.1. Using Circular Needles
Circular needles consist of two needle tips connected by a flexible cable. They are versatile and can be used for both flat and circular knitting.
- Cast on the required number of stitches.
- Join the stitches into a circle, being careful not to twist them.
- Knit or purl continuously around the circle, following your pattern.
6.2. Using Double-Pointed Needles (DPNs)
DPNs are sets of five short needles used to knit small-circumference tubes, such as socks and gloves.
- Cast on the required number of stitches.
- Divide the stitches evenly among four needles.
- Use the fifth needle to knit the stitches from the first needle, creating a continuous circle.
6.3. Magic Loop Technique
The magic loop technique uses a long circular needle to knit small-circumference tubes.
- Cast on the required number of stitches.
- Divide the stitches in half, pulling the cable between the two halves.
- Knit the first half of the stitches, then turn your work and knit the second half.
- Continue knitting in this manner, pulling the cable out between the halves as you go.
7. Understanding Knitting Patterns
Knitting patterns provide instructions for creating specific projects. Learning to read and interpret patterns is essential for advancing your skills.
7.1. Common Abbreviations and Symbols
Knitting patterns use abbreviations and symbols to save space and make instructions easier to follow. Here are some common ones:
- K: Knit
- P: Purl
- CO: Cast On
- BO: Bind Off (Cast Off)
- St(s): Stitch(es)
- Rep: Repeat
- Inc: Increase
- Dec: Decrease
- RS: Right Side
- WS: Wrong Side
7.2. Gauge and How to Measure It
Gauge is the number of stitches and rows per inch or centimeter in your knitted fabric. It’s crucial for ensuring your project matches the pattern’s intended size.
- Knit a swatch that is at least 4×4 inches in the stitch pattern specified in the pattern.
- Lay the swatch flat and use a ruler or gauge swatch tool to count the number of stitches and rows in a 1-inch or 4-inch area.
- Compare your gauge to the pattern’s gauge. If you have more stitches or rows, your gauge is tighter. If you have fewer stitches or rows, your gauge is looser.
- Adjust your needle size to achieve the correct gauge. Use a larger needle for a looser gauge and a smaller needle for a tighter gauge.
7.3. Pattern Repeats
Many knitting patterns involve repeating a sequence of stitches or rows. Understanding how to follow these repeats is essential for creating the correct pattern.
- Read the pattern carefully to identify the section that needs to be repeated.
- Follow the instructions within the repeat, paying attention to any specific stitch counts or techniques.
- Repeat the section as many times as specified in the pattern.
- Move on to the next section of the pattern once you’ve completed the repeat.
8. Advanced Knitting Techniques and Tips
As you gain experience, you can explore more advanced techniques to add complexity and detail to your projects.
8.1. Intarsia and Fair Isle Knitting
Intarsia and Fair Isle are colorwork techniques that allow you to create intricate designs using multiple colors of yarn.
- Intarsia: Involves knitting blocks of color within a row, using separate balls of yarn for each color.
- Fair Isle: Involves knitting with two colors in the same row, carrying the unused color across the back of the work.
8.2. Lace Knitting
Lace knitting creates delicate, openwork patterns using yarn overs and decreases.
- Yarn Over (YO): Bring the yarn to the front of your work, then knit the next stitch. This creates a hole in the fabric.
- Decrease: Knit two stitches together (K2tog) or slip one stitch, knit one stitch, pass the slipped stitch over (SSK) to reduce the number of stitches.
8.3. Brioche Knitting
Brioche knitting creates a thick, squishy fabric with a ribbed texture.
- Slip 1 Yarn Over (Sl1yo): Slip one stitch purlwise, then bring the yarn over the needle to create a yarn over.
- Brioche Knit (brk): Knit the stitch together with its yarn over.
- Brioche Purl (brp): Purl the stitch together with its yarn over.
8.4. Modular Knitting (Mitered Squares)
Modular knitting involves creating individual squares or shapes and then joining them together to form a larger project.
- Cast on a specified number of stitches.
- Decrease stitches in the center of the square to create a mitered corner.
- Continue knitting until the square is complete.
- Join the squares together using a variety of seaming techniques.
9. Caring for Your Knitted Items
Proper care ensures your knitted items stay beautiful and last longer.
9.1. Washing and Drying
- Hand Washing: Gently wash your knitted items in cool water with a mild detergent. Avoid wringing or twisting the fabric.
- Machine Washing: If the yarn label allows, machine wash your knitted items on a gentle cycle in cool water. Place the item in a mesh laundry bag to protect it.
- Drying: Lay your knitted items flat on a clean, dry surface to air dry. Avoid hanging them, as this can stretch the fabric.
9.2. Blocking
Blocking is the process of shaping and setting your knitted items. It can help even out stitches, define lace patterns, and improve the overall appearance of your work.
- Wet block: Soak your knitted item in cool water, then gently squeeze out the excess water.
- Pin the item to a blocking board, shaping it to the desired dimensions.
- Allow the item to dry completely.
9.3. Storing Your Knitted Items
Store your knitted items in a cool, dry place, away from direct sunlight. Fold them neatly or roll them up to prevent creases. Use cedar chips or lavender sachets to deter moths.
10. Finding Knitting Resources and Inspiration
There are numerous resources available to help you learn and grow as a knitter.
10.1. Online Tutorials and Websites
- LEARNS.EDU.VN: Offers a wide range of knitting tutorials, patterns, and tips for knitters of all skill levels.
- Ravelry: A popular online community for knitters and crocheters, offering forums, pattern databases, and project sharing.
- YouTube: A vast resource for video tutorials on knitting techniques and projects.
10.2. Knitting Books and Magazines
- “Knitting for Dummies” by Pam Allen and Tracy Barr: A comprehensive guide for beginner knitters.
- “Vogue Knitting: The Ultimate Knitting Book” by Trisha Malcolm: A detailed reference book covering a wide range of techniques and patterns.
- “Interweave Knits” magazine: A quarterly publication featuring stylish patterns and informative articles.
10.3. Knitting Communities and Workshops
- Local Yarn Stores (LYS): Often offer classes and workshops for knitters of all skill levels.
- Knitting Guilds: Provide opportunities to connect with other knitters, learn new techniques, and participate in community projects.
- Online Forums and Social Media Groups: Connect with knitters from around the world, share your projects, and ask for advice.
11. Understanding Yarn Weights
Yarn weight refers to the thickness of the yarn strand. Choosing the right yarn weight is crucial for achieving the desired look and feel in your knitted projects. Here’s a guide to common yarn weights:
| Yarn Weight | Ply | Needle Size (US) | Gauge (Stitches per inch) | Common Uses |
|---|---|---|---|---|
| Lace/Fingering | 1-ply | 0-3 | 7-10 | Delicate shawls, baby clothes |
| Sock/Fingering | 4-ply | 1-3 | 6-8 | Socks, lightweight garments |
| Sport | 5-ply | 3-5 | 5.5-7.5 | Baby clothes, lightweight sweaters |
| DK (Double Knit) | 8-ply | 5-7 | 5-6 | Versatile for sweaters, scarves, and blankets |
| Worsted/Aran | 10-ply | 7-9 | 4-5 | Most sweaters, hats, and blankets |
| Bulky | 12-ply | 9-11 | 3-3.5 | Quick projects like cowls and chunky sweaters |
| Super Bulky/Jumbo | 14+ ply | 11+ | 1-2 | Extra chunky blankets and home décor |
12. The Importance of Swatching
Creating a gauge swatch before starting a project is an essential step to ensure your finished piece matches the pattern’s intended size and look.
12.1. Why Swatch?
- Accurate Sizing: Ensures your project will fit as expected.
- Fabric Appearance: Helps you see how the yarn and stitch pattern will look together.
- Practice: Provides a small-scale opportunity to practice new techniques.
- Yarn Substitution: Determines if a substitute yarn will work in the pattern.
12.2. How to Create a Gauge Swatch
- Use the Recommended Yarn and Needles: Use the yarn and needle size recommended in the pattern.
- Cast On Enough Stitches: Cast on at least 4 inches (10 cm) more stitches than the gauge listed in the pattern to allow for accurate measuring away from the edges.
- Work the Stitch Pattern: Knit in the stitch pattern for at least 4 inches (10 cm).
- Bind Off: Bind off loosely.
- Block the Swatch: Block the swatch as you plan to block the finished project.
- Measure the Gauge: Use a ruler or gauge tool to count the number of stitches and rows in a 4-inch (10 cm) area in the center of the swatch.
- Compare and Adjust: Compare your gauge to the pattern’s gauge. If they match, you’re good to go! If not, adjust your needle size and create another swatch until you achieve the correct gauge.
13. Ergonomics and Knitting
Knitting can be hard on your body if you don’t pay attention to proper posture and ergonomics. Here are some tips to stay comfortable and prevent injuries:
13.1. Posture
- Sit Upright: Maintain a good posture with your back straight and shoulders relaxed.
- Support Your Back: Use a chair with good back support or add a cushion.
- Elevate Your Feet: Use a footrest to keep your knees at a 90-degree angle.
13.2. Hand and Wrist Care
- Relax Your Grip: Avoid gripping the needles too tightly.
- Take Breaks: Take frequent breaks to stretch your hands and wrists.
- Use Ergonomic Needles: Consider using ergonomic needles with comfortable grips.
13.3. Stretching Exercises
- Wrist Flexion and Extension: Gently bend your wrist up and down.
- Finger Stretches: Spread your fingers wide and then make a fist.
- Shoulder Rolls: Roll your shoulders forward and backward to relieve tension.
13.4. Lighting
- Good Lighting: Ensure you have adequate lighting to reduce eye strain.
- Adjustable Lamps: Use adjustable lamps to direct light where you need it most.
14. Knitting for Charity and Community
Knitting can be a wonderful way to give back to your community and support various causes.
14.1. Organizations to Knit For
- Warm Up America!: Provides knitted and crocheted blankets and afghans to people in need.
- Knitting for Charity: Offers patterns and resources for knitting items for various charities.
- Project Linus: Provides handmade blankets to children in hospitals, shelters, and social service agencies.
14.2. Benefits of Knitting for Others
- Sense of Purpose: Knitting for others can provide a sense of purpose and fulfillment.
- Community Involvement: Connect with other knitters and contribute to a meaningful cause.
- Stress Relief: Knitting can be a relaxing and meditative activity that helps reduce stress.
14.3. Tips for Organizing a Knitting Group
- Define Your Focus: Decide what type of projects you want to knit and which charities you want to support.
- Find a Meeting Place: Choose a convenient location for your group to meet regularly.
- Recruit Members: Spread the word about your group and invite friends, family, and neighbors to join.
- Share Resources: Share patterns, tips, and encouragement with each other.
15. Upskilling and Continued Learning
Once you’ve mastered the basics, there are many ways to continue learning and improving your knitting skills.
15.1. Advanced Techniques
- Entrelac: Creates a woven-look fabric using interlocking rectangles.
- Double Knitting: Produces a reversible fabric with different designs on each side.
- Shadow Knitting: Creates hidden images that appear when viewed from different angles.
15.2. Workshops and Classes
- Local Yarn Stores (LYS): Often offer advanced knitting classes and workshops.
- Online Courses: Platforms like Craftsy and Udemy offer comprehensive knitting courses.
- Knitting Retreats: Provide immersive learning experiences with expert instructors.
15.3. Designing Your Own Patterns
- Start Simple: Begin by modifying existing patterns to create your own unique designs.
- Learn Pattern Writing: Take a class or read a book on pattern writing to learn the basics of pattern construction and grading.
- Sketch Your Designs: Sketch out your designs and plan your stitch patterns and shaping.
16. Knitting and Mental Wellness
Knitting has been shown to have numerous mental health benefits, making it a valuable activity for promoting overall well-being.
16.1. Stress Reduction
- Repetitive Motion: The rhythmic, repetitive motion of knitting can have a calming effect on the mind and body.
- Mindfulness: Knitting encourages mindfulness by focusing your attention on the present moment.
- Distraction: Knitting provides a distraction from daily stressors and worries.
16.2. Improved Mood
- Dopamine Release: Completing a knitting project releases dopamine, a neurotransmitter associated with pleasure and reward.
- Sense of Accomplishment: Finishing a project provides a sense of accomplishment and pride.
- Creative Expression: Knitting allows for creative expression and self-discovery.
16.3. Social Connection
- Knitting Groups: Joining a knitting group can provide a sense of community and social support.
- Shared Interest: Connecting with others who share your passion for knitting can foster meaningful relationships.
- Reduced Isolation: Knitting can help reduce feelings of isolation and loneliness.
17. Innovative Knitting Tools and Gadgets
The world of knitting is constantly evolving with new tools and gadgets designed to make the craft easier and more enjoyable.
17.1. Ergonomic Knitting Needles
- Features: Comfortable grips, lightweight materials, and smooth surfaces.
- Benefits: Reduces hand and wrist strain, improves knitting speed, and enhances overall comfort.
17.2. Yarn Winders and Ball Winders
- Purpose: Quickly and efficiently wind yarn into neat balls or cakes.
- Benefits: Prevents tangling, makes yarn easier to work with, and saves time.
17.3. Stitch Counters
- Types: Digital, mechanical, and row counters.
- Benefits: Helps keep track of rows and stitch counts, preventing errors and ensuring accurate pattern following.
17.4. Knitting Needle Organizers
- Purpose: Keep knitting needles organized and easily accessible.
- Types: Cases, rolls, and stands.
- Benefits: Prevents damage to needles, saves space, and makes it easy to find the right needle size.
17.5. Blocking Tools
- Types: Blocking mats, pins, wires, and boards.
- Benefits: Helps shape and set knitted items, improving the appearance and fit of finished projects.
18. Sustainable Knitting Practices
As knitters, we can make conscious choices to reduce our environmental impact and support sustainable practices.
18.1. Choosing Eco-Friendly Yarns
- Organic Fibers: Look for yarns made from organic cotton, wool, or linen, which are grown without the use of harmful pesticides and chemicals.
- Recycled Fibers: Consider using yarns made from recycled materials, such as recycled cotton or polyester.
- Plant-Based Fibers: Opt for yarns made from plant-based fibers, such as bamboo, hemp, or soy, which are renewable and biodegradable.
18.2. Reducing Yarn Waste
- Plan Your Projects: Carefully plan your projects to avoid buying more yarn than you need.
- Use Scraps: Use leftover yarn scraps for small projects, such as hats, scarves, or dishcloths.
- Unravel Old Projects: Unravel old or unwanted knitted items and reuse the yarn for new projects.
18.3. Supporting Local Yarn Stores (LYS)
- Community Support: Supporting local yarn stores helps support your community and local economy.
- Expert Advice: LYS staff can provide expert advice on yarn selection, pattern fitting, and knitting techniques.
- Social Connection: LYS often host knitting groups and workshops, providing opportunities for social connection and learning.
19. Knitting and Technology
Technology has revolutionized the way we knit, providing new tools and resources to enhance the craft.
19.1. Knitting Apps
- Pattern Libraries: Apps like Ravelry provide access to vast libraries of knitting patterns.
- Stitch Calculators: Apps can help you calculate stitch counts and adjust patterns to fit your gauge.
- Project Trackers: Apps can help you track your progress on knitting projects, manage your yarn stash, and record your notes.
19.2. 3D Printing for Knitting
- Custom Tools: 3D printing can be used to create custom knitting needles, stitch markers, and other tools.
- Innovative Designs: 3D printing allows for the creation of innovative knitting designs and techniques.
19.3. Knitting Machines
- Automated Knitting: Knitting machines automate the knitting process, allowing you to create large quantities of fabric quickly.
- Complex Patterns: Knitting machines can create complex stitch patterns and designs that would be difficult or impossible to knit by hand.
20. Final Thoughts on Embarking on Your Knitting Journey
Learning how to knit is a journey filled with creativity, relaxation, and endless possibilities. By mastering the basic techniques, exploring different stitches and patterns, and utilizing the resources available, you can unlock a world of knitting enjoyment. Whether you’re creating cozy garments, intricate designs, or simply enjoying the meditative rhythm of the needles, knitting offers a unique and rewarding experience.
Ready to dive deeper into the world of knitting? Visit learns.edu.vn for a wealth of resources, tutorials, and expert tips to guide you on your knitting journey. From beginner basics to advanced techniques, we provide the tools and knowledge you need to succeed. Contact us at 123 Education Way, Learnville, CA 90210, United States, or via Whatsapp at +1 555-555-1212. Start your adventure today and discover the joy of creating something beautiful with your own two hands.
Frequently Asked Questions (FAQs) About Learning to Knit
Q1: What is the easiest way to learn knitting for beginners?
The easiest way to learn knitting is by starting with basic materials, such as smooth, light-colored yarn and size US 8 (5 mm) needles, and focusing on fundamental techniques like the knit stitch and casting on. Follow online tutorials or take a beginner’s class at a local yarn store.
Q2: How long does it take to learn basic knitting skills?
It typically takes a few hours to a few days to learn basic knitting skills like casting on, the knit stitch, and casting off. Consistent practice is key to mastering these techniques.
Q3: What are the essential knitting stitches for beginners?
The essential knitting stitches for beginners include the knit stitch, purl stitch, garter stitch (knitting every row), and stockinette stitch (alternating knit and purl rows).