Turning off the “Learn about this picture” icon on your desktop enhances your Windows 11 experience by removing clutter and personalizing your workspace. At LEARNS.EDU.VN, we understand the importance of a clean and efficient digital environment, which is why we offer clear, step-by-step guides to help you customize your operating system to your preferences. Discover effective methods to manage desktop icons and optimize your Windows settings for improved productivity and a more enjoyable user experience by exploring our resources today! This includes desktop customization, Windows 11 tips and personalized desktop settings.
1. What Is The “Learn More About This Picture” Icon?
The “Learn more about this picture” icon is a feature integrated with Windows Spotlight, designed to provide users with additional information about the current desktop background image. Windows Spotlight is a feature available in Windows 10 and Windows 11 that automatically downloads and displays new background images from Bing on the lock screen and desktop. These images often showcase stunning landscapes, wildlife, and landmarks from around the world.
When Windows Spotlight is enabled as the desktop background, the “Learn more about this picture” icon appears on the desktop. This icon allows users to:
- Get More Information: By clicking on the icon, users can access details about the image, such as the location, photographer, and other relevant facts.
- Interact with the Image: The icon provides options to like or dislike the current image, which helps Windows Spotlight tailor future selections to the user’s preferences.
- Navigate to New Images: Users can easily switch to the next background image directly from the icon’s context menu.
While this feature can be informative and engaging, some users may find the icon distracting or unnecessary, preferring a cleaner desktop appearance. Understanding the purpose and functionality of this icon is the first step in deciding whether to keep it or remove it.
2. Why Turn Off “Learn About This Picture” On Desktop?
Turning off the “Learn about this picture” icon can significantly enhance your desktop experience in several ways. Here are some key reasons why users choose to disable this feature:
- Reduce Desktop Clutter: Many users prefer a clean and minimalist desktop. The “Learn more about this picture” icon can be seen as an unnecessary element that clutters the desktop, especially if users are not interested in the additional information it provides.
- Minimize Distractions: A cluttered desktop can be distracting and can reduce focus and productivity. Removing the icon helps to streamline the visual environment, making it easier to concentrate on tasks.
- Personal Aesthetic Preference: Some users simply prefer a cleaner, more personalized look for their desktop. Removing the icon aligns with a desire to customize the desktop to their individual aesthetic preferences.
- Optimize Desktop Space: On smaller screens or with numerous icons, the “Learn more about this picture” icon can take up valuable space. Disabling it frees up this space, allowing for better organization of other desktop elements.
- Streamline Workflow: For users who do not find the information provided by the icon useful, it can be an unnecessary step in their workflow. Removing it simplifies the desktop interaction, making it more efficient.
Ultimately, the decision to turn off the “Learn about this picture” icon depends on individual preferences and workflow needs. By removing this icon, users can create a more streamlined, focused, and visually appealing desktop environment.
3. How To Remove “Learn About This Picture” Icon From Desktop Using Registry Editor?
Removing the “Learn more about this picture” icon from your desktop in Windows 11 can be achieved through a simple modification in the Registry Editor. This method is straightforward and effective, allowing you to customize your desktop to your preferences. Here’s how to do it:
3.1. Open Registry Editor
- Press
Win + Rto open the Run dialog box. - Type
regeditand press Enter. - Click “Yes” if prompted by User Account Control.
3.2. Navigate To The Correct Key
- In the Registry Editor, navigate to the following key using the left-hand pane:
HKEY_CURRENT_USERSoftwareMicrosoftWindowsCurrentVersionExplorerHideDesktopIconsNewStartPanel
3.3. Create A New DWORD Value
- Right-click on the
NewStartPanelkey in the left pane. - Select
New > DWORD (32-bit) Value. - Name the new value
{2cc5ca98-6485-489a-920e-b3e88a6ccce3}.
3.4. Modify The Value Data
- Double-click on the newly created value
{2cc5ca98-6485-489a-920e-b3e88a6ccce3}. - In the “Value data” field, change the value from
0to1. - Click
OK.
3.5. Refresh The Desktop
- Right-click anywhere on the desktop.
- Select
Refreshfrom the context menu.
3.6. Verify The Change
- The “Learn more about this picture” icon should now be removed from the desktop.
3.7. Restore The Icon (Optional)
- If you wish to restore the icon in the future, simply delete the
{2cc5ca98-6485-489a-920e-b3e88a6ccce3}value from the Registry Editor, and refresh the desktop.
By following these steps, you can easily remove the “Learn more about this picture” icon from your Windows 11 desktop, creating a cleaner and more personalized workspace. Always exercise caution when modifying the registry, and ensure you have a backup in case of any issues.
4. Using Ready-To-Use Registry Files To Turn Off “Learn About This Picture”?
For users who prefer a simpler and quicker method than manual registry editing, ready-to-use registry files offer a convenient solution to remove the “Learn more about this picture” icon from the desktop. These files automate the process of modifying the registry, reducing the risk of errors. Here’s how to use them:
4.1. Download The Registry Files
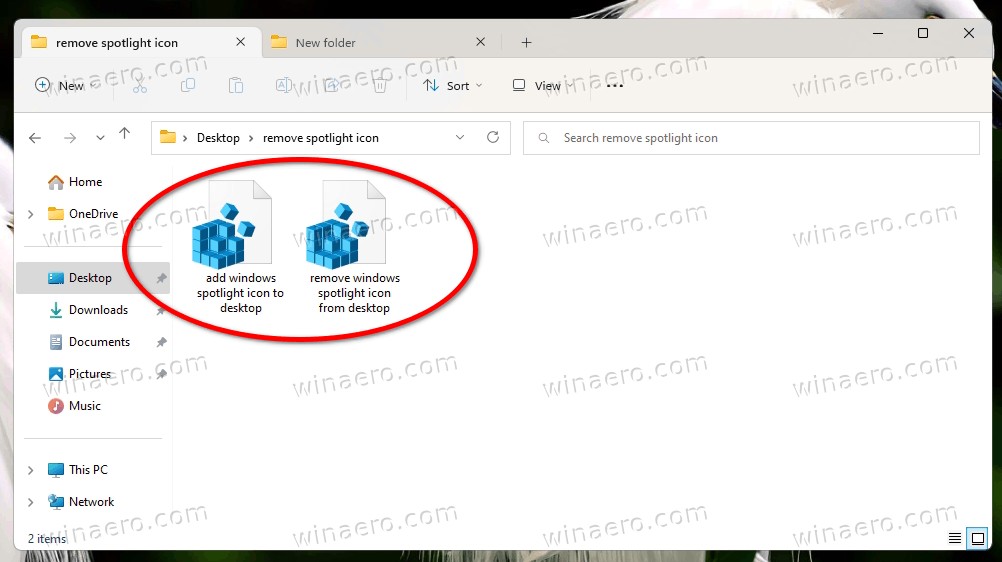
- Download the ZIP archive containing the registry files from a trusted source. For example, you can use the link provided by Winaero: remove-windows-spotlight-icon-from-desktop.zip.
- Extract the contents of the ZIP archive to a convenient folder location on your computer.
4.2. Run The Removal Registry File
- In the extracted folder, locate the file named
remove windows spotlight icon from desktop.reg. - Double-click the file to run it.
- If prompted by User Account Control, click
Yesto allow the Registry Editor to make changes to your system. - A warning message will appear, stating that adding information to the registry can unintentionally change or damage components. Click
Yesto proceed. - A confirmation message will appear, indicating that the information has been successfully added to the registry. Click
OK.
4.3. Refresh The Desktop
- Right-click anywhere on the desktop.
- Select
Refreshfrom the context menu.
4.4. Verify The Change
- The “Learn more about this picture” icon should now be removed from the desktop.
4.5. Restore The Icon (Optional)
- If you wish to restore the icon in the future, locate the file named
add windows spotlight icon to desktop.regin the extracted folder. - Double-click the file to run it, following the same prompts and warnings as before.
- After the information has been added to the registry, refresh the desktop to see the icon restored.
Using ready-to-use registry files simplifies the process of modifying registry settings, making it accessible to users of all technical levels. Ensure you download these files from a reputable source to avoid potential security risks.
5. What Is Winaero Tweaker And How To Use It?
Winaero Tweaker is a free, all-in-one customization utility for Windows that allows users to tweak various aspects of the operating system without having to manually edit the registry or use complex command-line tools. It provides a user-friendly interface to modify settings, enhance functionality, and personalize the Windows experience.
5.1. Key Features Of Winaero Tweaker:
- Extensive Customization Options: Winaero Tweaker offers a wide range of customization options for Windows, including appearance settings, behavior tweaks, and hidden feature adjustments.
- User-Friendly Interface: The software features a clean and intuitive interface, making it easy for users to navigate and find the settings they want to modify.
- No Manual Registry Editing: Winaero Tweaker eliminates the need to manually edit the registry, reducing the risk of errors and simplifying the customization process.
- Regular Updates: The application is regularly updated to support the latest versions of Windows and incorporate new customization options.
- Portable Version Available: Winaero Tweaker is available in both installable and portable versions, allowing users to choose the option that best suits their needs.
5.2. How To Use Winaero Tweaker To Remove The “Learn More About This Picture” Icon:
- Download And Install Winaero Tweaker:
- Download the latest version of Winaero Tweaker from the official Winaero website: Winaero Tweaker Download.
- Install the application by running the downloaded executable file and following the on-screen instructions.
- Launch Winaero Tweaker:
- Once installed, launch Winaero Tweaker from the Start menu or desktop shortcut.
- Navigate To The Windows Spotlight Desktop Icon Section:
- In the left pane of Winaero Tweaker, navigate to
Windows 11 > Windows Spotlight Desktop Icon.
- In the left pane of Winaero Tweaker, navigate to
- Disable The Windows Spotlight Desktop Icon:
- In the right pane, locate the option labeled
Disable Windows Spotlight Desktop Icon. - Place a checkmark next to this option to disable the icon.
- In the right pane, locate the option labeled
- Apply The Changes:
- You may need to refresh the desktop manually or sign out from your user account and sign back in to apply the changes.
- Verify The Change:
- The “Learn more about this picture” icon should now be removed from the desktop.
5.3. Additional Features:
- Customize Context Menus: Add or remove items from the context menus that appear when you right-click on files, folders, or the desktop.
- Change Appearance Settings: Modify various appearance settings, such as window colors, icon sizes, and font styles.
- Enable Hidden Features: Unlock hidden features and settings in Windows that are not accessible through the standard settings interface.
- Manage User Accounts: Customize user account settings, such as the login screen background and account picture.
- Tweak System Behavior: Adjust system behavior settings, such as disabling the Action Center or preventing Windows from automatically restarting after updates.
Winaero Tweaker provides a comprehensive set of tools for customizing and tweaking Windows, making it a valuable utility for users who want to personalize their operating system and optimize their user experience.
6. What Is ExplorerPatcher And How Does It Turn Off “Learn About This Picture” Icon?
ExplorerPatcher is a free, open-source application designed to restore some of the classic features and behaviors from previous versions of Windows to Windows 11. It allows users to customize various aspects of the operating system, such as the taskbar, Start menu, and File Explorer, without requiring extensive manual tweaking.
6.1. Key Features Of ExplorerPatcher:
- Classic Taskbar: Restore the classic Windows 10 taskbar with customizable settings, including icon size, position, and behavior.
- Classic Start Menu: Revert to the classic Windows 7 or Windows 10 Start menu, providing a familiar and efficient navigation experience.
- File Explorer Customization: Customize the appearance and behavior of File Explorer, including the ribbon, context menus, and navigation pane.
- System Tray Icons: Manage and customize system tray icons, allowing you to hide or show specific icons as desired.
- No Manual Registry Editing: ExplorerPatcher simplifies the customization process by providing a user-friendly interface to modify settings without directly editing the registry.
6.2. How To Use ExplorerPatcher To Hide The “Learn More About This Picture” Icon:
- Download And Install ExplorerPatcher:
- Download the latest version of ExplorerPatcher from the official GitHub page: ExplorerPatcher GitHub.
- Run the downloaded file and follow the setup wizard to install the application.
- Access ExplorerPatcher Properties:
- Once installed, the taskbar will revert to the Windows 10 style.
- Right-click on the taskbar and select
Propertiesfrom the context menu.
- Navigate To The Spotlight Section:
- In the ExplorerPatcher Properties window, navigate to the
Spotlightsection in the left pane.
- In the ExplorerPatcher Properties window, navigate to the
- Hide The “Learn About This Picture” Icon:
- In the
Spotlightsection, select the optionHide the "Learn about this picture" icon.
- In the
- Apply The Changes:
- The change should take effect immediately. If not, try restarting Explorer or your computer.
- Optional: Switch Back To The Windows 11 Taskbar:
- If you prefer the Windows 11 taskbar, you can switch back to it by navigating to the
Taskbarsection in the ExplorerPatcher Properties window and selecting the appropriate option.
- If you prefer the Windows 11 taskbar, you can switch back to it by navigating to the
6.3. Additional Features:
- Customize Taskbar Appearance: Modify the appearance of the taskbar, including color, transparency, and icon size.
- Manage System Tray Icons: Hide or show specific system tray icons, reducing clutter and improving visibility.
- Change Start Menu Behavior: Customize the behavior of the Start menu, such as disabling live tiles or changing the default power options.
- Tweak File Explorer Settings: Adjust various File Explorer settings, such as disabling the ribbon or restoring the classic context menus.
- Customize Other System Elements: Modify other system elements, such as the lock screen, login screen, and notification center.
ExplorerPatcher offers a comprehensive set of tools for customizing Windows 11, allowing users to restore classic features and personalize their operating system to suit their preferences.
7. Benefits Of A Clean And Organized Desktop
Maintaining a clean and organized desktop offers numerous benefits that extend beyond mere aesthetics. A well-organized desktop can significantly enhance productivity, reduce stress, and improve overall computer usage. Here are some key advantages:
- Increased Productivity:
- Faster File Retrieval: A clean desktop allows you to quickly locate and access the files and applications you need, saving valuable time and effort.
- Reduced Clutter: By minimizing clutter, you can focus more effectively on your tasks without being distracted by unnecessary icons and files.
- Improved Workflow: An organized desktop streamlines your workflow, making it easier to manage projects and prioritize tasks.
- Reduced Stress:
- Visual Clarity: A clean desktop provides a sense of visual clarity, reducing the mental clutter associated with a disorganized workspace.
- Enhanced Focus: By minimizing distractions, you can maintain better focus and concentration, leading to reduced stress levels.
- Sense Of Control: An organized desktop gives you a sense of control over your digital environment, which can be particularly beneficial during stressful times.
- Improved Computer Performance:
- Faster Startup Times: A desktop with fewer icons and files can contribute to faster startup times, as the operating system has less to load.
- Reduced Resource Usage: A clean desktop reduces the amount of system resources used to display and manage icons, leading to improved overall performance.
- Better Organization:
- Logical Grouping: Organize files and applications into logical groups or folders, making it easier to find related items.
- Consistent Placement: Establish a consistent placement for frequently used items, allowing you to quickly locate them without searching.
- Regular Maintenance: Regularly review and declutter your desktop, removing unnecessary files and organizing new items as they are added.
- Enhanced Aesthetics:
- Personalized Look: A clean desktop allows you to personalize your workspace with custom wallpapers, themes, and icons, creating a more enjoyable and visually appealing environment.
- Professional Appearance: An organized desktop projects a professional image, whether you are working from home or presenting your screen during meetings.
- Positive Impression: A clean desktop makes a positive impression on others who may view your screen, reflecting your attention to detail and organizational skills.
By investing time in creating and maintaining a clean and organized desktop, you can reap numerous benefits that contribute to increased productivity, reduced stress, and improved overall computer usage.
8. Tips For Maintaining A Clean Desktop
Maintaining a clean and organized desktop is an ongoing process that requires consistent effort and a few simple strategies. Here are some practical tips to help you keep your desktop clutter-free and efficient:
- Regularly Declutter:
- Schedule Time: Set aside a specific time each week or month to declutter your desktop, removing unnecessary files and organizing new items.
- Delete Unused Files: Delete files and shortcuts that you no longer need, such as temporary files, old documents, and unused applications.
- Archive Old Projects: Move completed projects and old files to an archive folder or external storage device to keep your desktop clutter-free.
- Use Folders Effectively:
- Create Logical Folders: Organize your files into logical folders based on project, type, or category.
- Nest Folders: Use nested folders to further organize your files within each category, creating a clear and intuitive folder structure.
- Name Folders Clearly: Use clear and descriptive names for your folders, making it easy to identify their contents at a glance.
- Minimize Desktop Icons:
- Keep Only Essential Icons: Keep only the most frequently used icons on your desktop, such as essential applications and important files.
- Use The Taskbar: Pin frequently used applications to the taskbar for quick access, reducing the need for desktop shortcuts.
- Hide Unnecessary Icons: Hide system icons and other unnecessary icons from the desktop to minimize clutter.
- Utilize Desktop Organization Tools:
- Fences: Use desktop fencing software to group icons into organized areas, creating a visually appealing and efficient desktop layout.
- Rainmeter: Use Rainmeter to display system information, application shortcuts, and other useful widgets on your desktop in an organized manner.
- ObjectDock: Use ObjectDock to create a customizable dock for launching applications and managing files, reducing the need for desktop icons.
- Automate Organization:
- File Management Software: Use file management software to automatically sort and organize files based on predefined rules.
- Cloud Storage Integration: Integrate cloud storage services such as Dropbox or Google Drive to automatically sync and backup your files, reducing the risk of data loss.
- Desktop Cleanup Tools: Use desktop cleanup tools to automatically remove temporary files and organize desktop icons.
- Establish A Routine:
- Daily Tidy-Up: Spend a few minutes each day tidying up your desktop, sorting new files and removing unnecessary items.
- Weekly Review: Conduct a weekly review of your desktop, ensuring that everything is organized and clutter-free.
- Monthly Overhaul: Perform a monthly overhaul of your desktop, archiving old projects and reorganizing your folder structure as needed.
By implementing these tips and establishing a consistent routine, you can maintain a clean and organized desktop that enhances your productivity, reduces stress, and improves your overall computer usage.
9. Exploring Windows Spotlight Features And Customization
Windows Spotlight is a feature in Windows 10 and Windows 11 that automatically downloads and displays new background images from Bing on the lock screen and desktop. It offers a visually refreshing experience and can be customized to suit your preferences. Here’s a closer look at its features and customization options:
9.1. Key Features Of Windows Spotlight:
- Automatic Image Updates: Windows Spotlight automatically downloads new background images from Bing, providing a constantly changing and visually appealing experience.
- Diverse Image Selection: The images featured in Windows Spotlight are carefully curated to showcase stunning landscapes, wildlife, landmarks, and other captivating scenes from around the world.
- Lock Screen Integration: Windows Spotlight is primarily designed for the lock screen, displaying a new image each time you lock your computer.
- Desktop Integration: In Windows 11, Windows Spotlight can also be set as the desktop background, providing a consistent visual experience across both the lock screen and desktop.
- “Learn More About This Picture” Icon: When Windows Spotlight is set as the desktop background, a “Learn more about this picture” icon appears, allowing you to get additional information about the current image.
- Feedback Options: Windows Spotlight provides options to like or dislike the current image, helping to tailor future selections to your preferences.
9.2. Customization Options:
- Enable Or Disable Windows Spotlight:
- Lock Screen: To enable or disable Windows Spotlight on the lock screen, go to
Settings > Personalization > Lock screenand selectWindows spotlightfrom theBackgrounddropdown menu. - Desktop: To set Windows Spotlight as the desktop background in Windows 11, right-click on the desktop, select
Personalize > Backgroundand chooseWindows spotlightfrom thePersonalize your backgrounddropdown menu.
- Lock Screen: To enable or disable Windows Spotlight on the lock screen, go to
- Provide Feedback On Images:
- Use the “Learn more about this picture” icon to like or dislike the current image, helping Windows Spotlight to better understand your preferences.
- Customize The “Learn More About This Picture” Icon:
- As discussed earlier, you can remove the “Learn more about this picture” icon from the desktop using the Registry Editor, ready-to-use registry files, Winaero Tweaker, or ExplorerPatcher.
- Choose Specific Themes Or Categories:
- While Windows Spotlight does not offer direct options to choose specific themes or categories, you can influence the types of images displayed by providing feedback on the images you like or dislike.
- Adjust Lock Screen Settings:
- Customize other lock screen settings, such as displaying notifications, adding app status, and setting a screen timeout.
9.3. Troubleshooting Common Issues:
- Images Not Changing:
- Ensure that Windows Spotlight is enabled in the lock screen or desktop settings.
- Check your internet connection, as Windows Spotlight requires an active internet connection to download new images.
- Restart your computer to refresh the Windows Spotlight cache.
- “Learn More About This Picture” Icon Not Working:
- Ensure that the “Learn more about this picture” icon is enabled in the Windows Spotlight settings.
- Check your internet connection, as the icon requires an active internet connection to retrieve image information.
- Update your graphics drivers to ensure compatibility with Windows Spotlight.
- Images Not Displaying Correctly:
- Ensure that your display settings are configured correctly, including resolution, scaling, and color settings.
- Update your graphics drivers to resolve any compatibility issues with Windows Spotlight.
By exploring the features and customization options of Windows Spotlight, you can create a visually appealing and personalized computing experience that reflects your individual preferences.
10. Additional Customization Options For Windows 11 Desktop
In addition to removing the “Learn more about this picture” icon, Windows 11 offers a wide range of customization options that allow you to personalize your desktop to suit your individual preferences and workflow needs. Here are some additional customization options to explore:
10.1. Change The Desktop Background:
- Personalize Your Background:
- Right-click on the desktop and select
Personalize > Backgroundto access the background settings. - Choose from a variety of background options, including pictures, solid colors, slideshows, and Windows Spotlight.
- Right-click on the desktop and select
- Use Your Own Images:
- Select
Picturefrom thePersonalize your backgrounddropdown menu and choose a personal image from your computer to use as the desktop background.
- Select
- Create A Slideshow:
- Select
Slideshowfrom thePersonalize your backgrounddropdown menu and choose a folder containing multiple images to create a rotating slideshow of desktop backgrounds.
- Select
10.2. Customize The Theme:
- Choose A Theme:
- Right-click on the desktop and select
Personalize > Themesto access the theme settings. - Choose from a variety of pre-installed themes, each with its own unique combination of background images, colors, and sounds.
- Right-click on the desktop and select
- Create A Custom Theme:
- Customize various aspects of the theme, such as the background image, accent color, sounds, and mouse cursor, to create a personalized theme that reflects your individual style.
- Download Themes From The Microsoft Store:
- Browse and download additional themes from the Microsoft Store to expand your theme selection and discover new and exciting options.
10.3. Adjust The Taskbar Settings:
- Customize Taskbar Behavior:
- Right-click on the taskbar and select
Taskbar settingsto access the taskbar settings. - Customize various aspects of the taskbar, such as its position, size, and behavior, to suit your individual preferences.
- Right-click on the taskbar and select
- Pin Applications To The Taskbar:
- Pin frequently used applications to the taskbar for quick access, reducing the need for desktop shortcuts.
- Manage System Tray Icons:
- Customize the system tray icons displayed in the taskbar, hiding unnecessary icons to reduce clutter and improve visibility.
10.4. Modify The Start Menu:
- Customize The Start Menu Layout:
- Right-click on the desktop and select
Personalize > Startto access the Start menu settings. - Customize the layout of the Start menu, choosing which apps and folders to display and how to arrange them.
- Right-click on the desktop and select
- Pin Applications To The Start Menu:
- Pin frequently used applications to the Start menu for quick access, creating a personalized and efficient Start menu layout.
- Organize The Start Menu Folders:
- Organize the Start menu folders into logical categories, making it easier to find and launch applications.
10.5. Adjust Display Settings:
- Change The Screen Resolution:
- Right-click on the desktop and select
Display settingsto access the display settings. - Adjust the screen resolution to optimize the display for your monitor, ensuring that text and images are clear and sharp.
- Right-click on the desktop and select
- Adjust The Scaling Settings:
- Adjust the scaling settings to increase or decrease the size of text, icons, and other elements on the screen, making them easier to see and interact with.
- Customize Multiple Displays:
- Configure multiple displays to extend your desktop across multiple monitors, creating a larger and more immersive workspace.
By exploring these additional customization options, you can create a Windows 11 desktop that is not only visually appealing but also highly functional and tailored to your individual needs and preferences.
At LEARNS.EDU.VN, we are dedicated to providing you with the knowledge and resources you need to master these skills and more.
FAQ: How To Turn Off Learn About This Picture
1. What is the “Learn more about this picture” icon on my Windows 11 desktop?
The “Learn more about this picture” icon is a feature of Windows Spotlight, providing information about the current desktop background image, including details about the location and photographer.
2. Why would I want to turn off the “Learn more about this picture” icon?
Turning off the icon helps reduce desktop clutter, minimizes distractions, and allows for a cleaner, more personalized desktop appearance.
3. How can I turn off the “Learn more about this picture” icon using the Registry Editor?
Open Registry Editor, navigate to HKEY_CURRENT_USERSoftwareMicrosoftWindowsCurrentVersionExplorerHideDesktopIconsNewStartPanel, create a new DWORD value named {2cc5ca98-6485-489a-920e-b3e88a6ccce3}, set its value to 1, and refresh your desktop.
4. Is there an easier way to turn off the icon than using the Registry Editor?
Yes, you can use ready-to-use registry files, Winaero Tweaker, or ExplorerPatcher for a simpler and quicker method.
5. What are ready-to-use registry files, and how do I use them?
These are pre-made .reg files that automate the process of modifying the registry. Download and extract the files, run the remove windows spotlight icon from desktop.reg file, and refresh your desktop.
6. What is Winaero Tweaker, and how can it help me turn off the icon?
Winaero Tweaker is a free customization utility for Windows that allows you to tweak various aspects of the OS. Navigate to Windows 11 > Windows Spotlight Desktop Icon and check the option to disable the icon.
7. What is ExplorerPatcher, and how does it help in removing the icon?
ExplorerPatcher is an open-source application that restores classic features to Windows 11. In its properties, go to the Spotlight section and select the option to hide the “Learn about this picture” icon.
8. Can I restore the “Learn more about this picture” icon if I change my mind?
Yes, you can restore the icon by deleting the {2cc5ca98-6485-489a-920e-b3e88a6ccce3} value in the Registry Editor, running the add windows spotlight icon to desktop.reg file, or unchecking the disable option in Winaero Tweaker.
9. Will turning off the icon affect the Windows Spotlight feature itself?
No, turning off the icon only removes the desktop icon and does not affect the automatic background image updates provided by Windows Spotlight.
10. Are there other ways to customize my Windows 11 desktop?
Yes, Windows 11 offers various customization options, including changing the desktop background, customizing themes, adjusting taskbar settings, and modifying the Start menu.
Ready to take control of your digital environment? Visit LEARNS.EDU.VN today to discover a wealth of resources, expert guides, and customized learning paths designed to help you master Windows 11 customization and unlock your full potential. Contact us at 123 Education Way, Learnville, CA 90210, United States. Whatsapp: +1 555-555-1212. or visit our website at learns.edu.vn to learn more.