Embarking on a new crafting journey can be both exciting and a little daunting, especially when you’re drawn to the timeless art of embroidery. If you’ve been captivated by beautifully stitched designs but feel unsure where to even begin, you’ve absolutely landed in the right place. Countless individuals worldwide have successfully started their embroidery adventures thanks to easy-to-follow blog posts and video tutorials on hand embroidery. Hand embroidery isn’t just a craft; it’s a deeply rewarding passion, and this guide is designed to distill all the essential knowledge into comprehensive beginner lessons. With just a handful of basic supplies and a grasp of fundamental stitches, you’ll be amazed at how quickly you can start creating your own stunning embroidered artwork.
How Accessible is Learning Embroidery?
One of the most appealing aspects of embroidery is its accessibility. Learning to embroider isn’t as challenging as you might think. It’s a craft that welcomes beginners with open arms. You won’t need a mountain of specialized equipment to get started, and the foundational stitches are surprisingly simple to master. These basic stitches are the building blocks that allow you to create intricate and beautiful designs, making it a perfect hobby for anyone looking to explore their creative side without a steep learning curve.
The Easiest Embroidery Stitch to Master
If you’re eager to pick up a needle and thread, you’ll be pleased to know that some stitches are easier to learn than others. The running stitch is widely considered the most straightforward embroidery stitch, making it an excellent starting point for beginners. Closely following the running stitch in terms of ease is the backstitch. Mastering these two stitches alone opens up a world of possibilities for creating simple yet charming embroidered projects.
6 Essential Embroidery Stitches for Beginners
To truly begin your embroidery journey, familiarizing yourself with a few key stitches is essential. Here are 6 basic embroidery stitches that will form the foundation of your embroidery skills:
- Running Stitch: The simplest stitch, creating a dashed line effect.
- Backstitch: Used for outlines and creating solid lines.
- Split Stitch: Creates a textured, slightly thicker line, great for outlines and filling.
- Stem Stitch: Perfect for creating smooth lines, especially for flower stems and curved designs.
- Satin Stitch: A filling stitch that creates smooth, solid blocks of color.
- French Knot: Adds decorative dots or textured elements to your embroidery.
Lesson 1: Essential Embroidery Supplies for Beginners
Before you can dive into stitching, gathering the right supplies is your first step. Fortunately, embroidery doesn’t require a huge investment to get started. Here are the essential supplies you’ll need as a beginner:
- Fabric: The foundation of your embroidery.
- Embroidery Floss (Thread): Available in a rainbow of colors to bring your designs to life.
- Embroidery Needles: Designed with larger eyes to accommodate embroidery floss.
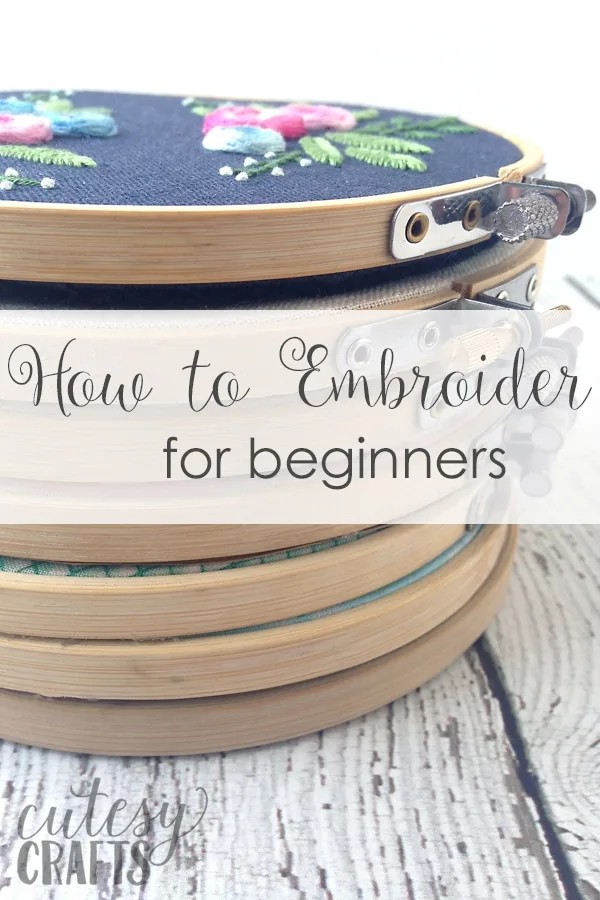
- Embroidery Hoop: To keep your fabric taut and make stitching easier.
- Tracing Supplies: To transfer your chosen patterns onto fabric.
For a more detailed look at each of these supplies and recommendations for beginners, explore resources dedicated to essential hand embroidery supplies. You might even discover some fun extras to enhance your embroidery experience!
Lesson 2: Choosing the Best Fabric for Embroidery
Fabric choice plays a significant role in your embroidery projects. While technically you can embroider on almost any fabric that a needle can pass through, some fabrics are definitely more beginner-friendly and yield better results. Different fabrics offer varying textures and weaves, which can impact the ease of stitching and the final look of your embroidered design. Learning about different types of embroidery fabric will help you understand why certain fabrics are preferred and guide you in selecting the best material for your specific projects.
Lesson 3: Top Embroidery Tips for Beginners
As you Learn To Embroider, mastering a few fundamental techniques and tips will significantly contribute to your success and enjoyment of the craft. Simple things like knowing how to thread a needle efficiently, the proper way to separate embroidery floss, and how to start and end your thread securely are crucial for clean and professional-looking embroidery. Working through these beginner embroidery tips will set you up for a smoother and more satisfying stitching experience.
Lesson 4: Beginner-Friendly Embroidery Patterns to Get Started
The most effective way to learn embroidery is by doing! Choosing a pattern that is designed for beginners is a fantastic way to practice your stitches and see your skills develop. When selecting your first embroidery patterns, look for designs that utilize basic stitches and have clear, simple lines. For a truly gentle introduction, consider using a free embroidery sampler pattern. If you have some crafting experience or are feeling a bit more adventurous, there are numerous other free embroidery patterns available to explore and ignite your creativity.
Lesson 5: How to Transfer Your Embroidery Pattern to Fabric
Once you’ve chosen a pattern that inspires you, the next step is to get that design onto your fabric. Pattern transfer might seem tricky, but there are actually several methods you can use, each with its own advantages and disadvantages depending on the fabric you’re using and your personal preferences. Exploring the various methods for how to transfer an embroidery pattern will empower you to choose the best technique for each of your embroidery projects, ensuring accurate and easy pattern placement.
Lesson 6: Mastering the Embroidery Hoop
The embroidery hoop is an indispensable tool for hand embroidery. It serves to hold your fabric taut, providing a stable and even surface for stitching, which is essential for creating neat and consistent stitches. To use an embroidery hoop effectively, select a hoop that is slightly smaller than your fabric piece. Loosen the outer hoop’s screw, place your fabric over the inner hoop, and then firmly press the outer hoop down over the fabric. Tighten the screw to secure the fabric, ensuring it is drum-tight for optimal stitching.
Lesson 7: Learning Basic Embroidery Stitches
Embroidery patterns come to life through the combination of various stitches. Each stitch brings a unique texture and visual element to your design. By learning a range of basic embroidery stitches, you’ll gain the ability to create a wide variety of embroidered motifs, from delicate flowers to bold lettering and intricate designs. Step-by-step video tutorials are invaluable resources for learning each stitch, allowing you to visually follow along and practice until you feel confident. Mastering these basic embroidery stitches truly unlocks your creative potential in hand embroidery.
Lesson 8: Finishing Your Embroidery Project
Completing the stitching is just one part of the embroidery process. Knowing how to properly finish your embroidery project ensures that your work looks polished and professional, and that it will last. Finishing techniques can include securing loose threads on the back of your work, trimming excess fabric, and deciding how you want to display or use your finished embroidery piece.
Lesson 9: Caring for Your Embroidered Creations: Washing
Proper care is crucial to preserve the beauty of your hand embroidered pieces. When it comes to washing embroidery, hand washing is generally the gentlest and recommended method, especially for delicate projects. Use cold water and a mild detergent to hand wash your embroidery and always opt for line drying rather than machine drying. Be mindful that some embroidery floss dyes can bleed, so take extra care, and consider using a color catcher in the wash to prevent any unwanted dye transfer.
Lesson 10: Pressing Your Finished Embroidery
Pressing your embroidery can add a final touch of neatness, but it’s important to do it correctly to avoid damaging your stitches. Avoid ironing directly over your embroidered design, as this can flatten and distort the stitches. Instead, iron your embroidery face down on a soft, thick towel to protect the raised texture of the stitches. Place a thin cloth over the back of the embroidery for added protection and use a gentle press-and-lift motion with the iron, rather than dragging it across the fabric.
Extra Embroidery Techniques to Explore
Once you’ve grasped the fundamentals of embroidery, a whole universe of exciting techniques and projects opens up. Here are a few additional embroidery tutorials to further expand your skills:
- How to Embroider Letters by Hand
- How to Appliqué by Hand
- How to Back an Embroidery Hoop with Felt
- How to Tie Knots in the End of Embroidery Floss with a Quilter’s Knot
- Start Embroidery without Knots
- Best Backing for Embroidery
- How to Embroider Tea Towels
If you’ve always wanted to learn hand embroidery, now is the perfect time to take the plunge. Don’t strive for perfection in your stitches right away. The unique charm of hand embroidery lies in its slight imperfections, which give your piece a handmade character that machine-made items simply can’t replicate. Embrace the process, don’t be afraid to make mistakes – after all, one of the beauties of hand embroidery is that stitches can always be carefully removed and redone. So, relax, have fun, and enjoy the rewarding journey of learning this productive and mindful new hobby!
You might also like: (links to related articles would be listed here)