Welcome to the wonderful world of crochet! If you’re looking for a relaxing, creative, and rewarding hobby, you’ve come to the right place. Crochet is incredibly accessible and fun, allowing you to craft beautiful items with just a hook and some yarn. Once you master the basics, the possibilities are endless, from cozy blankets to stylish accessories and beyond.
Many beginners, just like you might be feeling now, find themselves watching countless videos and tutorials to get started. It’s natural to want your first projects to look perfect right away, mirroring those you see online. Remember, the key to crochet mastery is practice! Creating sample squares is an excellent way to get comfortable with holding the hook and yarn, and understanding yarn tension. Don’t worry about making a pile of squares – they can be sewn together to create a charming blanket later on!
This guide will walk you through the essential steps to begin your crochet journey. We’ll cover how to hold your hook and yarn, create a slip knot, crochet a chain, master the single crochet stitch, and finally, how to finish off your work and weave in the ends.
Getting Started: Essential Crochet Supplies
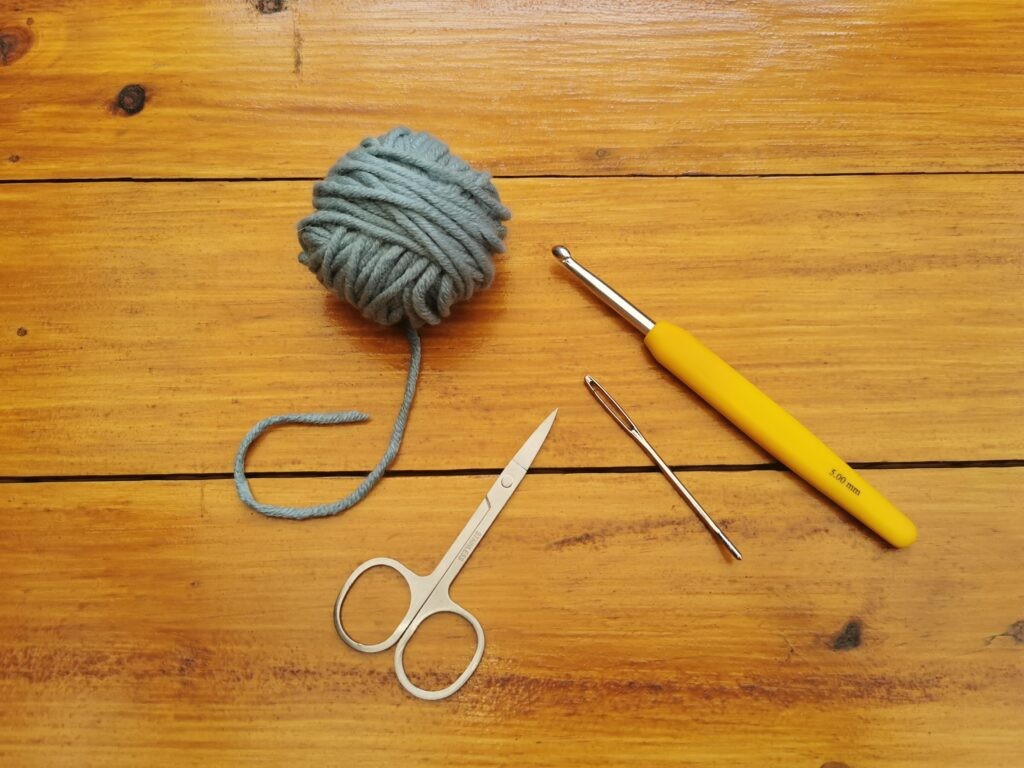
To embark on your crochet adventure, you’ll need a few key supplies: yarn, a crochet hook in the recommended size for your yarn, scissors, and a yarn needle (also known as a tapestry needle or darning needle).
For beginners, it’s highly recommended to start with a thicker yarn and the corresponding hook size suggested on the yarn label. But how do you decipher yarn labels when you’re yarn shopping? The yarn label provides crucial information, including the yarn weight, indicated by a number.
When starting out, look for yarn labeled as size 4 (worsted weight) or higher. The label will also usually recommend a hook size. For size 4 yarn, a 5.5mm (US size I-9) hook is generally a good starting point.
Mastering the Crochet Hook Hold
There isn’t one “correct” way to hold a crochet hook – comfort is key! Experiment to find what feels most natural for you. However, two common methods are the knife hold and the pencil hold.
Knife Hold
Pencil Hold
Many crocheters find the knife hold more comfortable, while others prefer the pencil hold. Try both to see which grip allows you to crochet most smoothly and comfortably.
Creating a Slip Knot: The First Step
Before we learn how to hold the yarn, we need to create a slip knot and place it onto your hook. The slip knot is the foundation of most crochet projects. While patterns usually assume you know how to make one, here’s a step-by-step guide:
- Measure about 3 inches of yarn tail. Hold the yarn with your last three fingers, extending your index finger like you’re making a finger gun.
- Wrap the yarn around your index finger once, with the short tail end in front.
- Wrap the yarn around your finger again, creating two loops around your index finger.
- Hold both yarn ends – the short tail and the long tail (working yarn attached to the ball) – with your thumb and middle finger.
- Take the back loop and pull it over the front loop, but don’t pull it off your finger completely yet.
- Now, take the back loop again and pull it completely off your finger. Tighten the knot by pulling on both yarn ends. Ensure the knot isn’t too tight; it needs to be able to slide on your hook.
Congratulations! You’ve made your first slip knot!
Insert your crochet hook into the slip knot loop. Pull the working yarn to tighten the knot around the hook. Make sure the tail end is facing towards the hook.
Yarn Holding Techniques for Crochet Beginners
We’ve covered hook holding and slip knots – next up is learning how to hold your yarn! This might seem minor, but it significantly impacts your crochet tension.
The way you hold your yarn controls the tightness or looseness of your stitches (tension). Whether you’re right-handed or left-handed, your yarn hand should be relaxed. Avoid holding the yarn too tightly or too loosely.
This is a common yarn holding method, but feel free to adjust it to your comfort:
- With the slip knot on your hook and the hook in your dominant hand, place the yarn between your middle and index finger of your non-dominant hand.
- Wrap the yarn around your pinky finger, bringing it back up to the front of your index finger.
- Wrap the yarn to the back of your index finger again. This creates a loop around your pinky and guides the yarn over your index finger, providing control.
Experiment and find a yarn holding technique that allows the yarn to flow smoothly as you crochet. Comfort and consistent tension are your goals.
Crochet Chain Stitch: Your First Stitches
You’ve made it this far – fantastic! Crocheting your first chain might feel a little awkward at first, but with practice, it will become second nature.
With the slip knot on your hook, hold the slip knot with your thumb and middle finger close to the hook.
- To make a chain stitch, bring the yarn over the hook from back to front (this is called “yarn over” or yo).
- Catch the yarn with your hook and pull it through the slip knot loop on your hook.
That’s your first chain stitch! Excellent work! Repeat this “yarn over, pull through” step until you have made 21 chains. Remember, the loop currently on your hook doesn’t count as a chain stitch. Your chain should look something like this:
Consistent tension is crucial for chains. They should be loose enough to see through the spaces in the chain. If your chains are too tight, it will be difficult to work into them in the next steps. If you’re struggling with tight chains, try using a larger hook size to loosen your tension.
Examining Your Crochet Chain Stitches
Let’s take a closer look at your chain. The image below shows how to count your chain stitches. You will be working into these stitches in the next section.
Still feeling a bit unsure?
For a more visual guide, check out this helpful YouTube tutorial that covers everything we’ve discussed so far in a quick 8-minute video! Click here to watch!
Don’t forget to subscribe to the YouTube channel and hit the notification bell to stay updated on new crochet tutorials!
The Single Crochet Stitch: Mastering a Basic Stitch
Now, let’s learn the single crochet stitch! This is one of the foundational crochet stitches.
For a visual demonstration, you can also watch a YouTube tutorial on the single crochet stitch: Single Crochet Tutorial
Pay attention to how to hold your chain between your middle finger and thumb as you work down the chain. Move your fingers down as you progress to maintain control.
- Skip the first chain stitch from the hook and insert your hook into the center of the second chain stitch from the hook.
- Yarn over (yo) – bring the yarn over your hook from back to front – and pull the yarn through the chain stitch and up onto your hook. You should now have two loops on your hook.
- Yarn over again (yo) and pull the yarn through both loops on your hook. One loop will remain on your hook – you’ve just completed your first single crochet stitch!
- Continue making single crochet stitches in each chain stitch across the row until you reach the end of your chain. You should have a total of 20 single crochet stitches (since you skipped the first chain). Your row of single crochet should look similar to this:
Starting the Next Row:
- To begin the next row and crochet on top of the previous row, you need to make a “chain 1” (ch 1). Yarn over and pull through the loop on your hook. This chain 1 is called a turning chain and helps keep the edges of your work straight.
- Turn your work. Always turn your work in the same direction (either clockwise or counter-clockwise) at the end of each row to maintain consistency.
- To continue crocheting down the row, insert your hook into the first single crochet stitch of the previous row. Look closely; you’ll see it’s the stitch right next to the chain 1 turning chain.
-
Notice in the picture above how the stitch looks like a “V”. Insert your hook under both loops of this “V” shape.
-
Yarn over and pull through the stitch – you’ll have two loops on your hook.
- Yarn over again and pull through both loops on your hook. You’ve completed a single crochet stitch in the second row!
And that’s it! You can crochet! To practice, continue making rows of single crochet to create a small square. This sample piece is also perfect for practicing how to finish off and weave in your ends, which we’ll cover next.
Finishing Off and Weaving in Ends: Securing Your Crochet
Cutting the yarn at the end of a project can be very satisfying! Crochet patterns often instruct you to “FO” or “Finish Off,” which simply means cutting your yarn and securing the last loop. Here’s how to finish off and weave in your ends:
At the end of your last row, yarn over as if you were making a chain 1.
Pull the loop on your hook out about an inch.
Keeping the loop on your hook, lay down your project and measure about 2 inches of yarn from the loop. Cut the yarn at the 2-inch mark.
Now, use your hook to pull the cut yarn end completely through the loop, tightening the knot to secure it.
Weaving in the Ends: Hiding Yarn Tails
To weave in the ends, thread the yarn tail through the eye of your yarn needle.
Pull enough yarn through the needle so you have a good length to hold onto.
Typically, you’ll weave the yarn tail through the back of the first stitch to reach the bottom row of your work.
Insert the needle from the top of a stitch downwards, ensuring you only go through one side of your crochet fabric, not all the way through to the front.
Pull the yarn through, but not too tightly, as you don’t want to distort your crochet work.
Weave the needle back in the opposite direction along the same row, inserting it where the yarn tail previously emerged.
Pull the yarn through again, again, not too tightly.
Remove the needle from the yarn and cut the yarn tail close to your crochet work. If a tiny piece peeks out, gently stretch the row until it disappears.
And you’re done!
Now you can continue practicing the single crochet stitch by making more squares to create a blanket or throw.
In conclusion, I hope you found this beginner crochet tutorial helpful and enjoyable! If you have any questions, please feel free to leave a comment. Happy crocheting!